


-14-
Model G0790 (Mfd. Since 9/15)
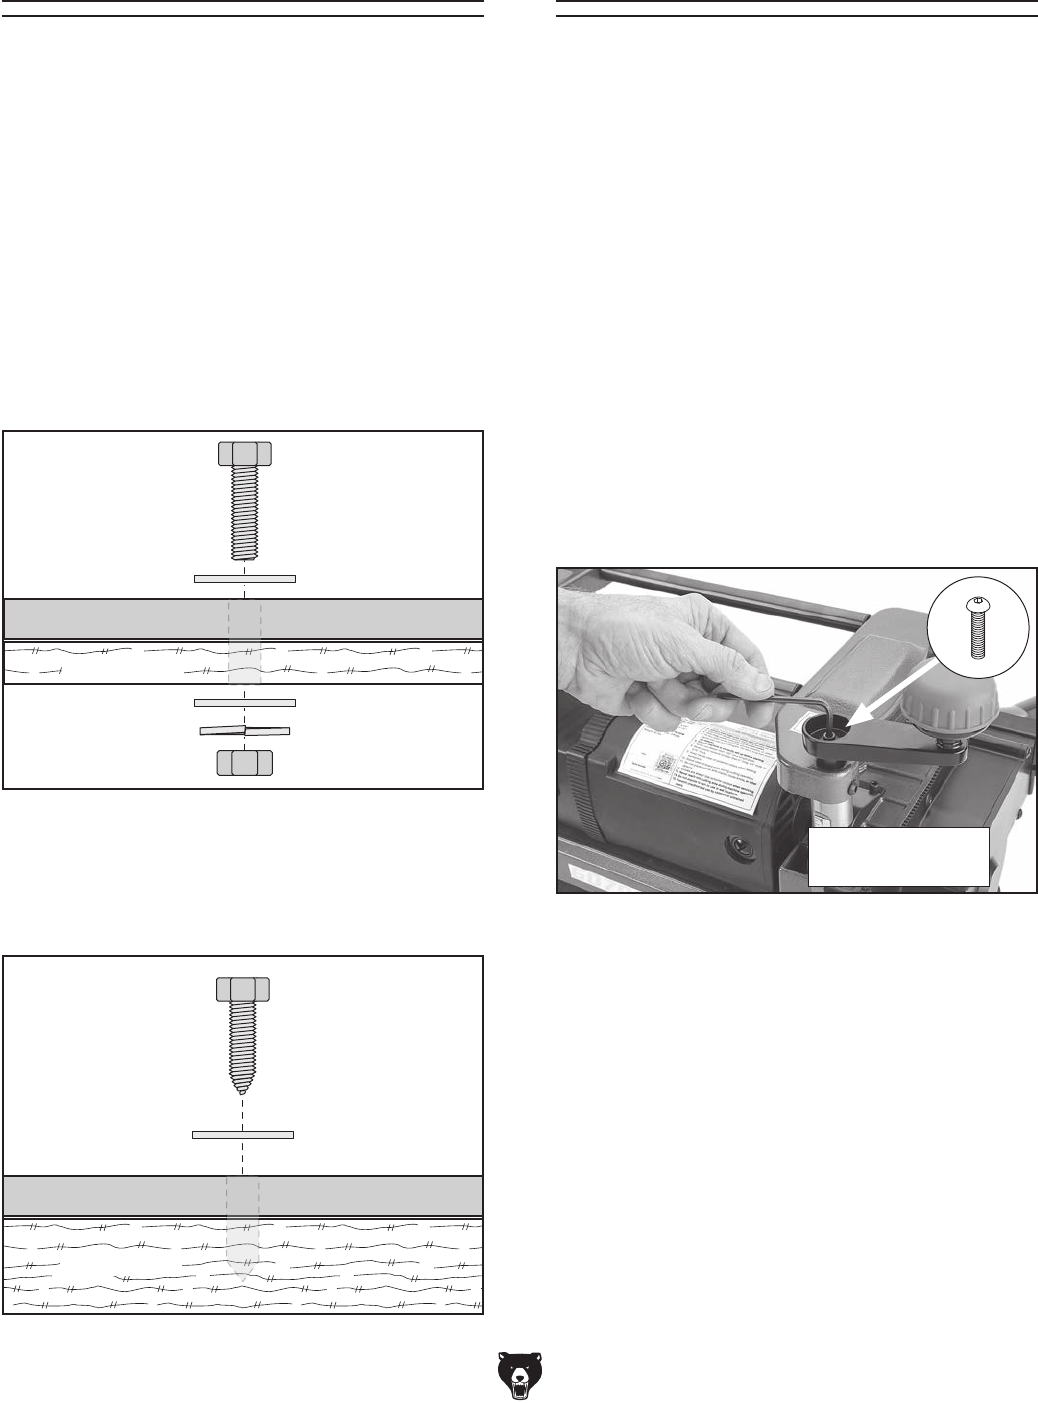
Bench Mounting
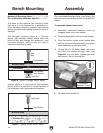
Figure 7. Typical "Direct Mount" setup.
Machine Base
Workbench
Lag Screw
Flat Washer
Another option is a "Direct Mount" (see example
below) where the machine is secured directly to
the workbench with lag screws and washers.
The base of this machine has mounting holes
that allow it to be fastened to a workbench or
other mounting surface to prevent it from moving
during operation and causing accidental injury or
damage.
The strongest mounting option is a "Through
Mount" (see example below) where holes are
drilled all the way through the workbench—and
hex bolts, washers, and hex nuts are used to
secure the machine in place.
Machine Base
Workbench
Hex
Bolt
Flat Washer
Flat Washer
Lock Washer
Hex Nut
Figure 6. Typical "Through Mount" setup.
Number of Mounting Holes ............................ 4
Dia. of Mounting Hardware Needed ..........
5
⁄16"
Assembly
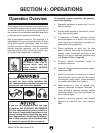
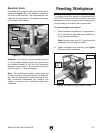
The cutterhead elevation crank, cord wraps, and
dust port must be installed in order to operate the
planer.
To assemble planer loose parts:
1. Assemble cutterhead elevation crank by
snapping knob onto crank handle.
2. Remove black plastic lid from crank handle.
3. Align flat portion inside crank handle bore
with flat portion on elevation shaft, then place
crank assembly on elevation shaft.
4. Thread M5-.8 x 25 button head cap screw
and 5mm flat washer through crank (see
Figure 8) and into shaft. Tighten with 4mm
hex wrench. Do not over-tighten.
5. Re-install black plastic lid.
Figure 8. Installing cutterhead elevation crank.
Cutterhead
Elevation Crank