


-18- G1066/G1066Z/G1079 Drum Sander
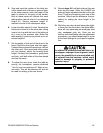
Figure 14. Illustrates paper preparation.
4. Unwind the old sandpaper and use it as a
pattern or use the pattern in Figure 14 to cut
a piece of 6" wide sandpaper of the desired
grit. It is necessary to cut a triangular portion
of the paper away at each end.
5. Starting at the left side of the drum, fold the
corner of the sandpaper into the spring clip,
then install the clip onto the tensioner. You
may need to tap the clip with a hammer or
mallet to ensure that it is seated; however,
you do not have to drive clip completely on,
just make sure it is secure. Too much force
will break the clip! Also, do not fold paper
over tensioner and then install the clip—the
paper may tear as a result.
6. Pull the paper until the tension wheel spring
has bottomed out in its travel.
7. This step is possible to accomplish alone, but
it is easier with an assistant. While one per-
son rolls the drum, the other tightly spirals
the paper onto the drum, ensuring that there
are no bubbles or overlapping edges.
IMPORTANT: Try to leave a uniform
3
⁄16" gap
between the spirals as you wind the paper
around the drum. This will allow the paper to
move and stretch slightly and will decrease
the likelihood of tearing and overlapping.
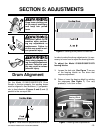
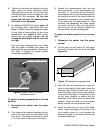
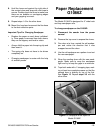
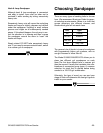
Figure 13. Sanding paper attachment.
Sanding Paper Clip
Tension Wheel
Tension Spring
Be careful that the tension wheel does not
pinch your fingers when the pressure is
released and it snaps back to a relaxed posi-
tion.
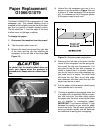
Paper Replacement
G1066/G1079
The Model G1066/G1079 is designed for 6" wide
sandpaper rolls. The outfeed sanding drum is
wrapped in felt to slightly increase the drum diam-
eter and to provide a smooth sanded surface.
The felt should be 1" from the edge of the drum
to allow room for the tape to adhere.
To change the paper:
1. Disconnect the machine from the power!
2. Take the sheet metal cover off.
3. Remove the tape from around the right side
of the drum and the clip that attaches the
sandpaper to the left side of the drum (See
Figure 13).