


-14-
H8203 Professional Drill Sharpening Machine
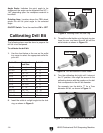
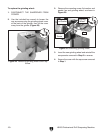
Figure 11. Calibrating dial set for a 7mm drill bit.
4. Turn the calibrating dial right until it stops at
the "0" position, then align the arrow on the
calibrating device with the number on the dial
that corresponds to the drill bit diameter.
For example, turn the dial to "7" for a 7mm
diameter drill bit, as shown in
Figure 11.
The following steps must be done to prepare the
drill bit to be sharpened.
To calibrate the drill bit:
1. Use the chart below or the one on the collet
tray cover to select the appropriate collet for
your drill.
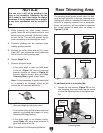
Figure 9. Inserting collet into lock ring.
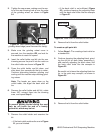
3. Thread the collet holder onto the lock ring two
turns for now, and insert the drill bit into the
collet holder as shown in
Figure 10.
Figure 10. Drill bit installed in collet holder.
Lock Ring
Collet
Collet Holder
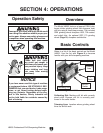
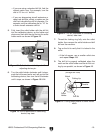
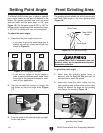
Angle Scale: Indicates the point angle to be
sharpened; the angle can be adjusted from 90º—
140º depending upon the workpiece material to
be drilled.
Grinding Area: Location where the CBN wheel
grinds the drill bit point angle to the selected
angle.
ON/OFF Switc
h: Turns the machine ON or OFF.
2. Insert the collet at a slight angle into the lock
ring, as shown in
Figure 9.
Metric Size Fractional-
Inch Size
Collet No.
2.0-3.0 Less than
1
⁄8" 3 2
3.1-4.0
1
/8"-
5
/32" 4 3
4.1-5
11
/64"-
3
/16" 5 4
5.1-6
13
/64"-
1
/4" 6 5
6.1-7
17
/64"-
9
/32" 7 6
7.1-8
19
/64"-
5
⁄16" 8 7
8.1-9
21
/64"-
23
/64" 9 8
9.1-10
3
/8"-
25
/64" 10 9
10.1-11
13
/32"-
7
/16" 11 10
11.1-12
29
/64"-
15
⁄32" 12 11
12.1-13
31
/64"-
1
⁄2" 13 12
Calibrating Drill Bit