


-18-
H8203 Professional Drill Sharpening Machine
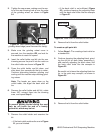
To prevent getting burned during the next
step, do not touch the end of a freshly
ground bit, which may be hot.
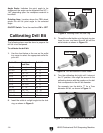
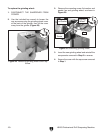
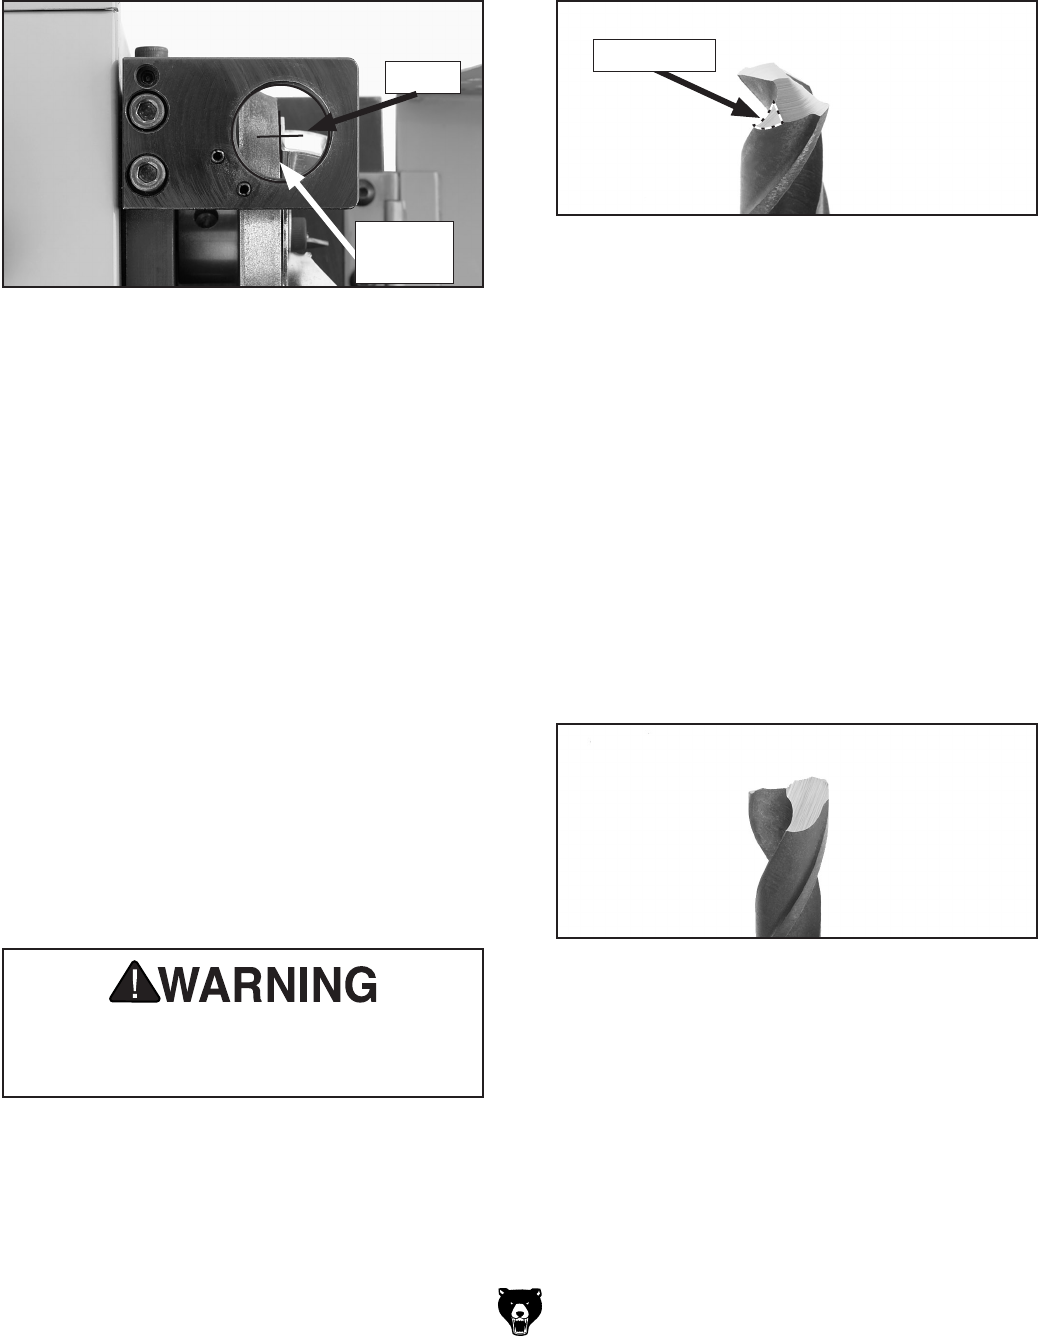
2. Tighten the cap screws, making sure the cen-
ter of the rear trimming hole is over the edge
of the grinding wheel, as shown in
Figure
24.
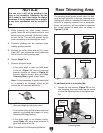
— If the back relief is not sufficient (Figure
25), continue lowering the adjusting block
until the back relief looks like the example
in Figure 21.
3. Make sure the grinding wheel cover is
secured, turn the machine
ON, and wait for
the machine to reach full speed.
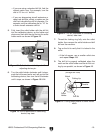
4. Insert the collet holder and bit into the rear
trimming area so the pins fit into the notch on
the collet holder as shown in
Figure 23.
5. Press the collet holder and bit down, and
after about four seconds dip the tip in water.
Continue alternating between grinding and
cooling until the machine stops making grind
-
ing noises.
Note: The harder you press down on the
collet holder, the larger the back relief will
be.
6. Remove the collet holder and drill bit, rotate
them 180º, reinsert them into the trimming
area, and repeat Step 5.
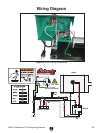
Figure 24. Rear trimming hole center over
grinding wheel edge (cover removed for clarity).
8. Remove the bit from the collet holder.
To create a split point bit:
1. Follow Steps 1-7 for creating a back relief on
a standard bit.
2. Continue lowering the adjusting block, grind-
ing the drill bit on both sides, examining it,
and carefully adjusting the block down until
the back relief looks like the example in
Figure 22.
Be careful not to lower the adjusting block too
far, or the point may oversplit, as shown in
Figure 26.
Figure 25. Back relief on standard bit too small.
Back Relief
3. Remove the bit from the collet holder.
Figure 26. Oversplit point.
7. Remove the collet holder and examine the
bit.
— If the back relief matches the one in
Figure
21 you are finished.
Center
Wheel
Edge