


SKU 45804 PAGE 12
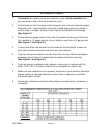
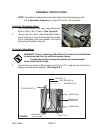
SAW BLADE (3)
(not included)
REAR OF
TABLE SAW
FRONT OF
TABLE SAW
FIGURE F
FENCE ASSY. (75)
Warning! Be very careful during blade tightening and loosening to avoid
contact with the blade.
3. Carefully reach into the Saw Blade opening and remove the Hex Nut (1) and
Blade Pad (2) from the Shaft (6) avoiding contact with the blade.
4. Insert the Saw Blade (3) at a slight angle (10°) and place the Blade on the Shaft
(6).
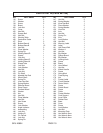
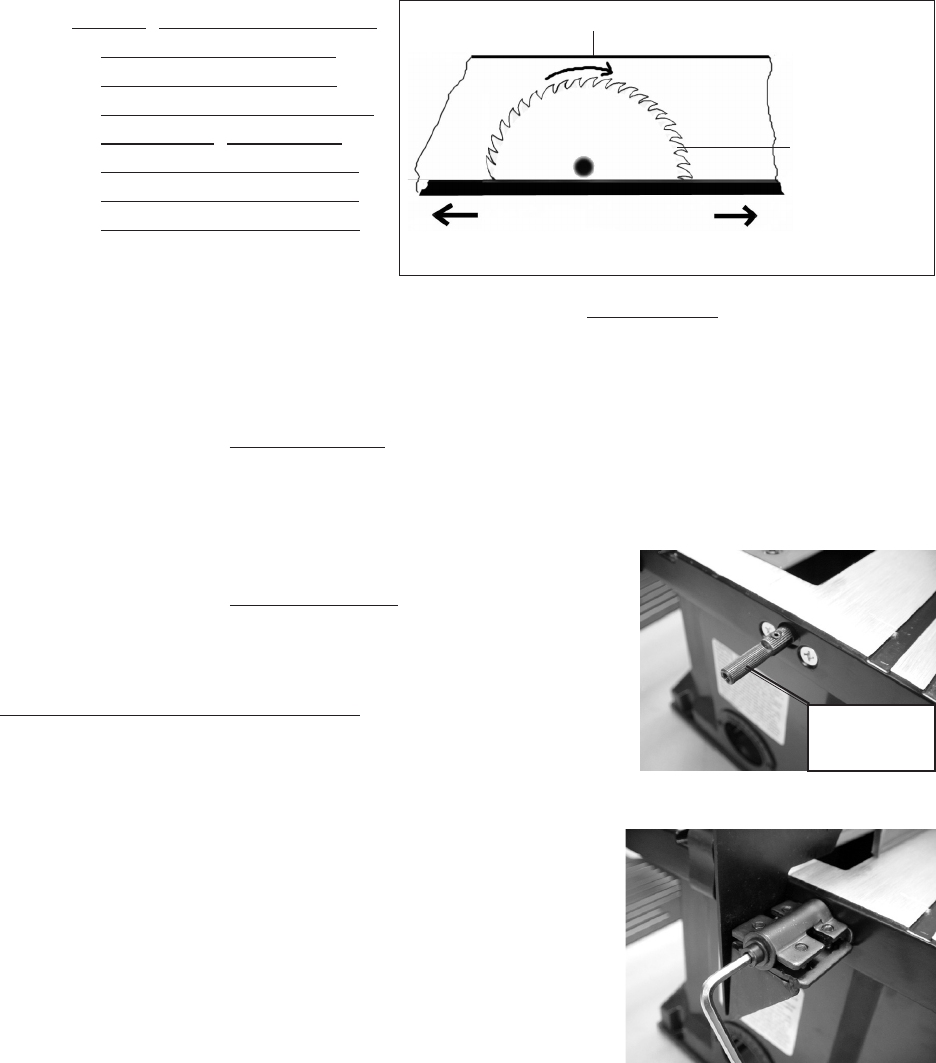
To Attach The Guard Assembly:
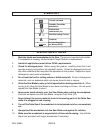
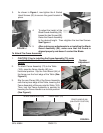
1. WARNING! Prior to installing the Guard Assembly
(50), make sure the Table Saw is disconnected from
its electrical power source.
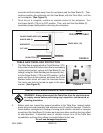
2. Put the Guard Assembly in place over the table.
The Guard Assembly attaches to the mounting post
shown in Figure G. Simply slip the Guard Assembly
over the mounting post. Place a Spring Washer (62),
Washer (64), and Big Washer (61) over the Socket
Head Screw (63) and thread into the end of the
mounting post. Use the included 4 mm Hex Wrench
(196) to tighten the Socket Head Screw (63). See
Figure H.
FIGURE H
FIGURE G
Mounting
Post
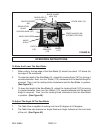
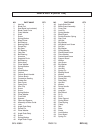
NOTE: Make sure the teeth
of the Saw Blade (not
included) are pointing
toward the FRONT of the
Table Saw. Follow the
directional arrow shown
on the Saw Blade when
mounting the Blade.
See Figure F.
5. Place the Blade Pad (2) onto the Shaft (6). Next, hand tighten the Hex Nut (1) onto
the Shaft.
6. In order to keep the Saw Blade (3) from turning during this step, use the Open-end
Spanner (39) to hold the Blade Pad (2). Then while holding the Open-end Spanner
firmly in place, wrench tighten the Hex Nut (1) with the Spanner (38) onto the Shaft
(6) to secure the Saw Blade. Position your hand well away from the blade teeth to
avoid injury if your hand was to slip while tightening.
7. Once the Saw Blade (3) is secured onto the Shaft (6),
replace the Cover (101) and the two Screws (96).
See Figure E, previous page.