


SKU 45804 PAGE 22
Appendix B
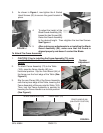
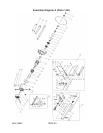
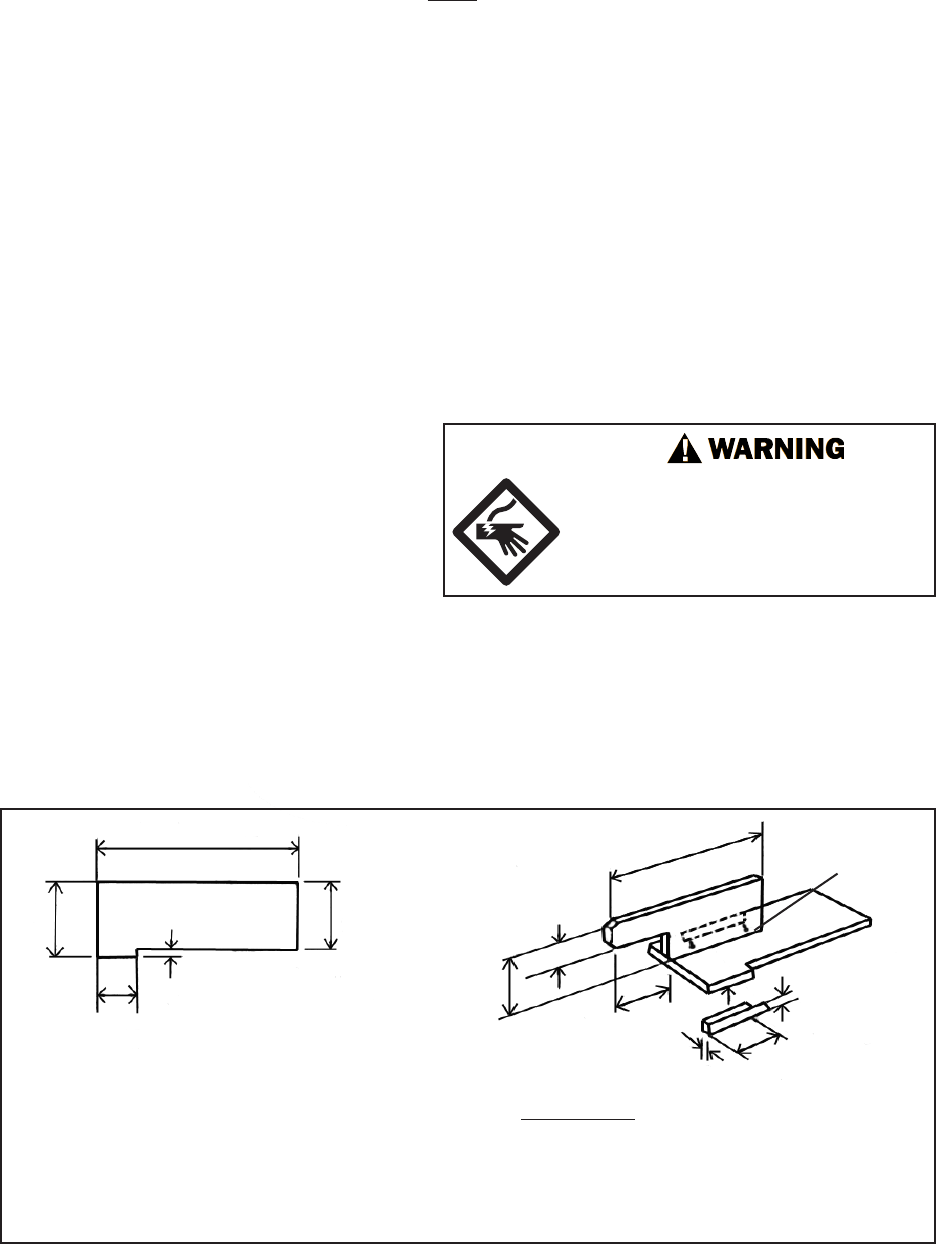
To Build a Push Block (not included)
(for use when ripping widths under 2”)
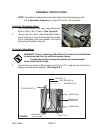
PUSH BLOCK
4-
3
/
4
”
12”
5”
2”
1
/
4
”
12”
2”
5”
4”
5
/
16
”
2”
3
/
8
”
WOOD
SCREWS
WARNING!
When using wood screws, lo-
cate the screws so they will not
accidently come in contact with
the saw blade.
Assemble Push Block
with glue and wood screws
(see warning to the right).
Top view
Appendix A
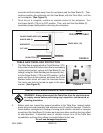
Mounting Instructions
WARNING: Mounting the saw should only be done with the power cord unplugged
and the sawblade removed.
If mounting onto a stand:
1. Make sure the stand is designed to handle the weight of this machine, plus any additional
weight placed on it during use. Also, make sure that the stand will match the base of this
stand properly.
2. Mount the Saw, following the instructions, warnings, and precautions in the manual for the
stand used.
If mounting onto a bench or other wooden surface:
1. Select four (4)
3
/
8
” Bolts, eight (8)
3
/
8
” Washers, and four (4)
3
/
8
” Nuts* (not included).
*Screws and washers may be used instead, if desired.
2. Place the Table Saw in the location it will be mounted in. Make a mark in the center of each
of the 4 mounting holes. Set the Saw aside.
3. Before drilling the holes, make sure
that there are no electric wires or
other obstructions in the area to be
drilled in -see warning, right.
4. Drill the holes straight down, large
enough to allow your mounting
hardware to fit.
5. Put the Saw in place and mount using the hardware mentioned above. Tighten all hardware
securely before use.
Risk of ELECTRIC SHOCK or DEATH.
Before drilling holes to mount this saw,
ensure that the area the holes are to be
drilled in is free from any wires, cables,
and utility lines.