


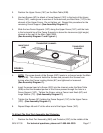
SKU 91130 For technical questions, please call 1-800-444-3353. Page 21
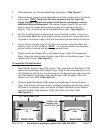
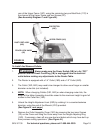
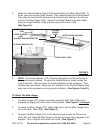
3. NOTE: The Height Adjustment Ring (14D) is marked with a straight arrow point-
ing to the edge of the Adjustment Board (17D). The Adjustment Board (17D) is
marked with ten corresponding lines. When setting the depth of cut, always align
the arrow on the Height Adjustment Ring with one of the ten lines on the Adjust-
ment Board. (See Figure Q.)
4. To determine the depth of cut, use a ruler to measure the distance between the
base of the Main Table (20B) and the tip of the router bit.
5. Once the depth of cut is acquired, align the Height Adjustment Lock (23D) and
turn the Lock in a
clockwise
direction to lock. (See Figure Q.)
6. NOTE: Always make a trial cut on scrap wood to ensure the correct depth of cut
has been selected.
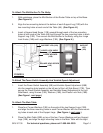
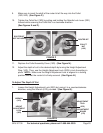
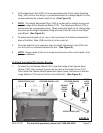
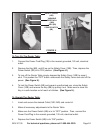
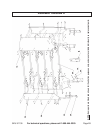
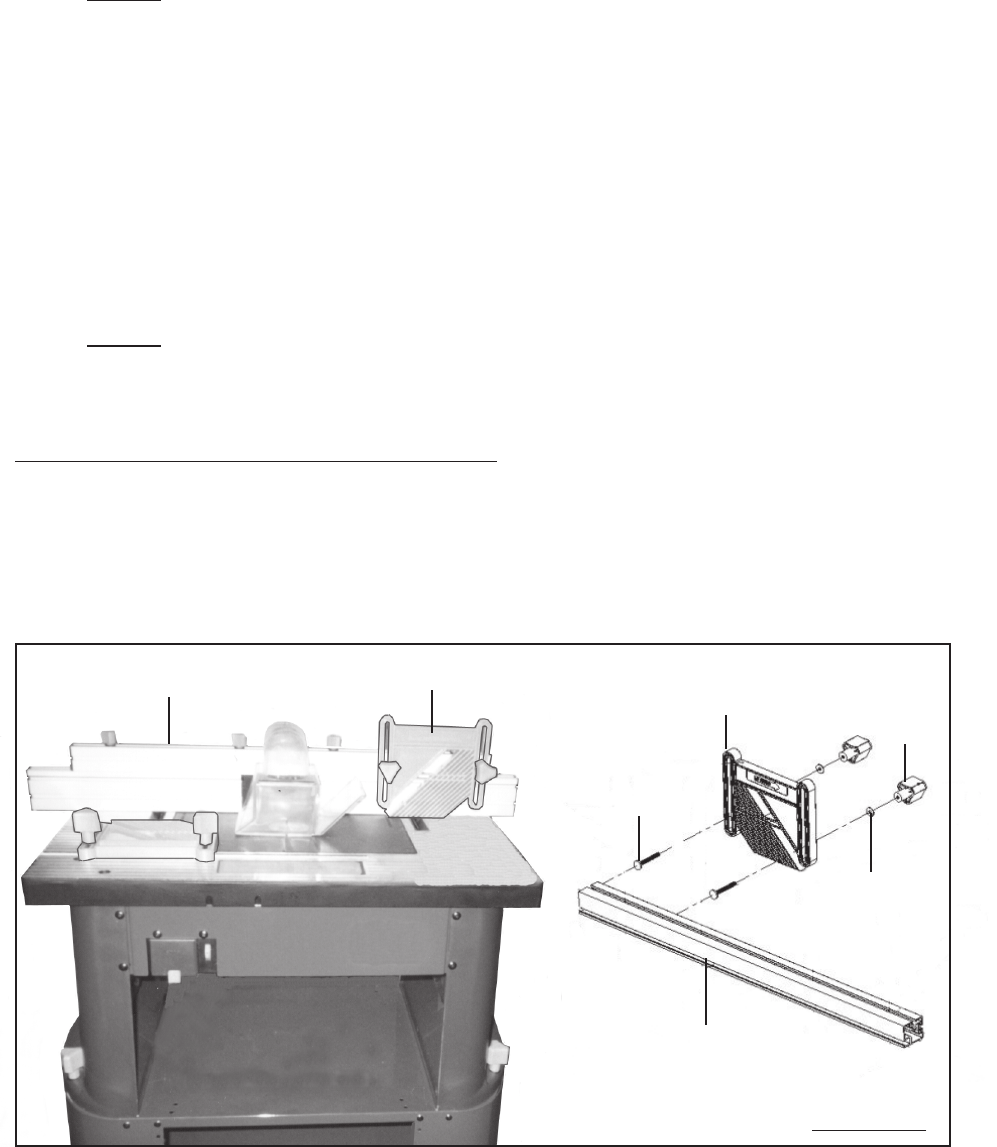
To Attach And Adjust The Feather Boards:
1. To attach the
first
Feather Board (14C), slide the heads of two Square Head
Screws (15C) into a channel (groove) on the front of the Upper Fence (16C).
Then mount the Feather Board against the Upper Fence, and secure it with two
Large Washers (7C) and two Fence Lock Knobs (8C). (See Figure R.)
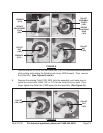
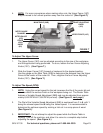
2. Fit the Adjustment Tool (27D) in the corresponding slots of the Height Adjusting
Ring (14D) and turn the Ring in a
clockwise
direction for a deeper depth of cut or
counterclockwise
for a lesser depth of cut. (See Figure Q.)
UPPER FENCE (16C)
UPPER FENCE (16C)
FEATHER BOARD (14C) FEATHER BOARD
(14C)
SQUARE
HEAD
SCREW
(15C)
LARGE
WASHER
(7C)
FENCE
LOCK
KNOB
(8C)
FIGURE R