


SKU 91130 For technical questions, please call 1-800-444-3353. Page 22
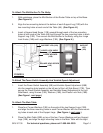
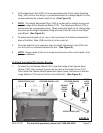
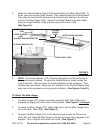
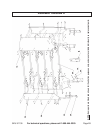
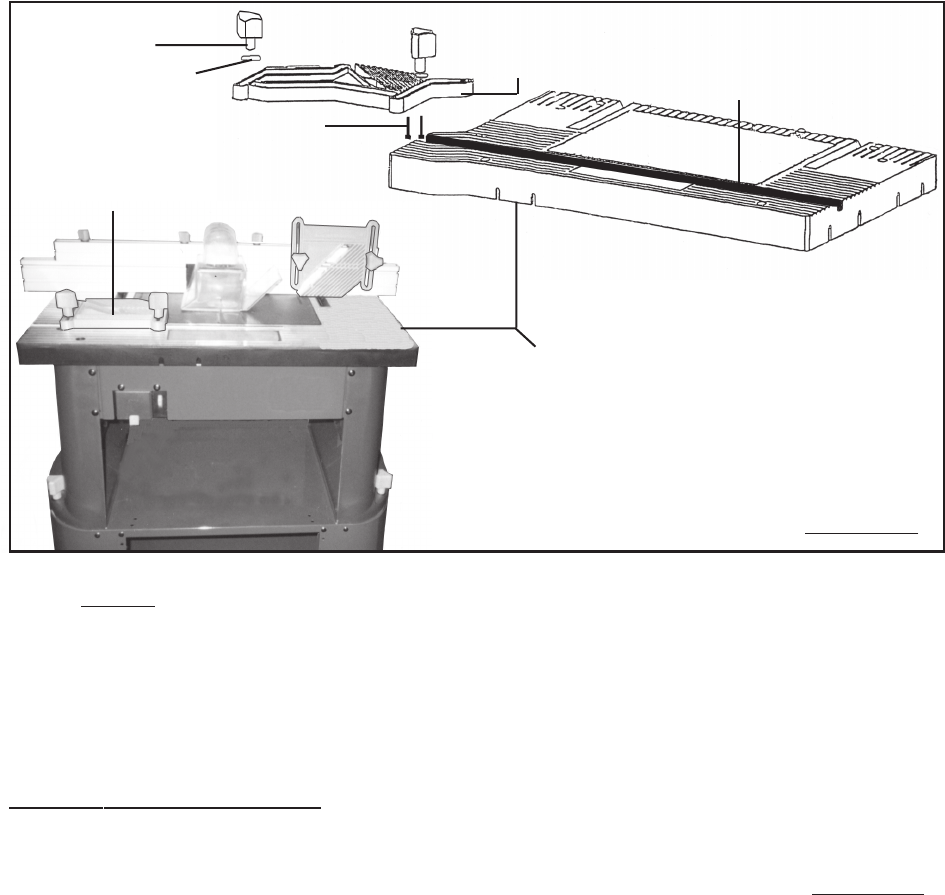
2. Attach the
second
Feather Board (21B) horizontally to the Main Table (20B). To
do so, insert two Square Head Screws (11B) upward through the Feather Board.
Then slide the head of both Screws into the keyhole slot located in the channel
used for the Miter Gauge (27C). Secure the Feather Board to the Main Table,
using two Large Washers (13B) and two Large Lock Knobs (14B).
(See Figure S.)
FEATHER BOARD (21B)
FEATHER
BOARD
(21B)
SQUARE HEAD SCREW (11B)
MITER GAUGE CHANNEL
LARGE WASHER
(13B)
LARGE LOCK KNOB
(14B)
MAIN TABLE (20B)
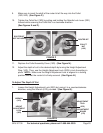
3. NOTE: The Feather Boards (14C, 21B) are designed to hold the workpiece in
place and prevent kickback. To adjust the Feather Boards, simply loosen the
Lock Knobs (8C, 14B) and move the Feather Boards into the workpiece. Then,
retighten the Lock Knobs. Make sure the “feathers” of the Feather Boards allow
easy feed of the workpiece and help prevent kickback. (See Figures R and S.)
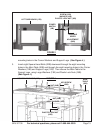
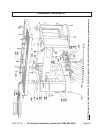
To Attach The Miter Gauge:
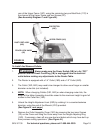
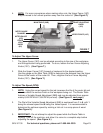
1. The Miter Gauge (27C) slides horizontally along the Main Table (20B) and is
designed for edging and miter cuts in the workpiece. (See Figure T, next page.)
2. To attach the Miter Gauge (27C), simply slide its bar into the Miter Gauge Chan-
nel on the Main Table (20B). (See Figure T.)
3. To adjust the Miter Gauge (27C) to the desired angle, loosen the Fence Lock
Knob (8C) and rotate the Miter Gauge to the desired angle from 0 degrees to 45
degrees. Then, retighten the Fence Lock Knob. (See Figure T.)
FIGURE S