9
Unpacking
Remove the crate and packing material from the
band saw except for the transport skid on the
bottom. Inspect the machine for damage. Report
any damage to your distributor and shipping agent.
Move the saw to its permanent working location.
The site should be dry, well lit, and have enough
room to handle long stock and the service and/or
adjustment of the machine from any side.
Move the band saw off the skid. Clean all rust
protected surfaces with a mild solvent or diesel fuel
and a soft cloth. Do not use lacquer thinner, paint
thinner, or gasoline. These will damage painted
surfaces.
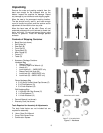
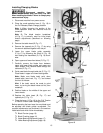
Contents of Shipping Container
1 Band Saw (not shown)
1 Rail Guide (A)
1 Rear Rail (B)
1 Front Rail (C)
1 Fence Body (D)
1 Miter Gauge (E)
1 Fence (F)
1 Table (G)
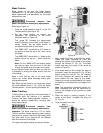
1 Accessory Package Contains:
Hardware Bag
01 0Resaw Post (H)
01 010/12mm Open End Wrench (J)
01 0Handle (K)
01 0Lock Handle (L) – JWBS-20QT only
01 0Resaw Post Lock Knob (M)
01 0Lock Knob (N) – JWBS-20QT only
02 0Lock Knob (N) – JWBS-18QT only
Fence Hardware Bag
04 5/16-18x3/4 Socket Head Cap Screws (P)
04 5/16 Flat Washers (Q)
04 5/16 Lock Washers (R)
Rail Hardware Bag
09 1/4-20x5/8 Hex Cap Screws (S)
09 1/4 Flat Washers (T)
09 1/4 Lock Washers (U)
1 Owner’s Manual (not shown)
1 Warranty Card (not shown)
Tools Required for Assembly & Adjustments
The tools listed below are not included but are
required for assembly.
2 14mm Open End Wrench
1 Cross Point Screw Driver
1 Combination Square
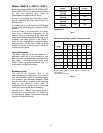
Figure 3 - Hardware


