


18
The welder is designed for
intermittent use. Repeated welding within a
short period of time may cause the welder to
overheat.
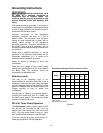
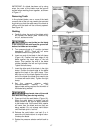
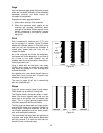
12. Remove the blade from the clamps, and
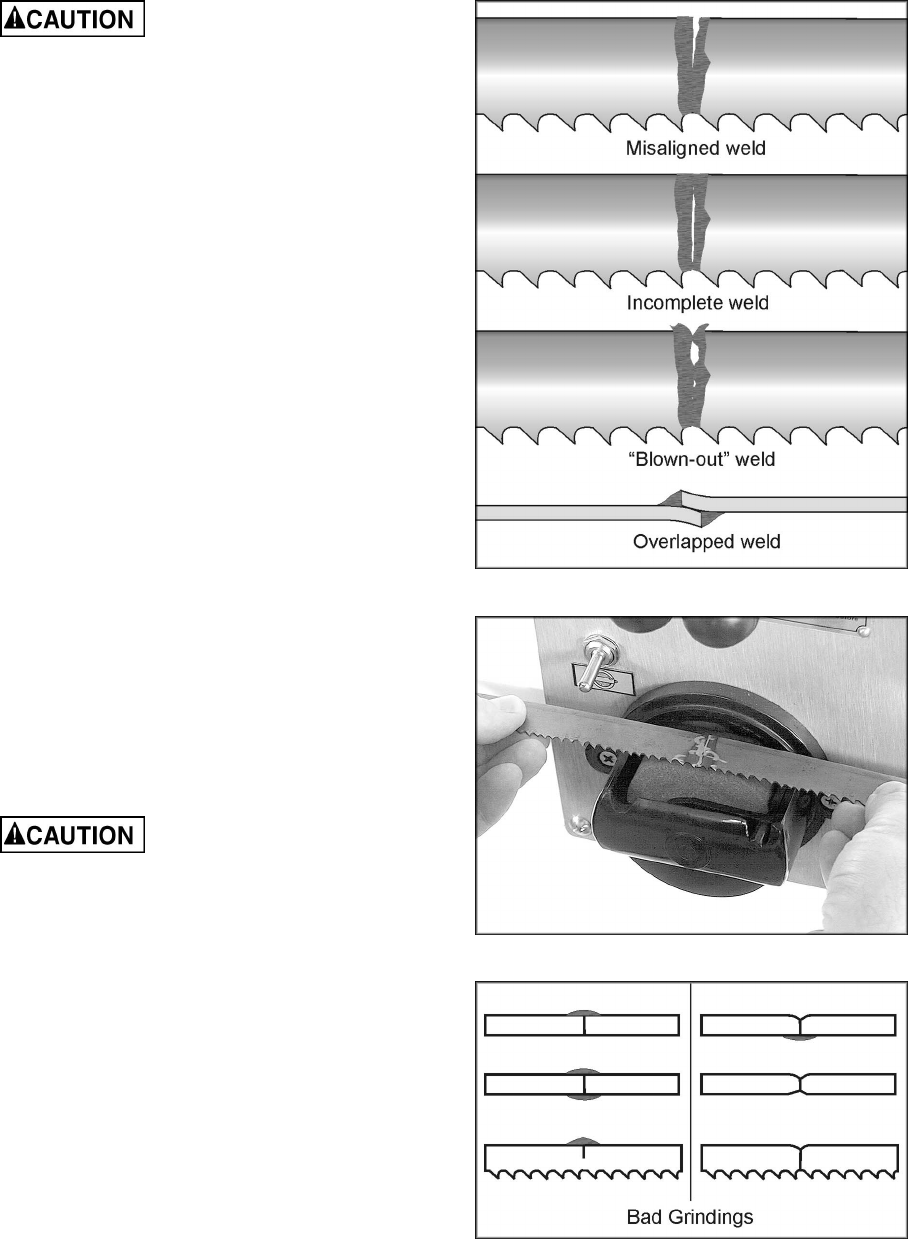
carefully inspect it. The spacing of the teeth
should be uniform and the weld should be
located in the center of the gullet.
Misalignment is easily noted at this time
from the weld appearance. See Figure 19
for examples of incorrect welds.
13. If the weld is imperfect, refer to the trouble-
shooting section on page 28 for possible
remedies to any problems. Make corrections
before annealing.
Annealing
The blade must now be annealed, or cooled at a
controlled rate to prevent it from becoming too
brittle.
14. Turn the pressure selector knob all the way
to the left so the clamp jaws are closest to
each other.
15. Insert the blade into the clamps so the weld
area is centered between the clamps.
Secure the blade in the jaws with the clamp
handles.
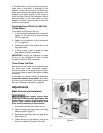
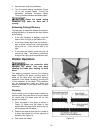
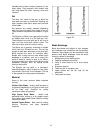
16. Quickly press and release (jog) the anneal
button (Figure 18). Repeat the press-and-
release process until you see a slightly red
glow from the weld area.
Do not press and hold the
anneal push button. The weld will be
overheated and will fail due to the excessive
heat.
17. Release both blade clamps, allow the blade
to cool, then remove the blade from the
clamps.
18. Check the integrity of the weld. Bend the
blade to form a radius at the point of the
weld. The size of the radius should be
approximately the same as the radius of the
band saw drive wheel. The weld must hold
and not break or crack after forming the
radius. If the weld breaks, cut away the
welded area and repeat the welding-
annealing process.
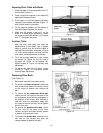
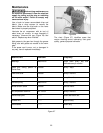
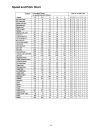
19. Check to make sure the welded section is
the same thickness as the rest of the blade.
If not, grind off excess weld material using
the grinder (Figure 20). Figure 21 illustrates
some unacceptable grindings.
Figure 19
Figure 20
Figure 21