


9
Installation and Assembly
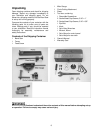
Tools required for assembly:
Forklift with strap or chain
Eye bolt (provided)
Set of hex wrenches (provided)
Remove all crating and plastic from around the
band saw. Remove any lag screws or holding
straps which secure the band saw to the wood
pallet.
Remove the eye bolt from the tool box, and
screw it into the hole at the top of the machine.
Use a forklift with a strap or chain connected to
the eye bolt to lift the band saw from the pallet.
Move the band saw to its permanent location
which should be dry, well ventilated, with
sufficient lighting. Leave enough space on all
sides to handle long stock or perform routine
maintenance on the machine. Make sure the
floor is level and able to support the weight of
the machine.
The Band Saw may be further stabilized by
securing it to the floor using lag screws through
the four holes in the stand.
Areas of the Band Saw have been given a
protective coating at the factory. This should be
removed with a soft cloth moistened with
kerosene or mineral spirits. Do not get solvents
near plastic or rubber parts, and do not use an
abrasive pad as it may scratch metal surfaces.
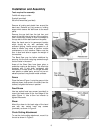
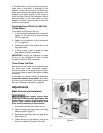
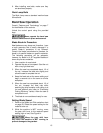
Fence
Place the fence (Figure 1) onto the groove in the
table as shown, and screw in the knob (from the
toolbox) to tighten the fence in position.
Feed Screw
Use two socket head cap screws (provided) to
mount the feed screw to the front edge of the
table (Figure 1). Use a 6mm hex wrench to
tighten the screws.
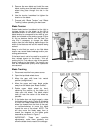
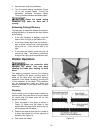
Shear
Mount the shear to the back edge of the band
saw with two socket head cap screws
(provided), as shown in Figure 2.
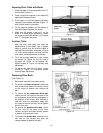
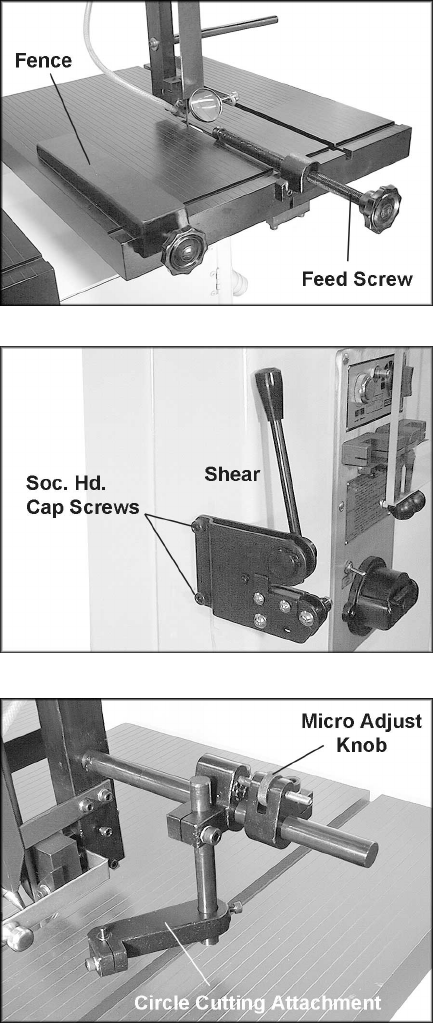
Circle Cutting Attachment
To use the circle cutting attachment, mount it to
the rod as shown in Figure 3.
Figure 1
Figure 2
Figure 3