


P 16/ 25
Repair
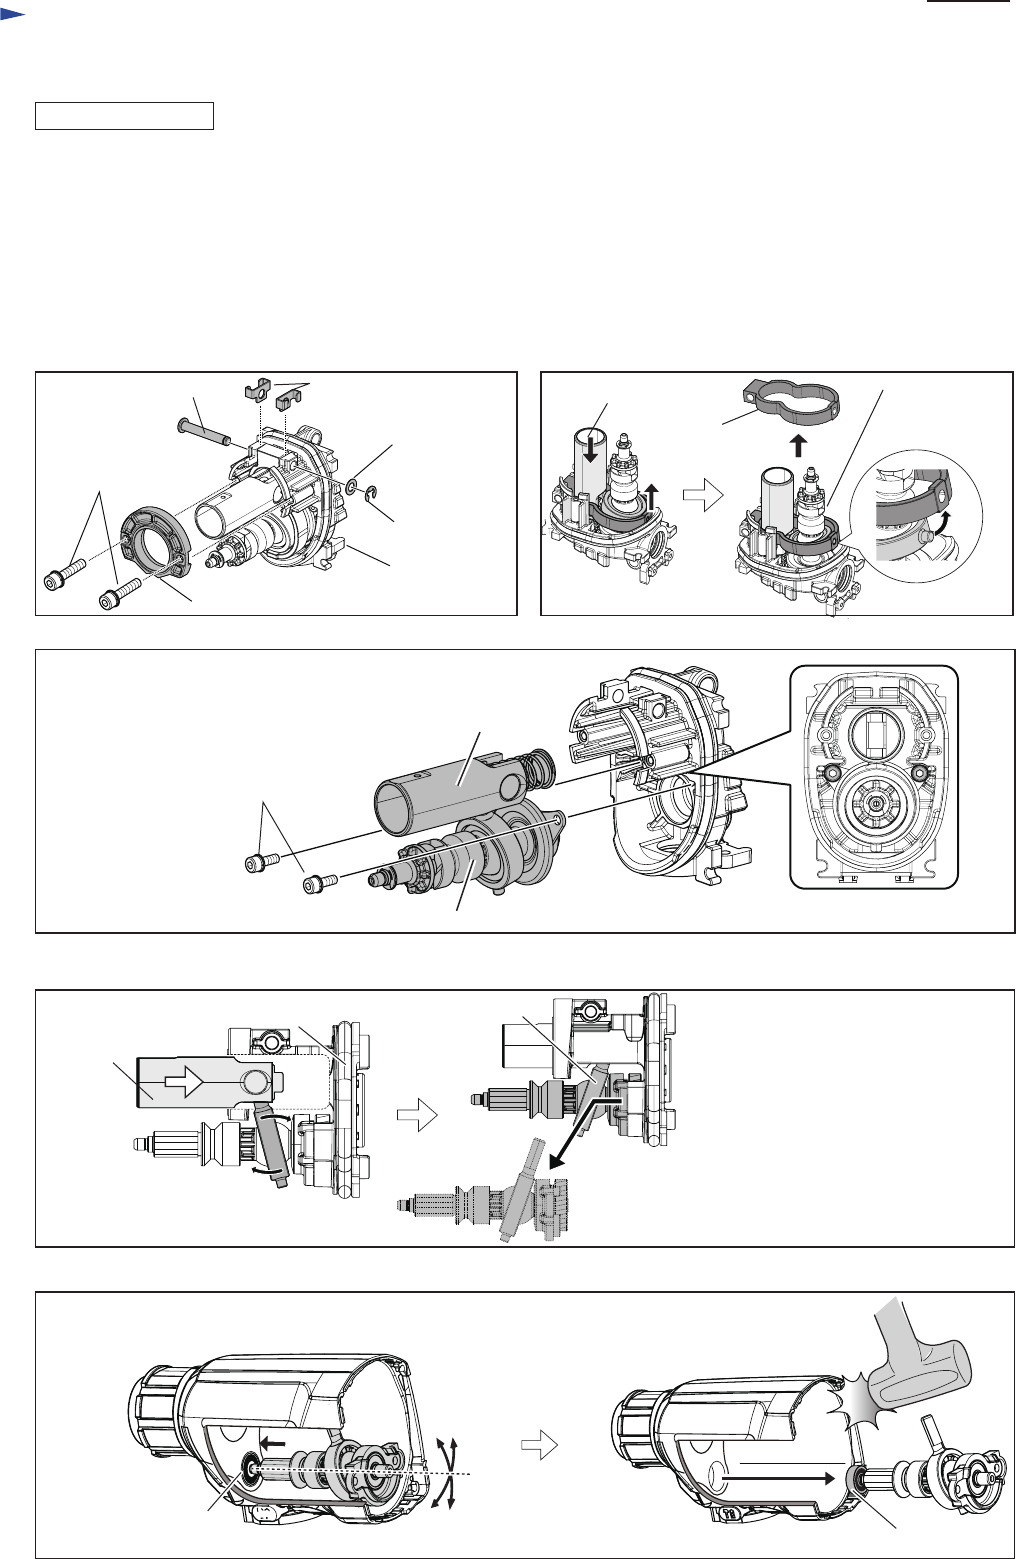
DISASSEMBLING
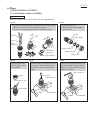
Fig. 47
Fig. 49
Fig. 48
Fig. 50
Fig. 51
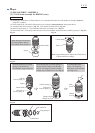
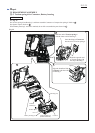
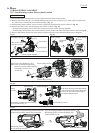
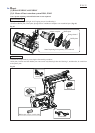
(1) Disassemble Motor housing section, Gear housing section and Inner housing section.
(2) Remove Flat fillister HD pin 6, two Weight holder guides, Flat washer 6, Stop ring E-5, Inner support complete and
two M4x25 Hex socket head bolts from Inner housing. (Fig. 47)
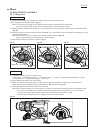
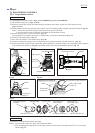
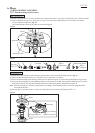
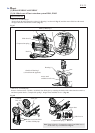
(3) While pushing Piston cylinder, remove Counter weight from Swash bearing section as drawn in Fig. 48.
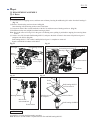
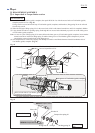
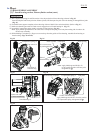
(4) Remove two M4x12 Hex socket head bolts with 1R170 or 1R228. (Fig. 49)
- Then pull Swash bearing section and Piston cylinder section out of Inner housing. (Fig. 49)
- Swash bearing section can be removed from Piston cylinder section with Inner housing attached as drawn in Fig. 50.
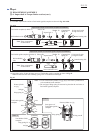
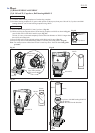
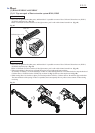
(5) Remove Ball bearing 606ZZ from Gear housing complete using the removed Swash bearing section. (Fig. 51)
Push Piston cylinder into Inner housing
to tilt Swash bearing 10.
Pull Swash bearing section horizontally
with Swash bearing 10 kept tilted, and
remove the pole of Swash bearing 10
toward the tilted direction.
Swash bearing section
Swash bearing 10
[3] DISASSEMBLY/ASSEMBLY
[3]-7. Swash bearing section, Piston cylinder section
M4x25 Hex socket
head bolt (2 pcs.)
Inner support complete
Inner housing
Flat fillister HD pin 6
Weight holder guide
(2 pcs.)
Piston cylinder
Counter
weight
Swash bearing
section
Flat washer 6
Piston cylinder section
Swash bearing section
Stop ring E-5
M4x12 Hex socket head bolt (2 pcs.)
Note: These are thread locking screws.
Do not reuse them without applying
ThreeBond 1321B/ 1342 or
Loctite 242.
Inner housing
Insert the shaft of Swash bearing section to the hole
of Ball bearing 606ZZ, and tilt it back and forth.
Tap Gear housing complete with plastic hammer.
Ball bearing 606ZZ is removed together with
Swash bearing section.
Piston
cylinder
Ball bearing 606ZZ
in Gear housing complete
Ball bearing 606ZZ