


Change cover
Change ring
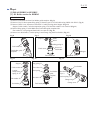
ASSEMBLING
Chuck holder
short arm of
Torsion spring 31
long arm of
Torsion spring 31
hole for
Torsion spring 31
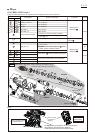
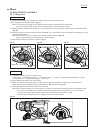
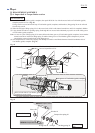
(1) Holding the flat portions of Chuck holder in vise, assemble Drill chuck to Chuck holder by turning it clockwise
using Hex wrench 10.
(2) Secure Drill chuck with M6x22 Flat head screw by turning it counterclockwise using Impact driver.
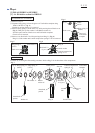
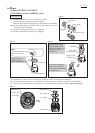
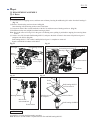
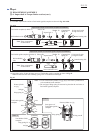
(3) Assemble Drill chuck to Spacer. (Fig. 23) Then mount two Steel balls 6. (Fig. 24)
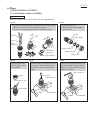
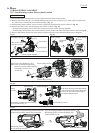
(4) Mount Torsion spring 31. Then assemble Drill chuck to Change cover. (Fig. 25)
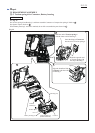
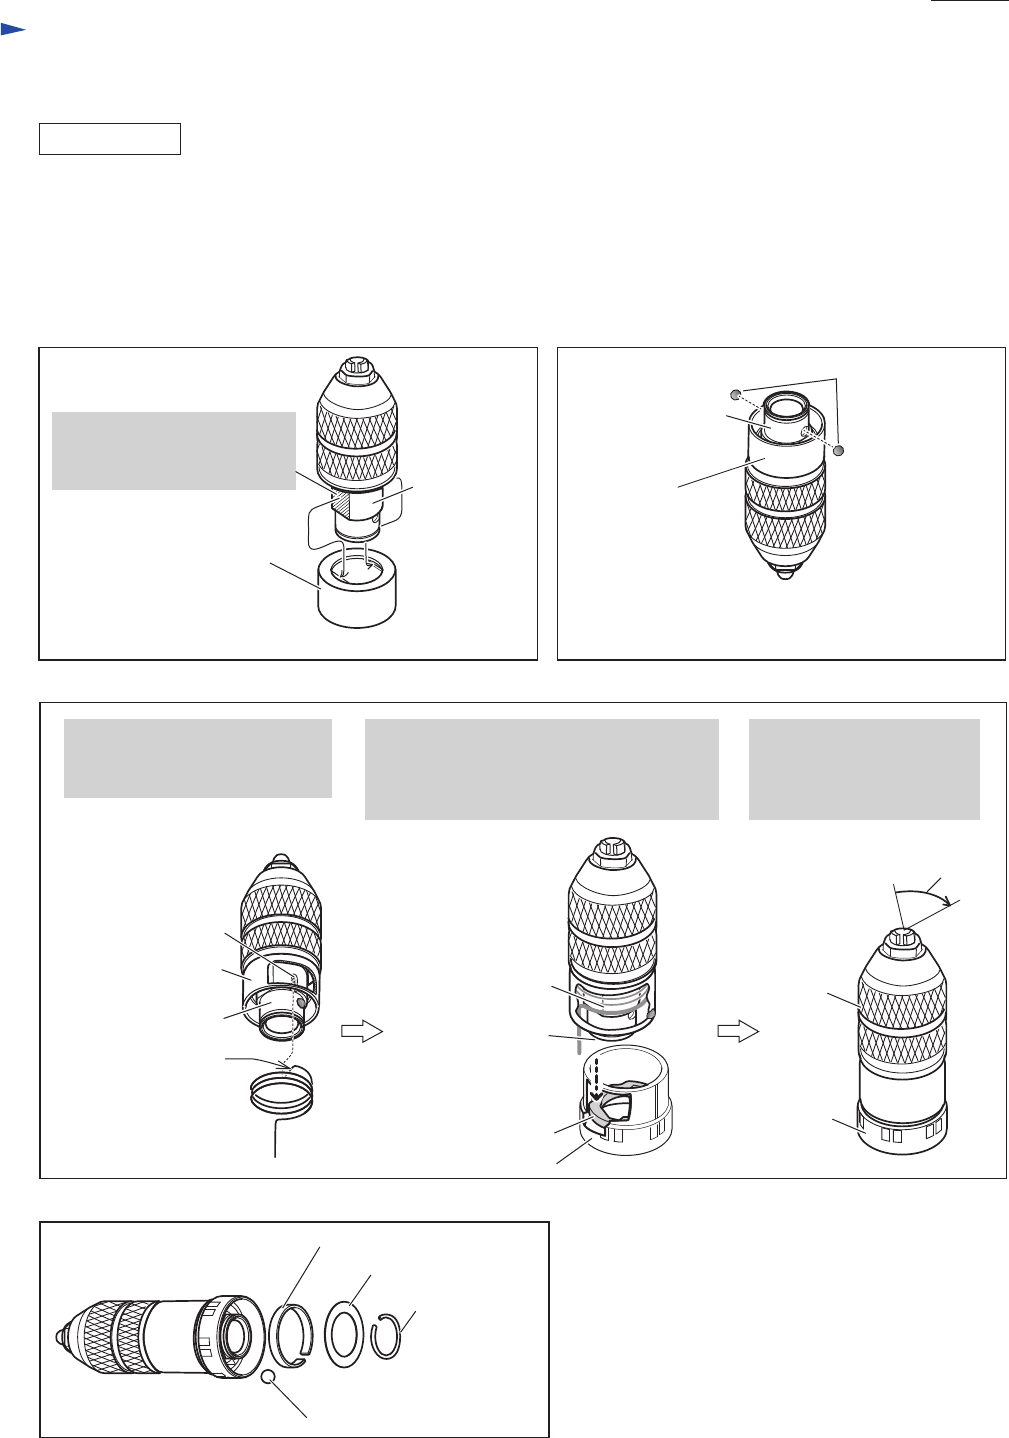
(5) Mount Steel ball 5, Leaf spring and Flat washer 24 to Chuck holder, then secure them with Ring spring 21. (Fig. 26)
Spacer
Spacer
Spacer
Insert the short arm of Torsion
spring 31 into the hole of
Chuck holder using small pliers.
While fitting the flat portions
of Chuck holder to Spacer,
mount Drill chuck to Spacer.
Fig. 23 Fig. 24
Chuck holder
Steel ball 6 (2 pcs.)
Note: Apply Makita grease RB No.00 to Steel balls 6
to protect them from falling.
Fig. 26
Fig. 25
By turning Drill chuck
approx. 75
°
clockwise,
Drill chuck can be fastened
to Change cover.
Drill
chuck
75
°
Ring spring 21
Steel ball 5
Flat washer 24
Leaf spring
Change
cover
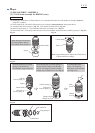
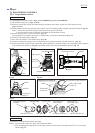
Torsion spring 31
Insert the long arm of Torsion spring 31
into the hole of Change cover through
the hole of Change ring, then assemble
Change ring to Change cover. (See Fig. 6.)
[3] DISASSEMBLY/ ASSEMBLY
[3] -2. Drill chuck assembly for BHR243 (cont.)
Chuck holder
Repair
P 9/ 25