


1.
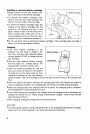
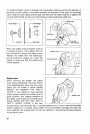
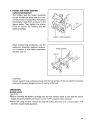
Vertical vise
The vertical vise can be installed in two
positions on either the left or right side
of the guide fence, or the holder assem-
bly (optional accessory).
Insert the vise rod into the hole in the
guide fence or the holder assembly and
tighten the screw to secure the vise rod.
(Note: When using the holder assembly,
install it on the holder as shown in the
figure.)
Position the vise arm according to the
thickness and shape of the workpiece
and secure the vise arm by tightening
the screw.
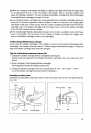
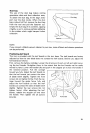
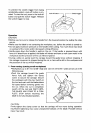
Turn
base
Make sure that no part of the tool contacts the vise when lowering the handle fully or
when pulling or pushing the carriage. If some part contacts the vise, reposition the
vise. Press the workpiece flat against the guide fence and the turn base. Position the
workpiece
at
the desired cutting position and secure
it
firmly
by
tightening the vise
knob. The maximum thickness of workpieces which can be secured by the vertical vise
is
61
mm
(2-3/8").
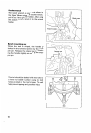
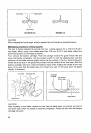
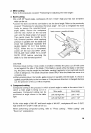
2.
Horizontal vise (optional accessory)
The horizontal vise can be installed on the left side of the base.
By
turning the vise knob
counterclockwise, the screw is released and the vise shaft can be moved rapidly in and
out.
To
grip workpieces, turn the vise knob gently clockwise until the projection reaches
its topmost position, then fasten securely. If the vise knob is forced in or pulled out
while being turned clockwise, the projection may stop
at
an angle. In this case, turn the
vise knob back counterclockwise until the screw is released, before turning again gently
clockwise. The maximum width of workpieces which can be secured by the horizontal
vise is
120
mm
(4-3/4").
I
Vise knob
Projection
ir
Vise shaft
16