


6-8.
Troubleshooting
AA
WARNING
ELECTRIC
SHOCK
can
kill.
Do
not
touch
live
electrical
parts.
Always
wear
dry
insulating
gloves.
Insulate
yourself
from
work
and
ground.
Stop
engine
before
installing
or
servicing.
Keep
all
panels
and
covers
securely
in
place
ENGINE
EXHAUST
GASES
can
kill.
Do
not
breathe
exhaust
fumes.
Use
in
open,
well-ventilated
areas,
or
vent
exhaust
outside
and
away
from
any
building
air
intakes.
HOT
PARTS
can
cause
severe
burns.
Allow
cooling
period
before
servicing.
Wear
protective
gloves
and
clothing
when
working
on
a
hot
engine.
ENGINE
FUEL
can
cause
fire
or
explo
sion.
Stop
engine
before
fueling.
Do
not
fuel
while
smoking
or
near
sparks
or
flames.
Do
not
overfill
tank;
clean
up
any
spilled
fuel.
MOVING
PARTS
can
cause
injury.
Keep
away
from
moving
parts
such
as
fans,
belts,
and
rotors.
Keep
all
doors,
panels,
covers,
and
guards
closed
and
securely
in
place.
Troubleshooting
to
be
performed
only
by
qualified
persons.
rwarnhl.1
11/91
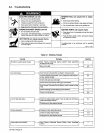
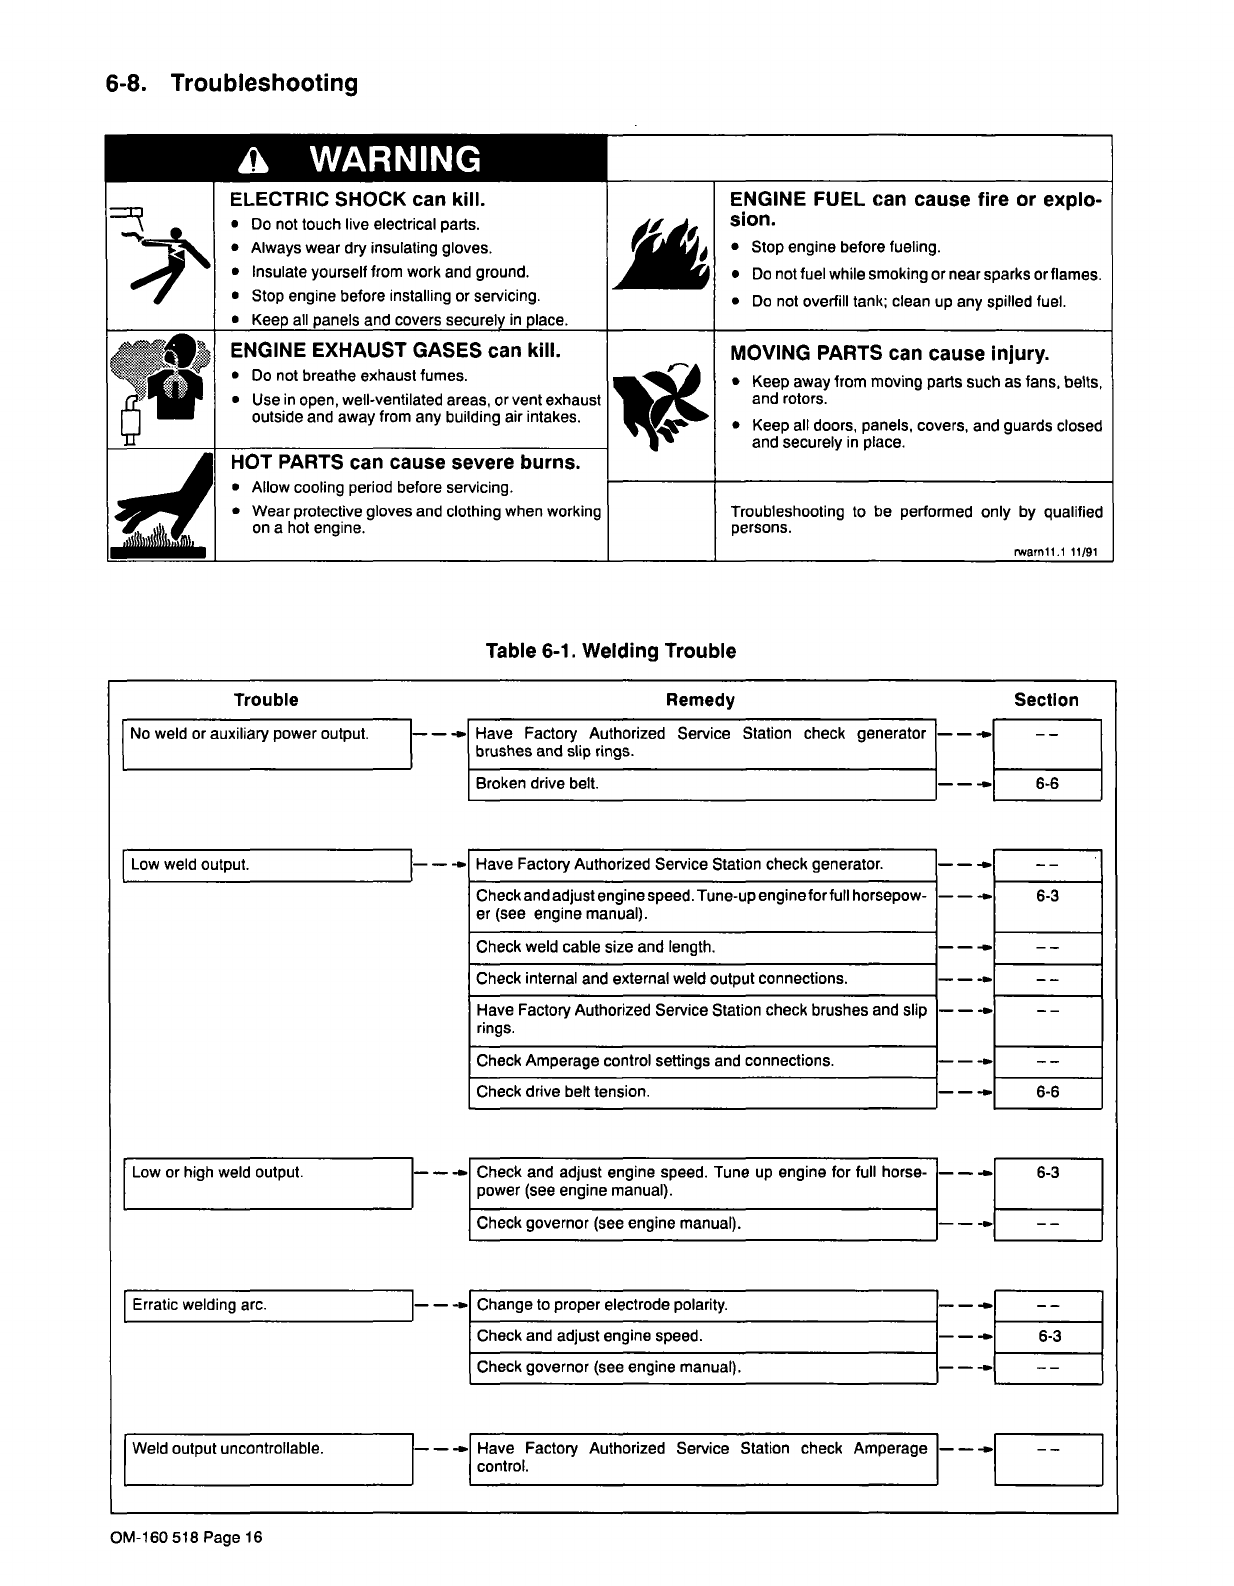
Table
6-1.
Welding
Trouble
Trouble
No
weld
or
auxiliary
power
output.
-~
Remedy
Low
weld
output.
Broken
drive
belt.
Have
Factory
Authorized
Service
Station
check
generator
brushes
and
slip
rings.
-~
Section
---~
--
-..
6-6
Have
Factory
Authorized
Service
Station
check
generator.
-~
-~
6.3
Check
and
adjust
engine
speed.
Tune-up
engine
forfull
horsepow
er
(see
engine
manual).
Check
weld
cable
size
and
length.
Check
internal
and
external
weld
output
connections.
Have
Factory
Authorized
Service
Station
check
brushes
and
slip
rings.
Check
Amperage
control
settings
and
connections.
--
-~
Check
drive
belt
tension.
Low
or
high
weld
output.
-a
--
-~
6-6
Erratic
welding
arc.
Check
and
adjust
engine
speed.
Tune
up
engine
for
full
horse
power
(see
engine
manual).
Check
governor
(see
engine
manual).
Change
to
proper
electrode
polarity.
-~
6-3
-a
--
Check
and
adjust
engine
speed.
Weld
output
uncontrollable.
Check
governor
(see
engine
manual).
-a
--
-~
6-3
---
--
-~
Have
Factory
Authorized
Service
Station
check
Amperage
-~
control.
OM-160
518
Page
16