


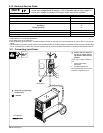

OM-224 043 Page 18
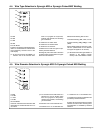
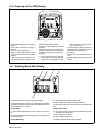
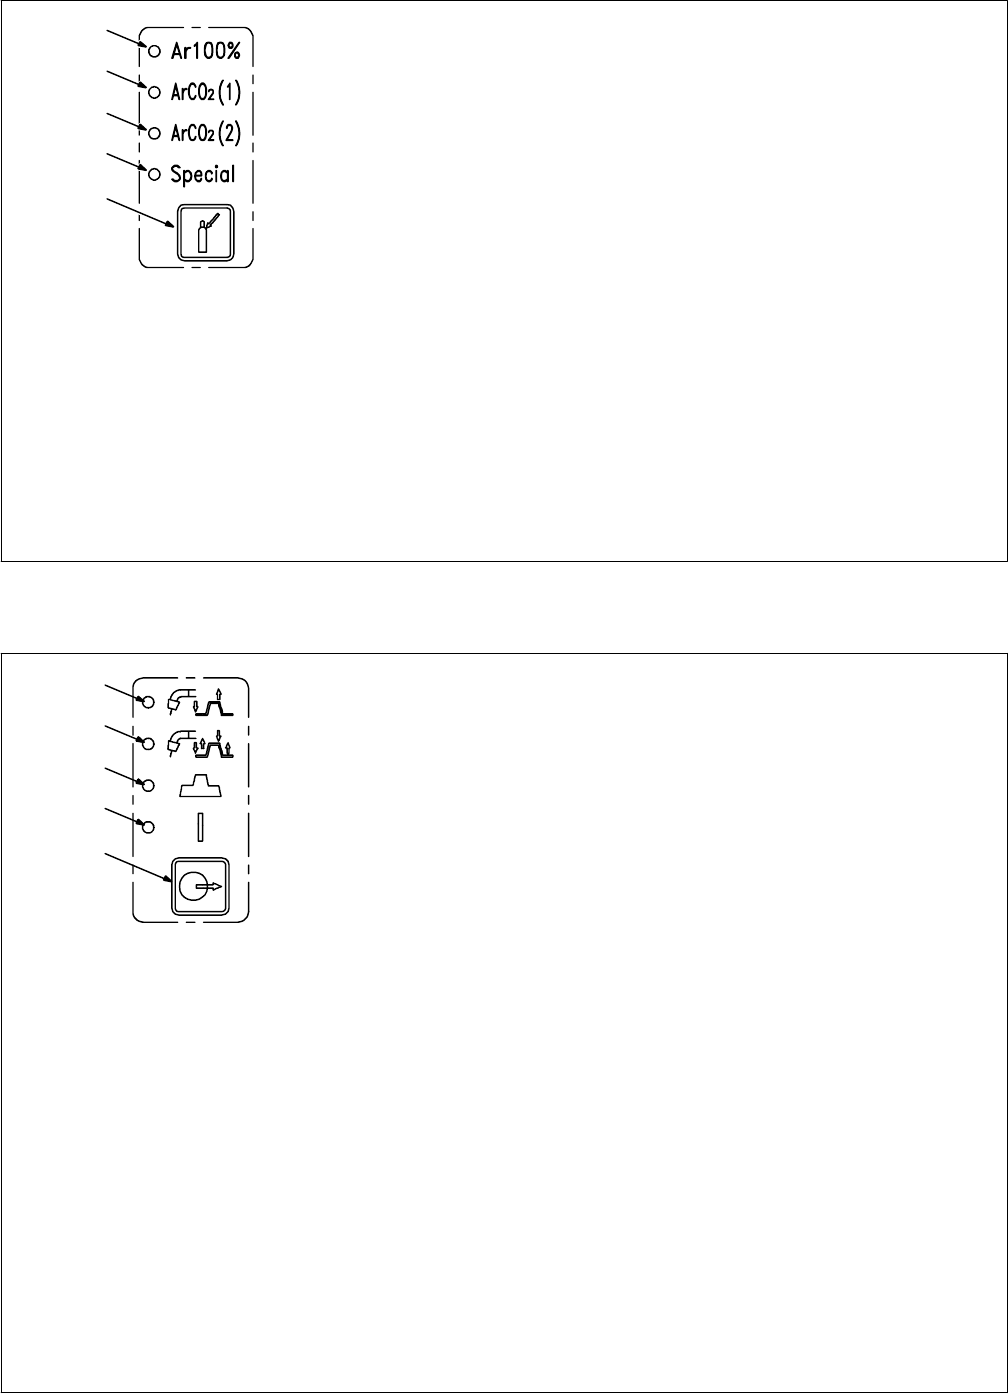
4-6. Gas Selection in Synergic MIG or Synergic Pulsed MIG Welding
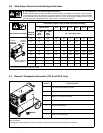
L13 LED
L14 LED
L15 LED
L16 LED
P6 Push Button
Press P6 until gas LED illuminates. D1 and
D2 will show gas name momentarily and
then it will return to the main display. If it is
allowed, change gas type during this time.
. D1 and D2 will show NO PROG or a
selection will not be allowed when
there is no program for the process,
material, wire diameter, and shielding
gas combination.
L13 (Ar 100%) selection is for 100% Argon
(generally used with aluminum and light al-
loys).
L14 (ArCO
2
[1])selection is for mixed gas
with Argon and CO
2
around 20% (general-
ly used with carbon steel).
L15 (ArCO
2
[2]) selection is for mixed gas
with Argon and CO
2
around 2% (generally
used with stainless steel).
L16 (Special) selection is for other gas type
not provided by standard selection.
L13
L14
L15
L16
P6
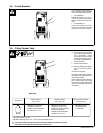
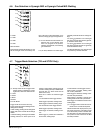
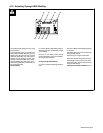
4-7. Trigger Mode Selection (TIG and STICK Only)
. Always check and set a trigger mode.
If trigger mode is undefined for a weld-
ing process, select the desired mode.
L17 LED
L18 LED
L19LED
L20 LED
P7 Push Button
Trigger mode can be set for TIG only.
Trigger mode also allows enabling and dis-
abling STICK welding.
In TIG welding, pressing P6 will change the
trigger mode, but D1 and D2 will not change
values.
In STICK welding, pressing P6 will enable
welding (L20 ON, D1 shows open circuit
voltage or weld voltage and D2 shows set
current or welding current) or disable weld-
ing (L20 OFF, D1 shows STK and D2
shows set current).
Press P7 to select the desired trigger
mode:
L17 ON selects 2 times trigger function.
When trigger is pressed, welding starts.
When trigger is released, welding stops.
L18 ON selects 4 times trigger function.
When trigger is pressed, welding starts.
When trigger is released, welding contin-
ues.
When trigger is pressed and released a
second time, welding stops.
L19 ON selects 3 levels trigger function.
When trigger is pressed, welding starts
with level 1 parameters.
When trigger is released, welding contin-
ues with main parameters.
When trigger is pressed a second time,
welding continues at level 2 parameters.
When trigger is released the second time,
welding stops.
. L19 trigger mode is useful for thin ma-
terials and for a crater fill sequence.
L20 ON means weld output power is pres-
ent at weld connectors. This LED must be
on for the STICK process to enable weld-
ing. LED will turn on when weld output pow-
er is present at weld connectors for MIG
and TIG processes.
L17
L18
L19
L20
P7