13
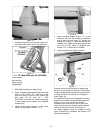
Figure 11
4. The guard can be pivoted to one of two
positions: Operating mode, or tilted back for
stock loading.
5. Pull up on plunger and begin tilting guard, then
release plunger. When guard reaches either of
the two positions, plunger will engage. (Swing
lamp holder away for guard clearance.)
7.9 Air/vacuum system
Connecting pressurized air to the lathe allows use
of the air blow gun and the vacuum chuck.
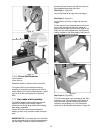
See Figures 12 and 13.
1. Connect blow gun hose (A, Figure 12) to the
tee connector.
2. Connect your incoming air supply (90 psi) to
the quick connect coupler (B).
3. Attach vacuum adaptor (C) to hose (D) and
push adaptor into spindle.
Figure 12
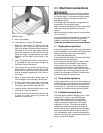
4. Install support bracket (E, Figure 13) with
knurled screw. This prevents adaptor from
backing out during spindle rotation.
Figure 13
7.10 Optional accessories
The following items are optional and purchased
separately. See your Powermatic dealer for
information. If you did not purchase an optional
accessory, proceed to section 7.11.
The optional 20-inch bed extension is available in
two configurations: Bed Extension only (p/n
6294905) and Bed Extension Kit with elevating and
swing-away function (p/n 6294900). The bed
extension can be installed to upper or lower sets of
holes.
7.10.1 20-inch Bed Extension
Installing Bed Extension only (p/n 6294905)
Tools required:
10mm hex key
1. Slide tailstock away from edge of bed.
2. Have an assistant hold bed extension flush to
end of lathe bed, and insert four screws with
washers (provided with bed extension). Snug
screws just enough to hold bed extension to
lathe bed.
3. Adjust extension bed to lathe bed, aligning the
surface and the inside ways as closely as
possible.
IMPORTANT: Top surface of bed extension
must be flush with surface of lathe bed, and
inside ways must be aligned, to allow smooth
movement of tailstock across joint.
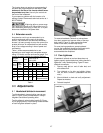
4. Slide tailstock over joint where beds meet, so
that clamping nut is centered over joint (Figure
14). Lock tailstock clamping handle; this will
align the beds.
5. Tighten screws in extension bed.
6. Unlock tailstock and slide it back and forth to
test smoothness of joint.


