


8
Unpacking
Open shipping container and check for shipping
damage. Report any damage immediately to
your distributor and shipping agent. Do not
discard any shipping material until the Edge
Sander is assembled and running properly.
Compare the contents of your container with the
following parts list to make sure all parts are
intact. Missing parts, if any, should be reported
to your distributor. Read the instruction manual
thoroughly for assembly, maintenance and
safety instructions.
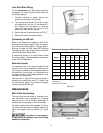
Contents of the Shipping Container
1 Edge Sander
2 Mounting Feet
4 Rubber Foot Pads
1 Control Switch Bracket
4 Hex Cap Screws, M10 x 30
4 Lock Nuts, M10
4 Flat Washers, M10
2 Hand Knobs
1 Owner's Manual
1 Warranty Card
Assembly
Tools required for assembly:
4mm hex wrench
14mm and 17mm wrenches
screwdriver
1. Remove all wood crating from around the
sander.
2. Use a 14mm wrench to remove the screws
holding the sander to the skid.
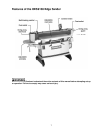
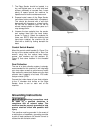
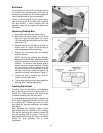
3. Lift the machine from the skid with a hoist or
forklift by attaching straps to the eyebolts on
top the sander. See Figure 1. DO NOT fork
beneath the main table, or damage to the
table may occur.
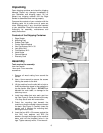
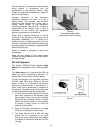
4. Install two rubber feet onto each cast iron
leg. See Figure 2. Screw the feet all the way
in so they are all level with one another.
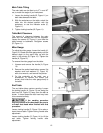
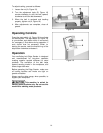
5. Orient the mounting feet beneath the
machine so that the double holes are toward
the back. See Figure 3. Carefully lower the
sander until it touches the mounting feet,
and align the four holes.
6. Insert the four M10 x 30 screws, against the
four M10 lock washers and M10 flat
washers, through the flange on the machine
base, and into the threaded holes in the
legs. Tighten securely with a 17mm wrench.
Figure 1
Figure 2
Figure 3