11
1. Remove screws holding saw to pallet, by
unscrewing them from underneath pallet.
2. Carefully slide saw from pallet onto floor.
The cabinet saw should be placed in an area with a
sturdy level floor, good ventilation and sufficient
lighting. Leave enough space around the machine
for mounting extension wings and rail assemblies,
and loading and off-loading stock and general
maintenance work.
Exposed metal surfaces, such as table top and
extension wings, have been given a protective
coating at the factory. This should be removed with
a soft cloth moistened with kerosene or a cleaner-
degreaser. Do not use acetone, gasoline, or
lacquer thinner for this purpose. Do not use
solvents on plastic parts, and avoid using an
abrasive pad as it can scratch surfaces.
7.4 Installing handwheels and hooks
Refer to Figure 3.
1. Install handwheels (J, Figure 3) onto tilting and
raising shafts, as shown. Fit the slot of
handwheel hub onto roll pin on shaft, then
secure by screwing on a locking knob (H).
2. Install handle (I) onto each handwheel, using
14mm wrench on the flat to tighten it.
3. Install storage hooks (F) with two button head
screws and washers (HP-4/5/6). The hooks
are used to store the Accu-Fence when it is
not in use.
4. Tilt arbor using right handwheel, and remove
Styrofoam packing from around motor.
Figure 3
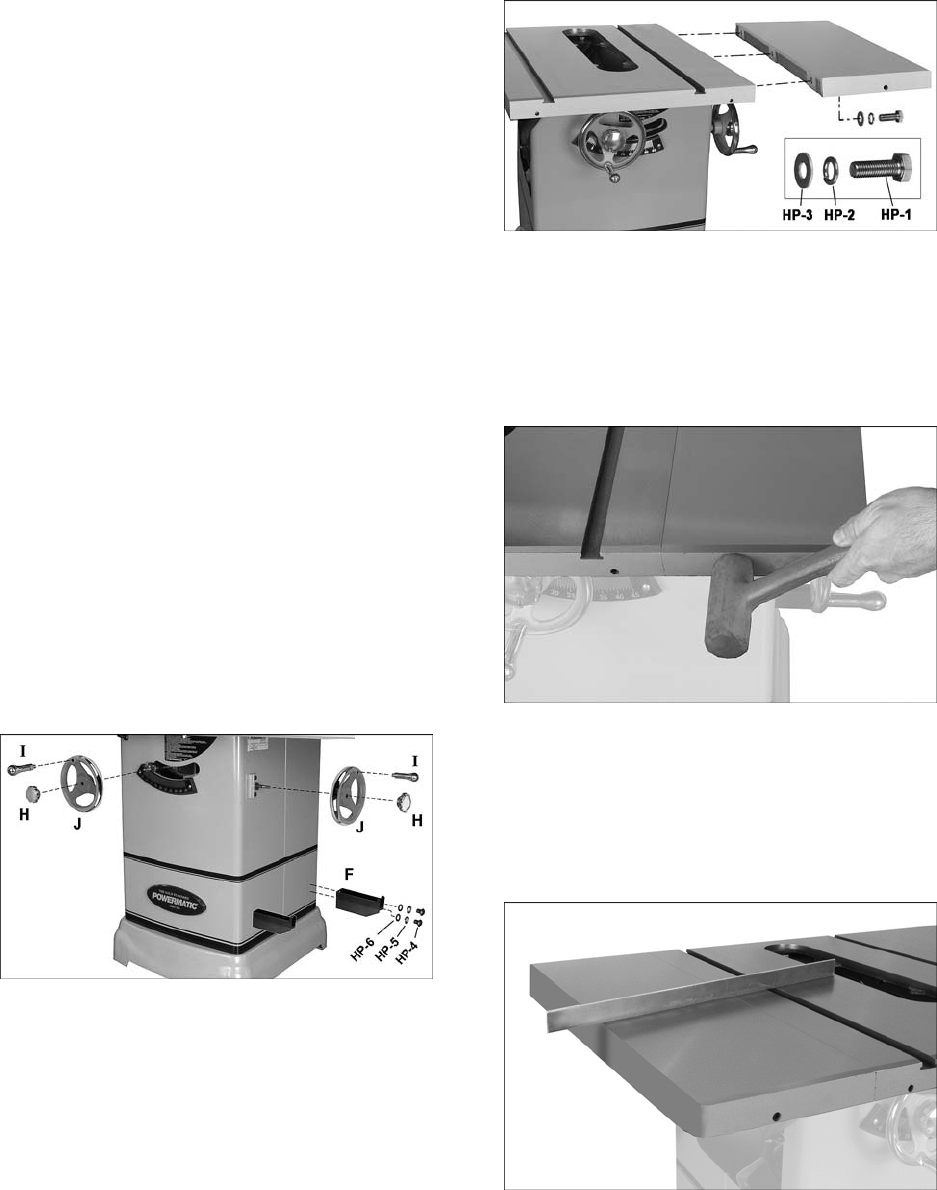
7.5 Installing table extensions
Refer to Figure 4.
1. Attach an extension wing to saw table. There
is a left and a right version – make sure edge
bevel on table extension faces front, to match
that of saw table. Use three screws, lock
washers and flat washers (HP-1/2/3). Lightly
snug screws with 17mm wrench.
(Assembly Tip: If you are doing this without an
assistant, lift extension wing vertically to table
edge. Install center screw and washer, and
make snug. Then pivot wing parallel to saw
table to insert remaining two screws.)
Figure 4
2. Repeat for opposite extension wing. Lightly
snug screws.
3. The front edge of extension wings must be
flush with front edge of saw table. If needed,
tap front edge of wing with a rubber mallet to
make flush. See Figure 5.
Figure 5
7.6 Leveling table extensions
Refer to Figure 6.
Level extension wings to saw table using a straight
edge. A metal straight edge is ideal, though a
carefully jointed board may also be used.
Figure 6


