


16
Do not rely that no light means
no power to the machine. Always check for
power first. Failure to comply may cause
serious injury.
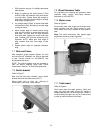
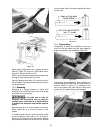
To start saw, pull red button. Push it back in to stop
saw.
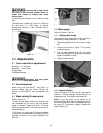
The switch has a safety key (Figure 15). Slide key
out and store in a safe place, to prevent
unauthorized starting of saw. Reinstall key to
operate saw.
Figure 15
9.0 Adjustments
9.1 Tools required for adjustments
Hex keys – 3, 4, and 8mm
Wrenches – 11 and 12mm
Straight edge
Combination square
Disconnect saw from power
source before making adjustments.
9.2 Fence alignment
Before using the Accu-Fence
®
, verify that it is
properly aligned with the blade. Consult the
manual, no. M-2195075Z, that accompanied the
fence.
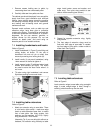
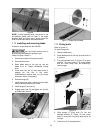
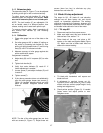
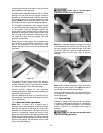
9.3 Blade raising/tilt mechanism
Refer to Figure 16:
To raise or lower blade, loosen lock knob (A) and
turn handwheel (B) on front of saw until desired
height is reached. Tighten lock knob. The blade
should be adjusted about 1/8" above top surface of
material being cut.
To tilt blade, turn lock knob (C) counter-clockwise
to loosen, turn handwheel (D) until desired angle is
obtained, as shown on tilt scale. Retighten lock
knob (C).
Figure 16
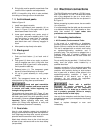
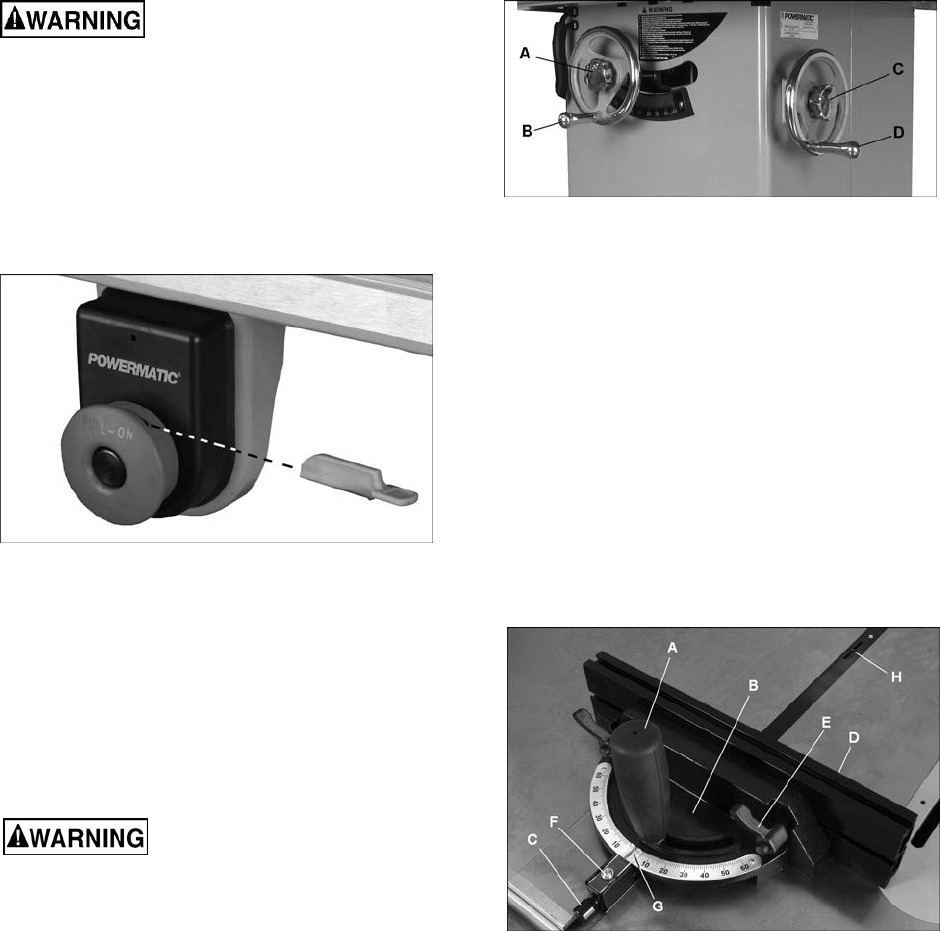
9.4 Miter gauge
Refer to Figures 17 and 18.
9.4.1 Setting miter angle
The precision miter gauge has a rack and pinion
adjustment for setting the angle. To operate:
1. Slide miter gauge into one of the slots on table
top.
2. Loosen lock handle (A, Figure 17) by turning
counterclockwise.
3. Pull out spring-loaded knob (C) and rotate
knob until body (B) of miter gauge is at desired
angle as indicated on scale.
4. Tighten lock handle (A).
Figure 17
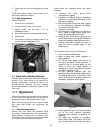
9.4.2 Indent settings
There are indents at 0º, 30º and 45º right and left
positions. At these settings, release knob (C) to
engage stop rod. Then tighten lock handle (A).
Note: Do not rely solely on the indents for an
accurate setting. After stop rod engages at the 0º,
30º and 45º positions, make a fine adjustment with
the knob (C) if necessary, setting it against the
scale indicator (G).