


9
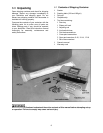
7.0 Assembly
The sander should be placed on a level, sturdy
floor, preferably concrete, with plenty of space
surrounding it for on- and off-loading of stock,
and general maintenance work.
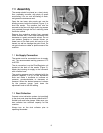
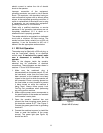
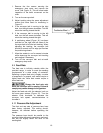
Open the two lower side panels and use the
leveling screws inside the cabinet (Figure 1) to
level the sander. The machine can also be
secured to the floor with high quality lag screws
(not provided) through the four mounting holes
inside the cabinet.
Remove the protective coating from exposed
metal surfaces with a soft cloth moistened with
kerosene or a good commercial solvent. Do not
use acetone, gasoline or lacquer thinner, as
these have a low flash point and can be a fire
hazard, as well as damage the paint finish. Do
not get solvents on rubber or plastic areas of the
machine.
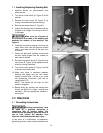
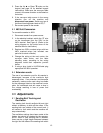
7.1 Air Supply Connection
The sander must be connected to an air supply
unit. The recommended working pressure is 75
to 80 PSI.
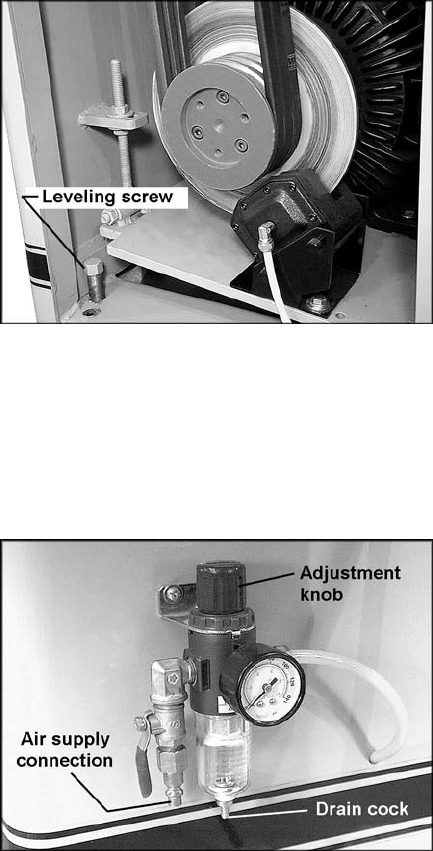
The air connection is on the Filter/Regulator unit
located at the back of the sander (Figure 2).
Attach the incoming air supply to the connector
with a flexible hose.
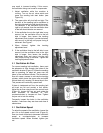
The working pressure can be adjusted with the
pressure regulator. Lift up on the adjustment
knob and rotate it clockwise to increase air
pressure, counterclockwise to decrease air
pressure. When the desired pressure is shown
on the pressure gauge, push down the
adjustment knob to lock the setting.
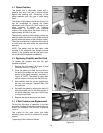
7.2 Dust Collection
Connect a dust collection system (not provided)
to the dust ports atop the sander cabinet with 5”
flexible hose and hose clamps. Make sure your
dust collector has sufficient capacity for this
machine.
Always turn on the dust collector prior to
operating the sander.
Figure 1
Figure 2