21
4. Bed ways; keep clean, use steel wool to
remove any rust spots, and apply paste wax
to prevent buildup of rust and finishes.
5. Tool support; use a mill file to remove nicks
and dings.
6. Spindle tapers; should be clean and free of
dust and chips for proper seating of tapers.
7. Tailstock; clean and lubricate ram and
locking device.
Lighting; proper lighting is essential to eliminate
shadows and reduce eye strain.
Turning Tools
If possible, select only quality, high-speed steel
turning tools. High-speed steel tools hold an
edge and last longer than ordinary carbon steel.
As one becomes proficient in turning, a variety
of specialty tools for specific applications can be
acquired. The following tools provide the basics
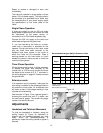
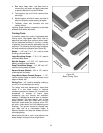
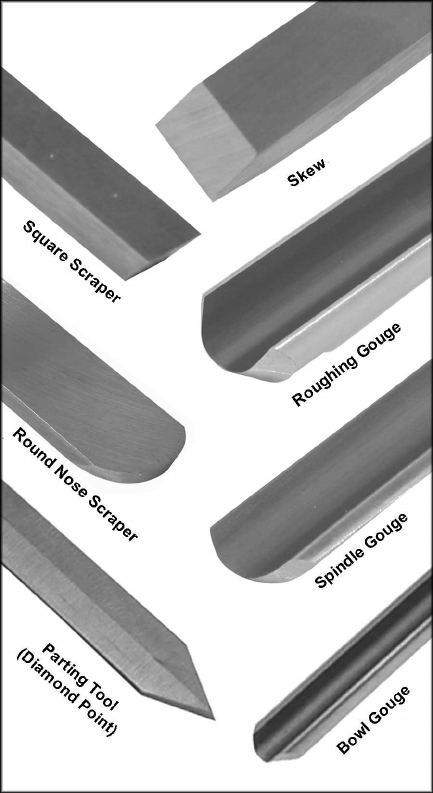
for most woodturning projects (see Figure 28):
Skews – 1-1/2" and 1" or 1-1/4", used to make
finishing cuts and details.
Large Roughing Gouge – 1" to 1-1/4", used to
eliminate waste wood.
Spindle Gouges – 1/4", 3/8", 1/2", used to turn
beads, coves and other details.
Deep Fluted Bowl Gouge – 1/4", 3/8" and 1/2",
used for turning bowls & plates.
Square Scraper (Bedan) – 3/8” or 1/2", used to
create square shoulders.
Large Round Nose (Domed) Scraper – 1-1/2",
used to reduce ridges on interior of bowls, round
edges of bowls, etc.
Parting Tool - 1/8", used for scraping, making a
cut-off, or to set diameters for sizing.
For safety and best performance, keep tools
sharp. If a tool stops cutting or requires
excessive pressure to make a cut, it needs to be
sharpened. A number of brand name
sharpening jigs and fixtures are available;
however, a woodturner should learn to sharpen
tools freehand. For best results, use a slow
speed grinder (1800 rpm) fitted with a 60-grit
aluminum oxide wheel (for shaping) and a 100-
grit alum. oxide wheel (for final sharpening and
touchup). The grinder should be located near
your lathe and at a comfortable height. A
diamond dresser will keep the wheels true and
eliminate glazing.
Never allow the tool to rest in one place on the
wheel, keep it moving and use a light touch.
Figure 28
Basic Turning Tools


