


Page 29
+
-
OPERATION
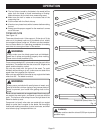
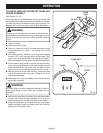
TO MAKE A COMPOUND MITER CUT
It is recommended that you place the piece to be saved on
the left side of the blade and that you make a test cut on
scrap wood first.
WARNING:
Make sure the blade guard assembly is securely installed
and working properly to avoid serious personal injury.
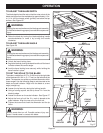
Remove the rip fence by lifting the lock down handle.
Unlock the bevel locking lever.
Adjust the bevel angle to the desired setting.
Lock the bevel locking lever.
Set the saw blade to the correct depth.
Loosen the lock knob on the miter gauge, set the miter
gauge to the desired angle and tighten lock knob.
Turn the power switch to the on ( ) position.
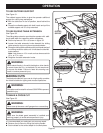
Position the workpiece flat on the table with the edge flush
against the miter gauge. Let the blade build up to full speed
before feeding the workpiece into the blade.
Advance the workpiece and the miter gauge toward the
blade. Keep the workpiece flush against the miter gauge.
Push the miter gauge and workpiece toward the blade.
Stand slightly to the side of the wood as it contacts the
blade to reduce the chance of injury should kickback occur.
When the cut is made, turn the saw off ( ). Wait for the
blade to come to a complete stop before removing the
workpiece.
After the blade has stopped completely, remove the cutoff
stock.
TO MAKE NON-THROUGH CUTS
Non-through cuts can be made with the grain (ripping) or
across the grain (crosscut). The use of a non-through cut is
essential to cutting grooves, rabbets, and dadoes. This is the
only type cut that is made without the blade guard installed.
Make sure the blade guard assembly is reinstalled upon
completion of this type of cut. Read the appropriate section
which describes the type of cut in addition to this section on
non-through or dado cuts. For example, if your non-through
cut is a straight cross cut, read and understand the section
on straight cross cuts before proceeding.
WARNING:
Unplug the saw to avoid possible injury.
Remove the screw holding the throat plate in place.
Remove the throat plate.
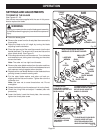
Raise the saw blade.
Put the saw in angle mode by pushing the bevel locking
lever to the right. Turn the blade adjusting handle until the
blade indicator shows a 30° angle. Push the bevel locking
lever securely to the left to lock the angle.
Loosen the two hex nuts at the base of the riving knife.
Do not remove hex nuts. Remove the riving knife/
guard assembly. Retighten the two hex nuts on the
base.
Lower the blade and insert the throat plate, then securely
tighten the throat plate screw.
Bring the blade back to 90°.
Raise the blade to the correct height by turning the blade
adjusting handle counterclockwise.
Feed the workpiece into the blade.
WARNING:
Carefully check all setups and rotate the blade one full
revolution to assure proper clearance before connecting
saw to power source.
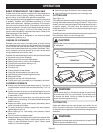
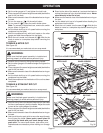
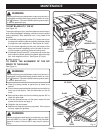
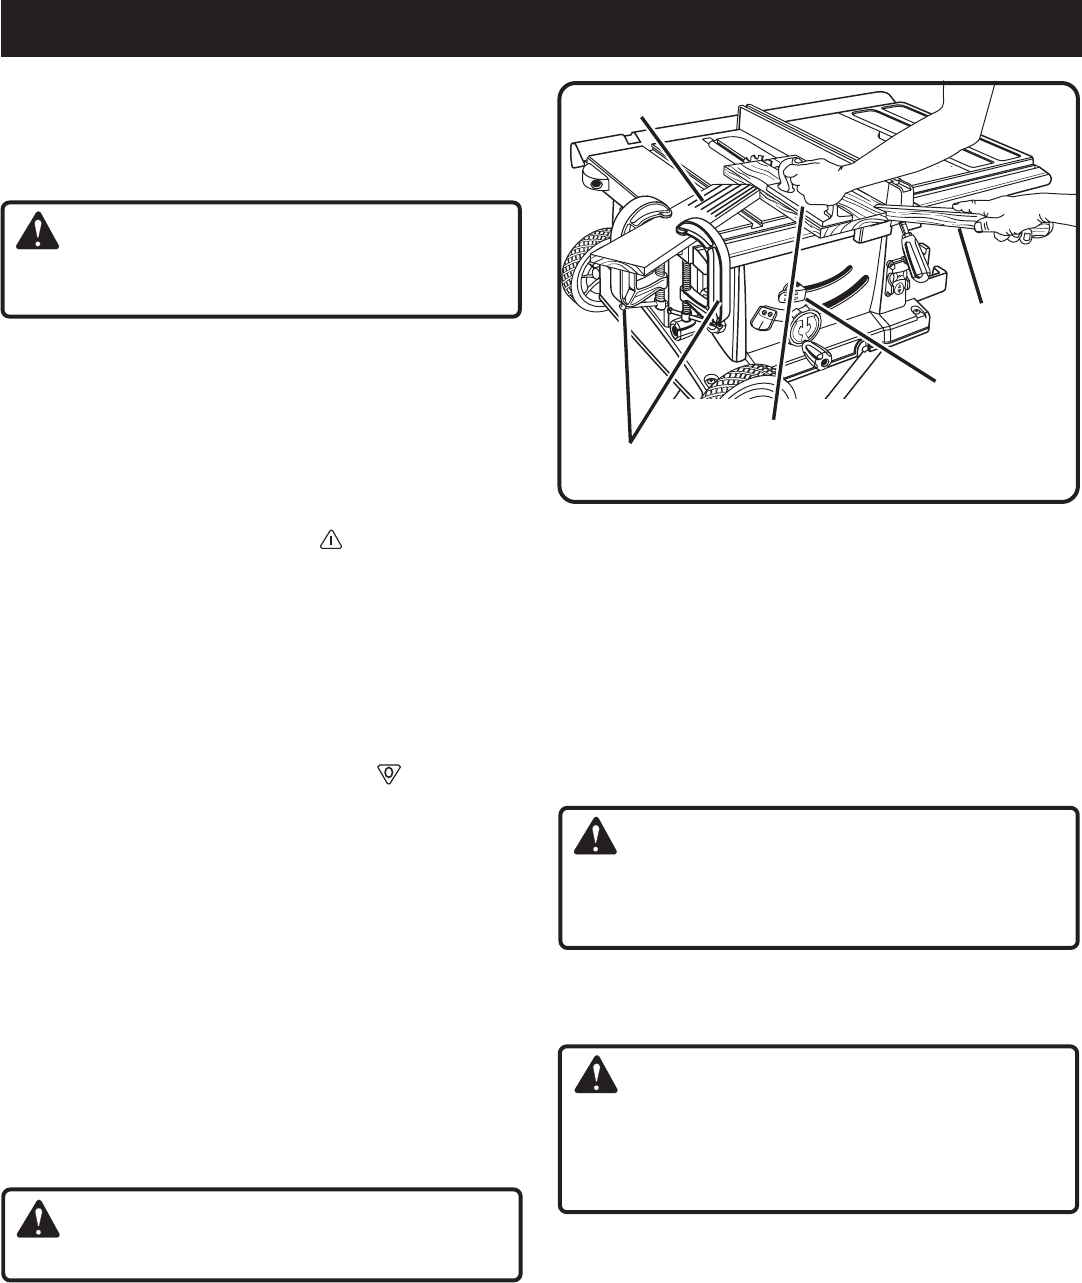
Always use pushblocks, pushsticks, and featherboards
when making non-through cuts to avoid the risk of serious
injury.
See Figure 39.
WARNING:
When making a non-through cut, the cutter is covered by
the workpiece during most of the cut. Be alert to the
exposed cutter at the start and finish of every cut to avoid
the risk of serious personal injury.
PUSHBLOCK
Fig. 39
“C” CLAMP
FEATHERBOARD
PUSHSTICK
BEVEL
LOCKING LEVER