


-31-
M1014 7" x 12" Metal Cutting Bandsaw
SERVICE
Blade Tracking
A blade that tracks incorrectly can wear out the wheel
flanges or come off of the bandsaw. You must make sure
the blade tracks on the wheel so the rear of the blade is
supported by the lip on the wheel or wheel flange.
To set the blade tension, do these steps:
1. UNPLUG THE BANDSAW POWER CORD!
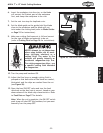
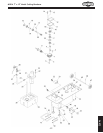
2. Raise the headstock to the vertical position and
close the feed valve to lock the headstock in place
(see Figure 46).
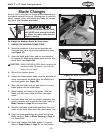
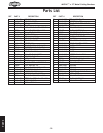
3. Slide the lower sliding cover up, open the main
blade guard, and remove the blade guide assemblies
(See Figure 47).
4. Plug the bandsaw in and start the machine.
Note: For the next step, turning the set screw and blade
tension knob in opposite directions keeps the blade in
tension during this adjustment process.
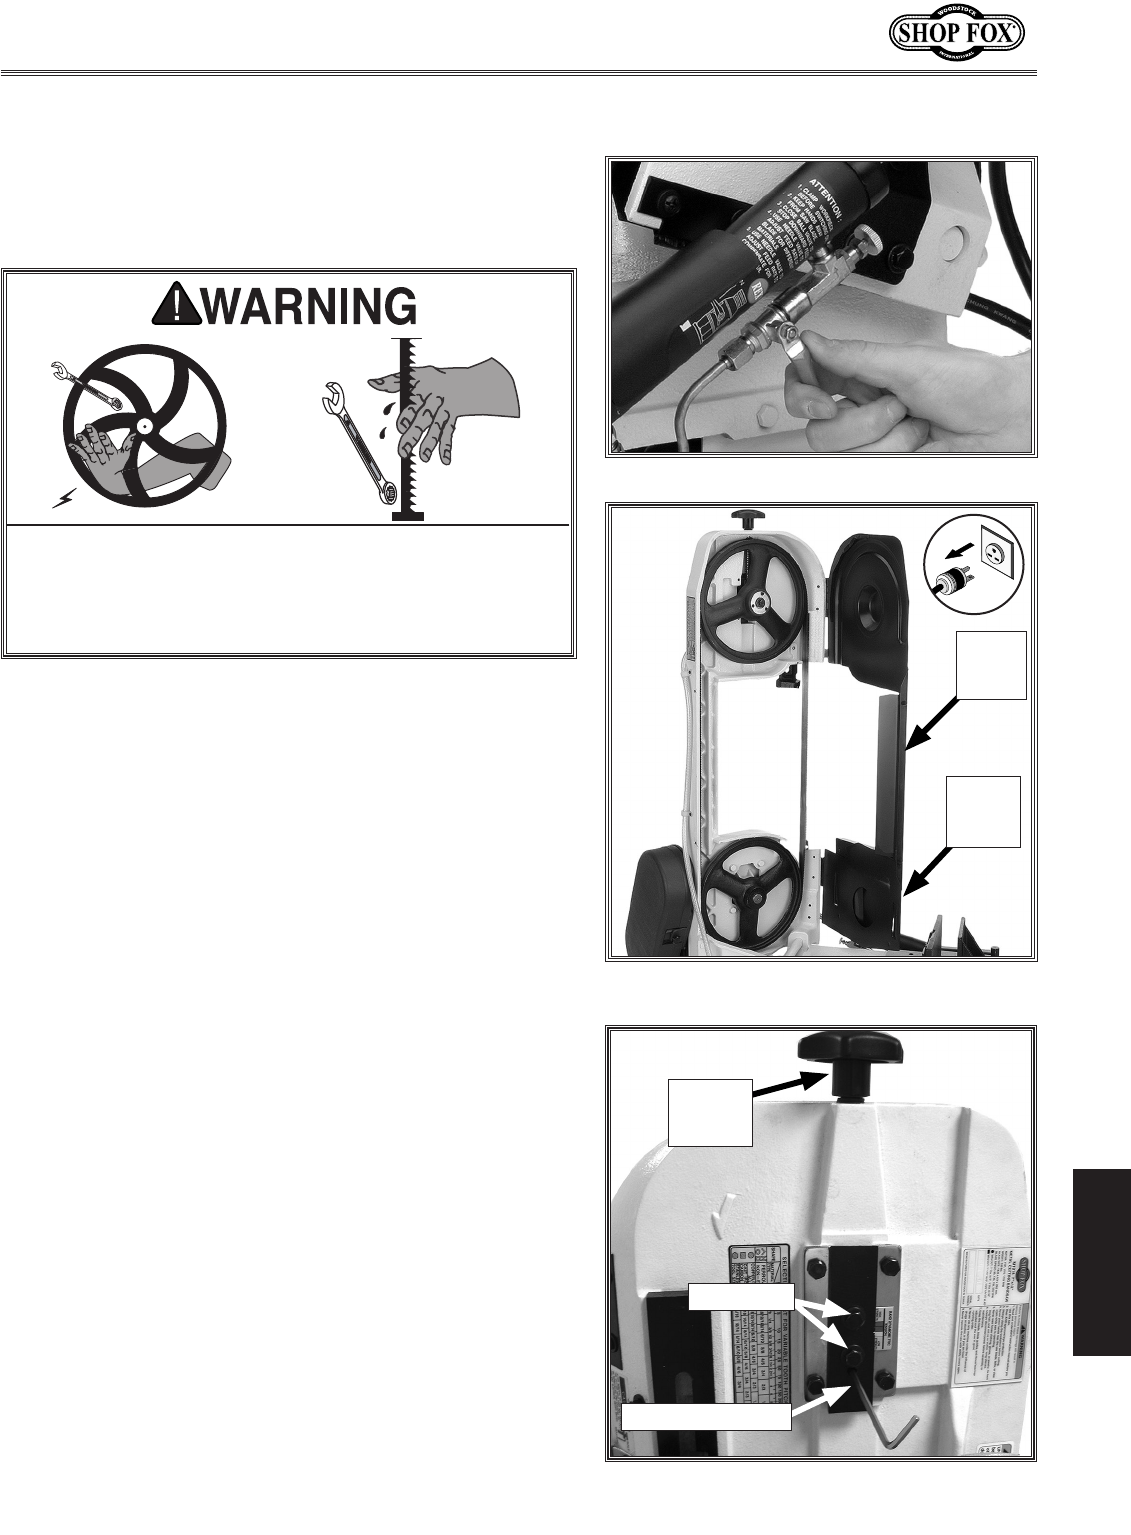
5. Using a 4mm hex wrench, adjust the set screw
and blade tension knob simultaneously in opposite
directions, and observe the blade position on the
wheels. If the setscrew does not turn, you may have
to loosen one or both hex bolts shown in Figure 48.
• If tracking is correct, the rear of the blade should
be just touching the wheel flange or wheel
shoulder. Unplug the saw and reinstall and adjust
the blade guides and close the blade guard.
• If there is a gap between the wheel shoulder
or the blade is riding on top of the shoulder,
repeat the adjustment as required to get the
correct tracking.
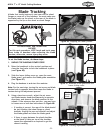
Figure 46. Stopping the feed cylinder.
Figure 47. Bandsaw blade guard and the
lower sliding cover.
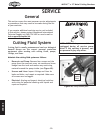
For this next procedure, KEEP hands and tools away
from inside of bandsaw when adjusting the blade
tension; otherwise, severe injury may occur.
ENTANGLEMENT and LACERATION
HAZARD!
Figure 48. Tracking adjustment controls.
Blade
Tension
Knob
4mm Set Screw
Hex Bolts
Lower
Sliding
Cover
Main
Blade
Guard