


OPERATIONS
-22-
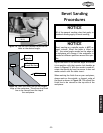
NOTICE
Frequent cleaning can go a long way towards
getting the most life from your sanding
sleeves. Refer to the Maintenance section for
complete instructions on cleaning sanding
sleeves.
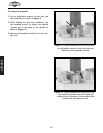
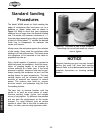
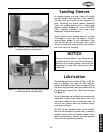
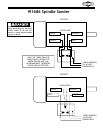
Figure 18. The Model W1686 is best suited for
smoothing the curved cuts made by a band-
saw or jigsaw.
Standard Sanding
Procedures
The Model W1686 excels at finish sanding the
edges of workpieces that have been cut on a
bandsaw or jigsaw (saber saw) as shown in
Figure 18. Keep in mind that your workpiece
needs to be cut larger than the desired finished
size. The sander will remove a minimum of
1
⁄16"
from the edges depending on the grit used. Make
a habit of cutting about
1
⁄16" outside the desired
finish line to compensate for material the
sander will remove.
Always move the workpiece against the rotation
of the sander. Never sand the workpiece while
holding it off the table surface. This could cause
the workpiece to be slammed to the table or
propelled into the air.
Only a small amount of pressure is needed to
effectively sand the workpiece. Avoid the temp-
tation of pressing harder in an attempt to
remove material at a faster rate. If too much
pressure is applied, excessive heat may be gen-
erated causing the workpiece to burn and the
sanding sleeve to wear prematurely. The best
sanding results will be achieved when small
amounts of material are removed in several
passes. This reduces heat build up, ensures
accurate results, and promotes long life from
the sanding sleeves.
The best way to become familiar with the
sander is to sand on scrap pieces of wood.
Practice sanding inside curves and outside
curves of varying size. Try different size spindles
and see how the performance of the sander
changes. Try using different grits on various
species of wood. Now is the time to make mis-
takes, not when you are using expensive stock.