


-21-
W1677/W1711 10" Table Saw
SETUP
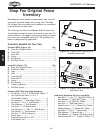
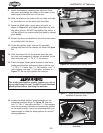
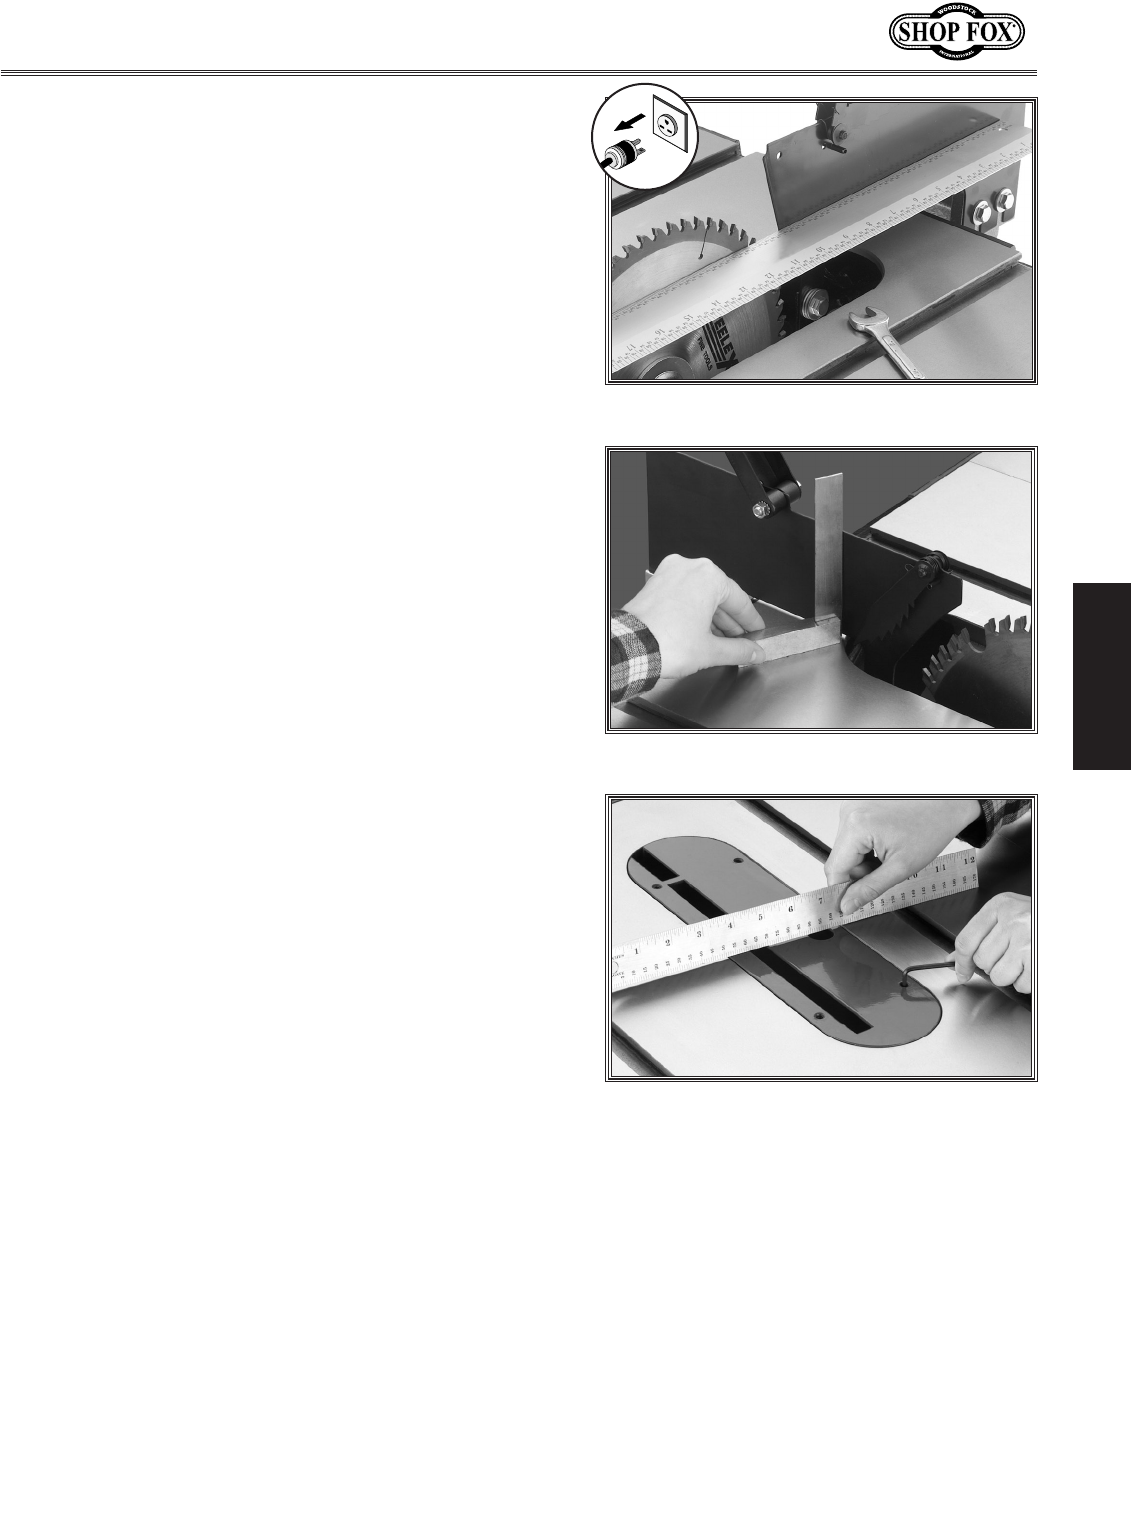
Figure 30. Squaring splitter.
19. Loosen the set screws on the lower bracket half (see
Figure 28), square the splitter to the table (Figure
30), and retighten the set screws.
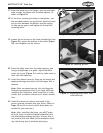
20. Place the table insert into the table opening, and
using a straightedge as a guide, adjust the table
insert set screws (
Figure 31) until the table insert is
flush with the table top.
21. Install the cabinet cover by lining up the hinges and
tapping the hinge pins down into the hinges with a
hammer.
Note: Paint can sometimes get into the hinge pin
holes during manufacturing. If you have difficulty
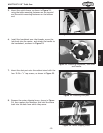
installing the hinge pins, use a round file or other
similar tool to remove this paint for easier installa
-
tion.
22. Install the fence and rails as instructed in the
owner's manual included with your fence. (Refer to
Pages 15 and 16 to clarify which fence parts are
needed for your machine.)
Note: After installing the fence, you MUST make
sure the fence is correctly adjusted parallel with
the blade before making any cuts. A fence that is
not parallel with the blade invites workpiece bind-
ing, which may lead to kickback and injury.
Figure 31. Adjusting table insert flush
with table top.
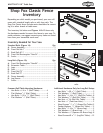
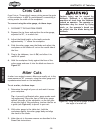
17. Raise the blade up to full height, and use a straight-
edge to align the blade with the blade splitter, as
shown in
Figure 29.
18. At the front mounting location on the splitter, use
the provided washers (or get thinner electrical wash
-
ers) to shim between the splitter and the casting
to take up any space, and tighten all the splitter
mounting bolts.
Figure 29. Aligning splitter to blade.