


-45-
W1756/W1757 43" Wide-Belt Sander
SERVICE
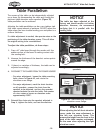
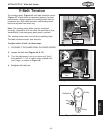
Feed Belt Tension
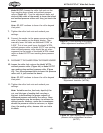
To adjust the feed belt tension, do these steps:
1. DISCONNECT THE SANDER FROM THE POWER SOURCE!
2. Do not remove the safety guard!
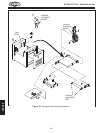
3. Find the adjustment ports in the safety guard
(Figure 54) at the front end of the feed table.
4. Using a 20mm wrench, turn both left and right
adjustment bolts (
Figure 54) clockwise equally to
increase tension.
5. When tensioned properly, you should not be able
to slide the feed belt back and forth on the table
surface.
DO NOT sand boards with the guard
removed. Failure to follow this warning
could result in serious personal injury.
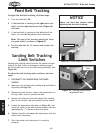
Figure 54. Feed belt tension adjustment
bolts. Note: Safety guard removed only
for clarity.
Safety Guard
Right
Adjustment
Bolt
Feed Belt
Left
Adjustment
Bolt
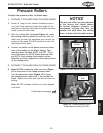
NOTICE
The feed belt tension has been adjusted
at the factory and should require no
further attention. However, adjust the
feed belt tension if you notice that
your feed belt is slipping or is tracking
off center.
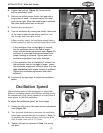
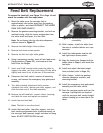
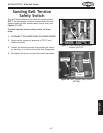
Sanding Belt Replacement
To replace the sanding belts, do these steps:
1. Follow Steps 1–3 on Page 19.
2. Making sure the rotation arrows on the sanding belt
point the same direction as those shown in
Figure
11, remove the sanding belt and install the new
sanding belt by starting first on the upper roller,
and then the lower roller.
Note:
The sanding belt must be centered between
the limit switches and the edge of the sanding belt
must be between tongs of the oscillation controller
as shown in
Figure 12 on Page 19. Damage to the
sanding belt could occur if the sander is turned
ON
before the sanding belt is correctly positioned.
NOTICE
The directional arrow on the back of the sanding
belt must be pointing in a counterclockwise direction
during installation. Failure to install the sanding belt
correctly could result in damage to the sanding belt
or the sander itself.
3. Follow Steps 6–7 on Page 19.