


-21-
W1761/W1762 12" Table Saw with Riving Knife
SET UP
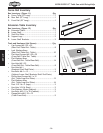
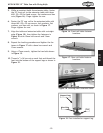
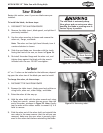
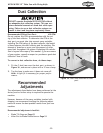
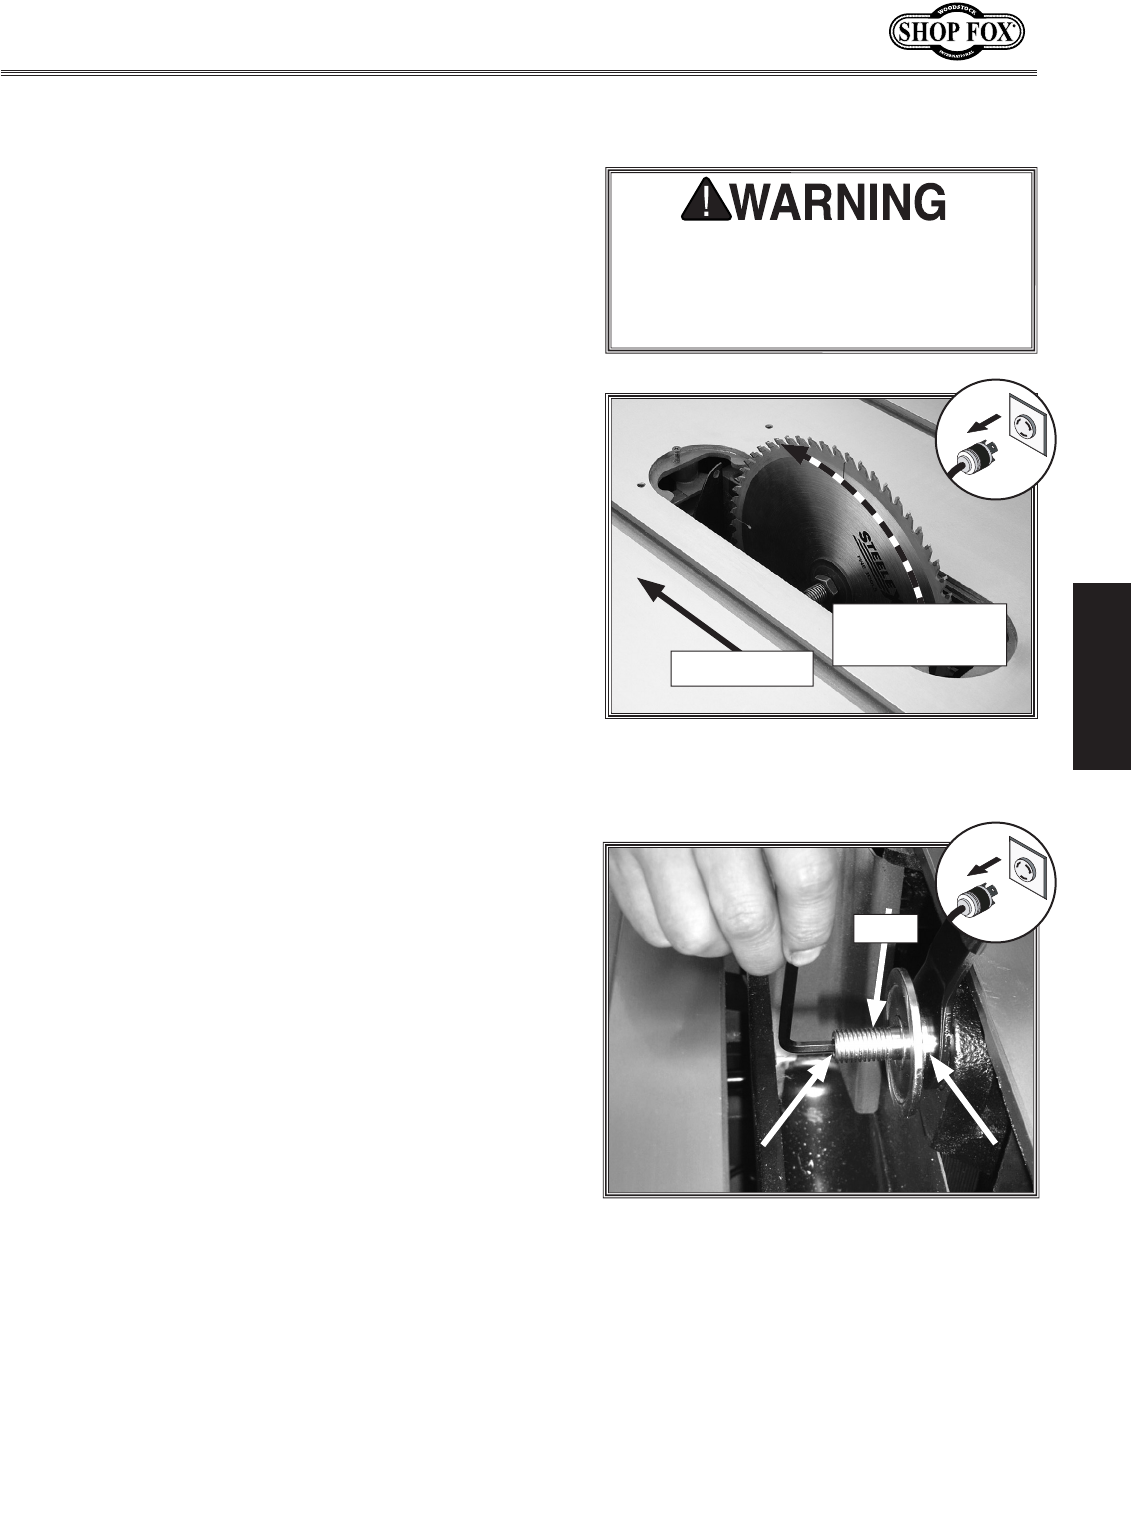
Figure 24. Correct blade direction.
Saw Blade
Review this section, even if your saw blade came pre-
installed.
To install the blade, do these steps:
1. DISCONNECT THE SAW FROM POWER!
2. Remove the table insert, blade guard, and splitter–if
previously installed.
3. Use the arbor wrenches to loosen and remove the
arbor nut, flange, and blade.
Note: The arbor nut has right hand threads; turn it
counterclockwise to loosen.
4. Slide the new blade over the arbor with the teeth
facing the front of the saw, as shown in
Figure 24.
5. Re-install the arbor flange and the arbor nut, and
tighten them against the b
lade with the wrench
included with the saw. DO NOT overtighten.
Front Of Saw
Teeth Direction
& Blade Rotation
Arbor
A 1" or
5
/8" arbor can be installed on the table saw, depend-
ing upon the arbor size of the blade you want to install.
To change the arbor, do these steps:
1. DISCONNECT THE SAW FROM POWER!
2. Remove the table insert, blade guard and splitter or
riving knife, arbor nut, arbor flange, and blade.
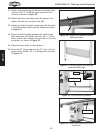
3. Raise the arbor all the way up.
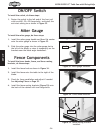
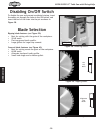
4. Hold the arbor shaft with the arbor wrench and, using
a 5mm hex wrench, remove the cap screw from the
end of the arbor, as shown in
Figure 25. Note: Gently
tap the arbor with a rubber mallet to unseat it if it is
hard to remove.
5. Slide the arbor out of the arbor shaft and reinstall the
new arbor in the same manner that the old one was
removed. Make sure the new arbor is securely tight
-
ened in the arbor shaft before reinstalling the blade.
Figure
25. Removing arbor.
Cap Screw
Arbor
Shaft
Arbor
The saw blade is extremely sharp.
Wear gloves and use extra care when
handling the blade or working near it.
Serious injury is possible.