


-4-
Model W1761/W1762 (M-1/10, S7/10+)
Installing Blade Guard & Spreader
1. DISCONNECT SAW FROM POWER!
2. Remove the table insert.
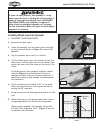
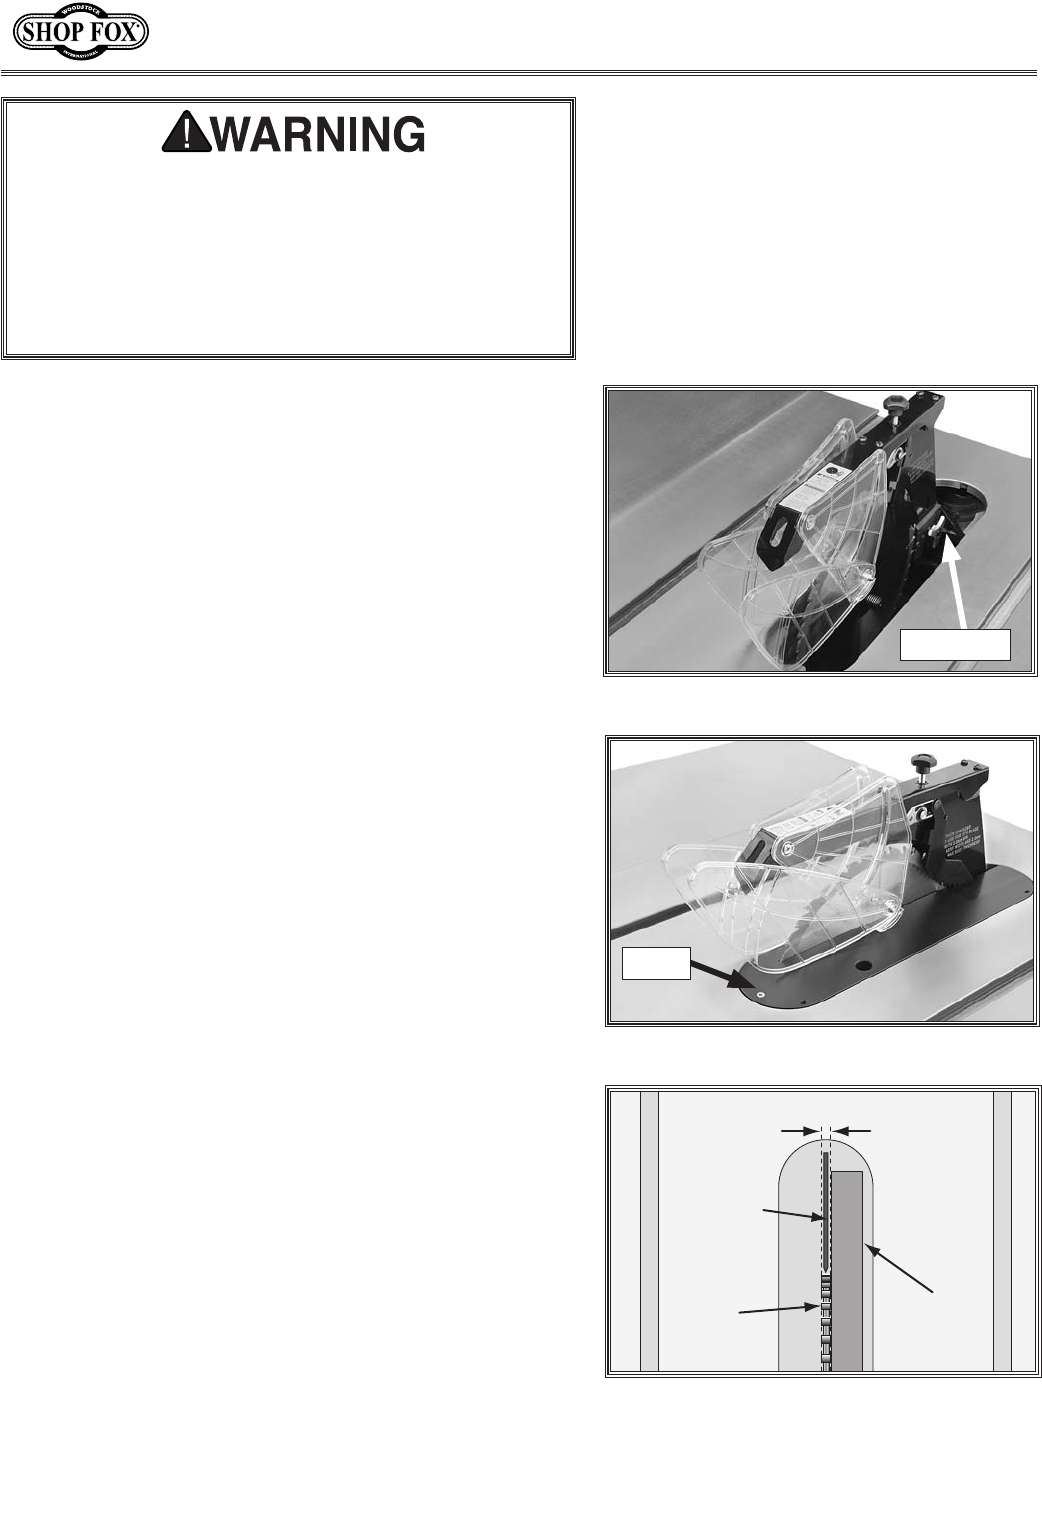
3. Insert the spreader into the bracket slot and tight-
en the lock knob shown in Figure 5 to secure the
spreader.
4. Tug the spreader up to verify it is locked.
5. Lift the blade guard cover just enough to slide the
table insert into the table slot over the blade, then
secure the insert with the screw at the front of the
insert.
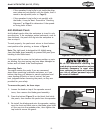
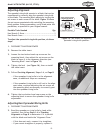
The blade guard, when properly installed, should
look like Figure 6 and should pivot freely so it
touches the table surface in the down position. It
should also swing up high enough to accommodate
the workpiece.
6. Check to make sure the blade is 90° to the table.
Follow the instructions in the original manual for
setting the 90° stop bolt.
7. Swing one side of the blade guard up and out of the
way.
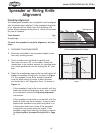
8. While lifting up on the right spreader pawl, place a
straightedge against the blade and the spreader.
When properly aligned, the spreader/riving knife
will be in the "Alignment Zone," (Figure 7) and will
be parallel with the blade.
Figure 5. Location to secure blade guard.
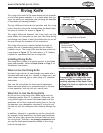
In order to work properly, the spreader or riving
knife cannot be bent or misaligned with the blade. If
either of these gets accidentally bent, DISCONNECT
SAW FROM POWER, and straighten or replace it.
Using a bent or misaligned spreader will increase
the risk of kickback! Refer to Page 8 to check/adjust
alignment if necessary.
Figure 7. Spreader/riving knife alignment
zone.
8c`^ed\ek
Qfe\
Jgi\X[\ifi
I`m`e^Be`]\
9cX[\
JkiX`^_k\[^\
Figure 6. Blade guard and insert installed.
Screw
Lock Knob