


30
.
Adjustments
90° and 45° Positive Stops
Adjustment
T
he saw has positive stops that will quickly position the saw blade
at 90° or 45° to the table. Make the following adjustments only if
necessary.
NOTE: 90° and 45° blade adjustment screws require a 5 mm Allen
wrench (supplied) and a 10 mm wrench or socket (not supplied) for
a
djustment. To access the 10 mm jam nut attached to the 90° and
45° adjustment screws, turn the saw on its left side. Make sure the
saw is secure.
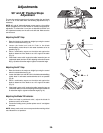
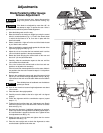
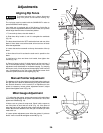
Adjusting the 90° Stop:
1.
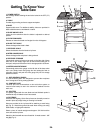
Raise the blade to the maximum height by turning the control
wheel
1 counterclockwise (Fig. 8).
2. Loosen the blade lock knob
2. Push in the blade
elevation/tilting control wheel
1 and rotate clockwise as far as
possible (Fig. 8).
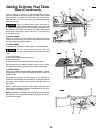
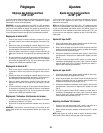
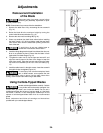
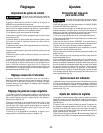
3. Place a combination square on the table and against the
blade to determine if the blade is at a 90° angle to the table
(Fig. 9).
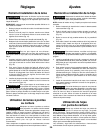
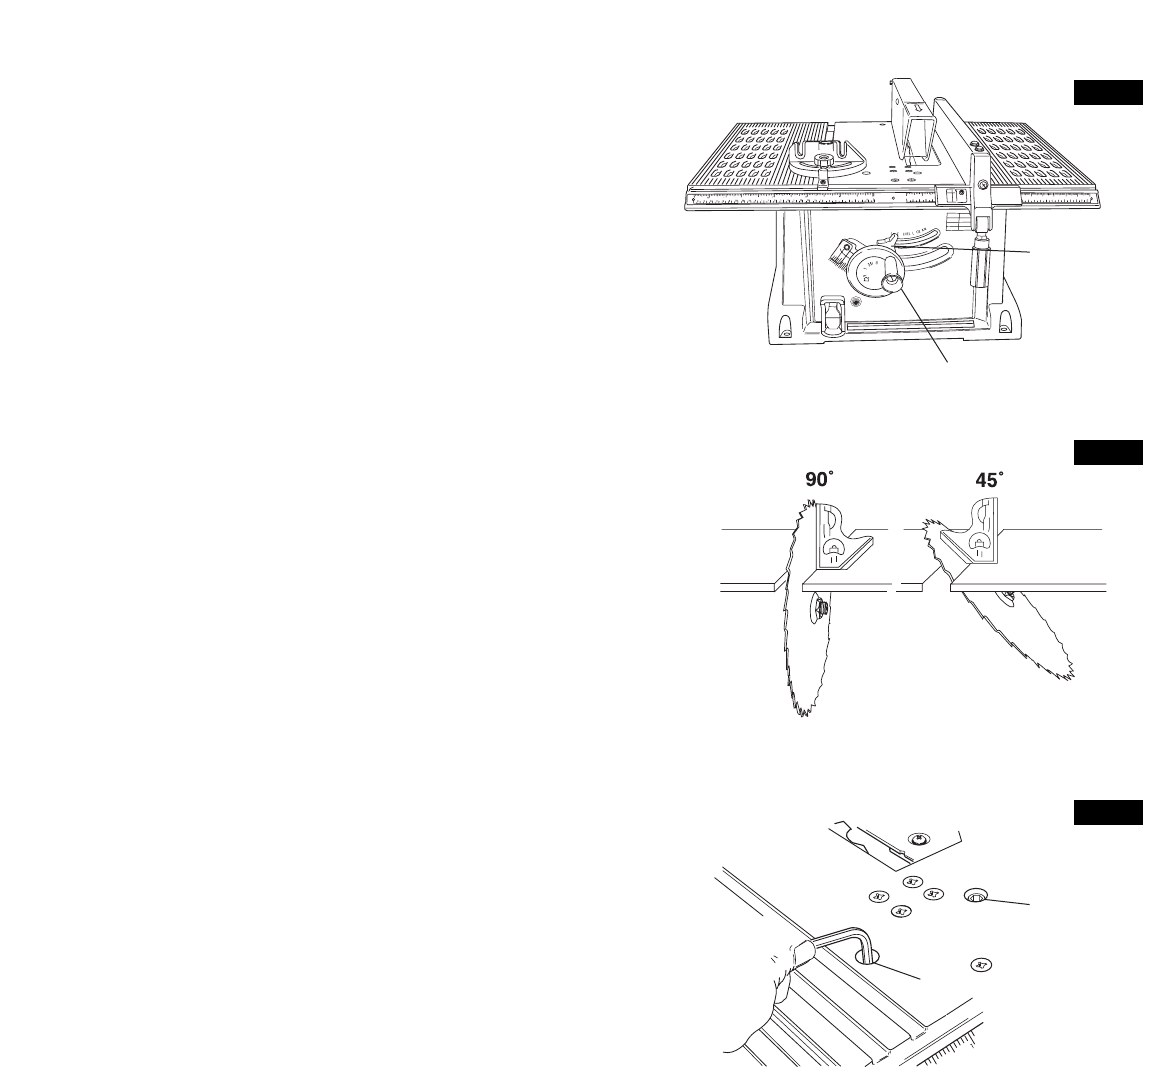
4. If the blade is not at a 90° angle to the table, loosen the jam nut
(underneath table) and turn the 90° adjusting socket head screw
2 (Fig. 10) left to reduce the angle or right to increase the angle.
Adjusting the 45° Stop:
1. Raise the blade to the maximum height by turning the control
wheel
1 counterclockwise (Fig. 8).
2. Loosen the blade lock knob
2. Push in the blade elevation/tilting
control wheel
1 and rotate counterclockwise as far as possible
(Fig. 8).
3. Place a combination square on the table and against the
blade to determine if the blade is at a 45° angle to the table
(Fig. 9).
4. If the blade is not at a 45° angle to the table, loosen the jam nut
(underneath table) turn the 45° adjusting socket head screw
3 left
to reduce the angle or right to increase the angle (Fig. 10).
Adjusting the Blade Tilt Indicator:
1. When the blade is positioned at 90
°, adjust the blade tilt
pointer to read 0° on the scale.
2.
Loosen the holding screw, position pointer over 0
°
and tighten
the screw.
NOTE: Always make a trial cut on scrap wood when making critical
cuts. Measure for cut precision.
FIG. 9
1
2
FIG. 8
2
3
FIG. 10