


6-3
Chapter 6: BIOS
3. Go to the VIRTUAL MEDIA menu and select FLOPPY IMAGE UPLOAD.
4. BROWSE or OPEN to locate the *.img file on your desktop and select it.
5. Press the UPLOAD button and wait a few seconds for the image to upload to the
CMM.
6. Once the upload finishes, turn on the blade module and press <D
EL> to enter the
BIOS setup utility.
7. In the B
OOT MENU, bring USB LS120: PEPPCMM VIRTUAL DISC 1 to the top of
the boot priority list.
8. Exit while saving the changes. The blade module will boot to the virtual media
(floppy image) A:\>.
9. Type flash filename.rom.
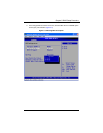
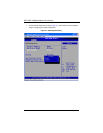
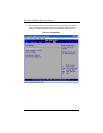
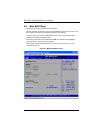
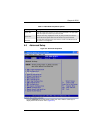
6-3 Running Setup
The BIOS setup options described in this section are selected by choosing the
appropriate text from the M
AIN BIOS SETUP screen. All displayed text is described in this
section, although the screen display is often all you need to understand how to set the
options.
When you first power on the computer, the BIOS is immediately activated.
While the BIOS is in control, the Setup program can be activated in one of two ways:
1. By pressing <D
ELETE> immediately after turning the system on, or
2. When the message Press the <Delete> key to enter Setup appears briefly at the
bottom of the screen during the POST, press the <D
ELETE> key to activate the main
S
ETUP menu:
NOTE: Replace filename.rom by the actual ROM file name (such as
B8DTE142.rom for example) in the command.
NOTE: Default settings are in bold text unless otherwise noted.