


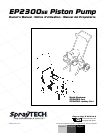

English
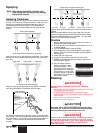
18. Insert the new upper wave spring and the new upper male
adapter.
19. Remove the new upper leather packings from the oil.
Install the new upper leather packings alternately with the
the new upper UHMWPE packings. (A tool, SprayTECH
part #06009, may be required to compress the packings.).
20. Insert the new upper female adapter.
21. Install the packing nut and tighten until the nut bottoms
out in the cylinder (Torque to 25 ft./lbs.). Do not over-
tighten.
22. Install the locknut onto the upper cylinder threads and turn
until the nut bottoms out on the threads of the cylinder.
23. Put anti-seize compound on the upper cylinder threads.
24. Remove the repacked fluid section from the vice and
install it into the main pump housing. The piston rod will
align itself inside the yoke.
25. Rotate the fluid section slightly to align the hole in the
yoke and the hole in the piston assembly. Insert the
connecting pin.
26. Replace the spring retainer.
27. Thread the fluid section into the pump housing completely,
then unscrew up to 3/4 turn to align the outlet elbow with
the fluid hose.
28. Rotate the locknut clockwise until it is tight against the
pump housing.
Motor Brush Replacement
Brushes should be inspected periodically to insure uninterrupt-
ed service. Their life depends on speed as well as load.
If one of the brushes measures less than 1/4'' or is worn
roughly or chipped, replace both motor brushes. It is also
recommended that brushes be checked when packings are
replaced.
Never operate the pump with the front cover removed.
1. Disconnect power cord from electrical supply.
2. Remove the four (4) motor shroud mounting screws and
remove the motor shroud.
3. Unscrew and remove brush caps holding brushes in
place.
4. Remove brushes.
5. Replace with new brushes.
6. Replace brush caps.
7. Replace motor shroud and screws.
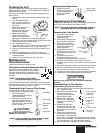
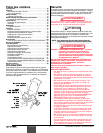
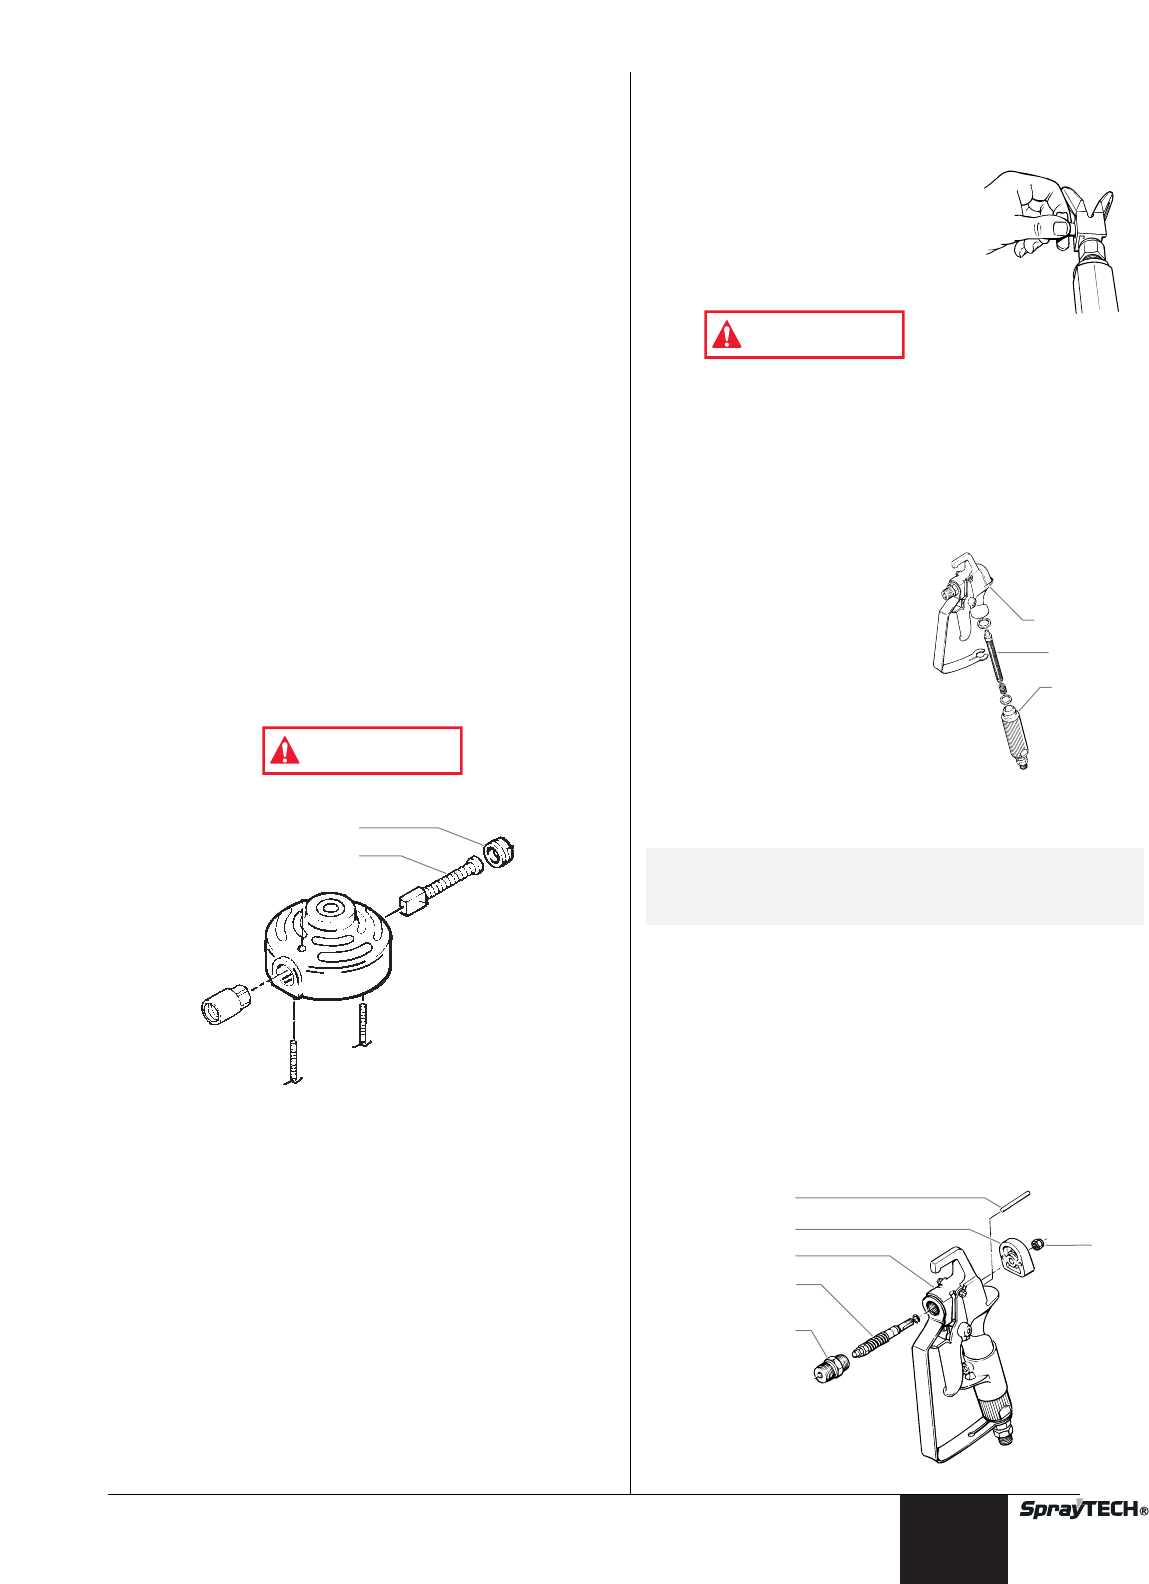
Brush Cap
Motor Brush
WARNING
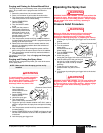
Cleaning the Spray Tip
1. Flush the gun with solvent immediately after the work is
completed.
2. Oil the sliding pins to prevent them from seizing up.
Should the spray tip become clogged,
reverse the spray tip with the lever and
pull the trigger. Once the obstruction
comes out of the spray tip, release the
trigger, reverse the spray tip back to the
spray pattern setting, and resume
spraying.
Do not attempt to clean the tip with your finger.
Do not use a needle or other sharp pointed instrument to
clean the tip. The hard tungsten carbide is brittle and can
be chipped.
Cleaning the Filter
Clean the filter with a brush dipped in solvent. Never poke the
filter with a sharp instrument.
Changing the Filter
1. Pull the trigger guard forward
so that it comes loose from
the handle.
2. Unscrew the handle from the
housing and remove the old
filter.
3. Slide the new filter, taper end
first, into the gun housing.
4. Replace the handle, washer
and spring. Screw the handle
into the housing until hand-
tight. Replace the trigger
guard.
Replacing the Valve Union Assembly
1. Unscrew the spray tip.
2. Lock the gun in the ON position and remove the diffuser
with a wrench
3. Unlock the gun.
4. Unscrew the nut with a wrench and remove the retainer
block.
5. Remove the sliding pins with care and store them in a
safe place so they will not be lost.
6. Drive the valve union assembly forward from the back of
the retainer block. Use the handle of a wooden hammer
or similar soft tool to avoid damaging the valve union
assembly.
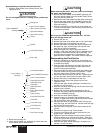
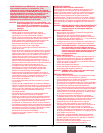
Gun Housing
Valve Union
Assembly
Sliding Pin
Nut
Retainer Block
Diffuser
NOTE: Replace the packing if the spray gun is
disassembled. Replace the sliding pins if they
are worn.
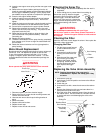
Gun Housing
Filter
Handle
WARNING
© SprayTECH Corporation. All rights reserved. 9