


3-3
Cisco Aironet 1100 Series Access Point Hardware Installation Guide
OL-4309-07
Chapter 3 Mounting Instructions
Mounting on a Horizontal or Vertical Surface
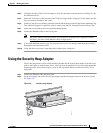
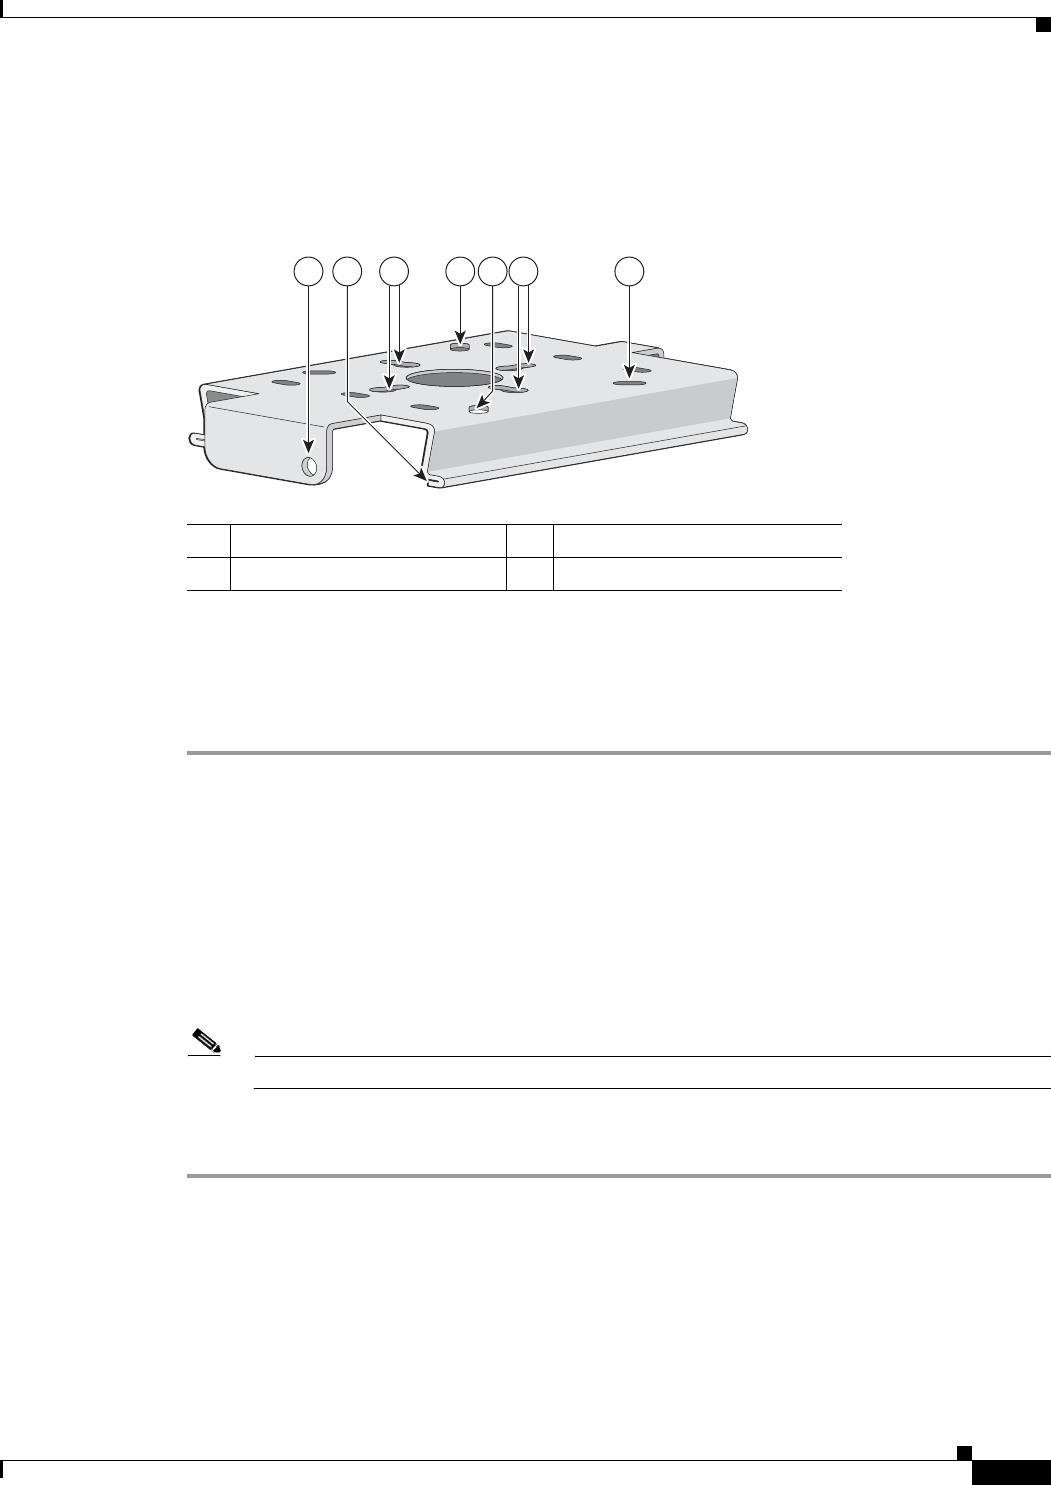
The wall or ceiling mounting bracket also serves as a template for transferring the location of the
bracket’s mounting holes to the mounting surface. Refer to Figure 3-1 to locate the various mounting
holes for the method you intend to use.
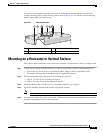
Figure 3-1 Mounting Bracket
Mounting on a Horizontal or Vertical Surface
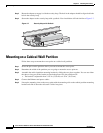
Follow these steps to mount the access point on a horizontal or vertical surface, such as a ceiling or wall.
Step 1 Use the wall or ceiling mounting bracket as a template to mark the locations of the mounting holes.
• You can use any of the 10 holes around the periphery (three of which are identified in the
illustration) of the bracket to mount it using the supplied #8 fasteners.
Step 2 Drill one of the following sized holes at the locations you marked:
• 3/16 in. (4.7 mm) if you are using wall anchors
• 3/32 in. (2.3 mm) if you are not using wall anchors
Step 3 Install the anchors into the wall if you are using them. Otherwise, go to Step 4.
Step 4 Secure the mounting bracket to the surface using the #8 fasteners.
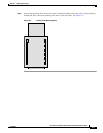
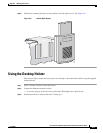
Note On a vertical surface, be sure to mount the bracket with its security hasp facing down.
Step 5 Line up the mounting slots on the access point with the mounting rail on the mounting bracket and slide
down the mounting rails until it clicks into place.
81171
1 4 43 3 42
1 Security hasp 3 Suspended ceiling mount holes
2 Access point mounting rail 4 Wall mount holes