


3-6
Cisco Aironet 1100 Series Access Point Hardware Installation Guide
OL-4309-07
Chapter 3 Mounting Instructions
Mounting Above a Suspended Ceiling
Mounting Above a Suspended Ceiling
The access point mounting bracket is designed to be integrated into the T-bar grid above the tiles of a
suspended ceiling. The access point uses a T-bar box hanger (not supplied) such as the Erico Caddy 512
or B-Line BA12 and should be oriented just above the top surface of a standard 5/8-in. (1.59 cm) ceiling
tile. You may need to modify a thicker tile to allow room for the access point.
Follow these steps to mount the access point above a suspended ceiling. Refer Figure 3-4 before
proceeding.
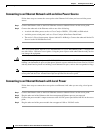
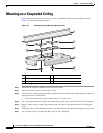
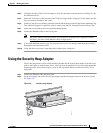
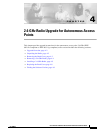
Figure 3-4 T-Bar Grid Mounting Bracket Parts
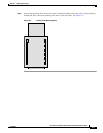
Step 1 Insert the bracket mounting clip’s tab into the large hole on the access point mounting bracket.
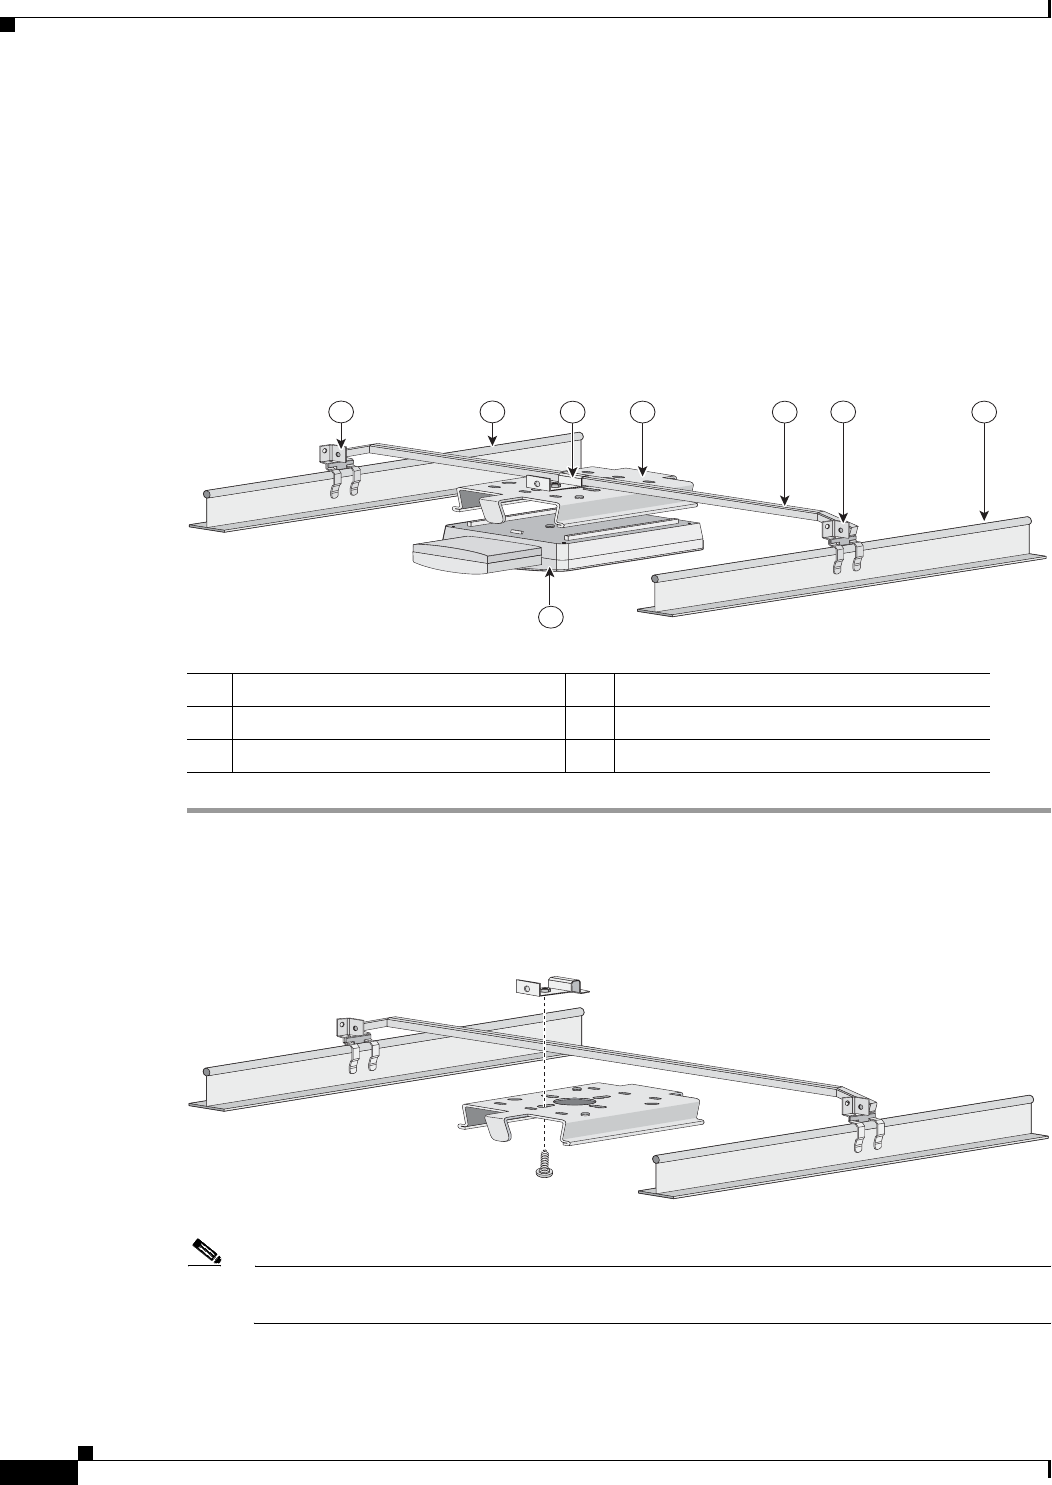
Step 2 Place the clip over the T-bar box hanger (refer to Figure 3-5) and secure it to the access point mounting
bracket with the 1/4-20 fastener (supplied with the T-bar hanger).
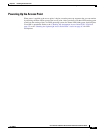
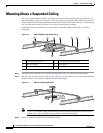
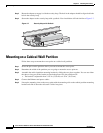
Figure 3-5 T-Bar and Mounting Bracket
Note Figure 3-5 shows the access point mounting bracket mounted perpendicular to the T-bar box
hanger. You can also mount the bracket parallel to the T-bar box hanger.
Step 3 Remove a ceiling tile adjacent to the mounting location.
1 Suspended ceiling T-rail 4 Access point mounting bracket
2 T-bar box hanger 5 Access point
3 Bracket mounting clip 6 T-rail clip
5
85776
1
1
2
6
6
4
3
85777