


4-6
Cisco Aironet 1100 Series Access Point Hardware Installation Guide
OL-4309-07
Chapter 4 2.4-GHz Radio Upgrade for Autonomous Access Points
Installing a 2.4-GHz Radio
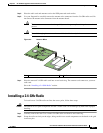
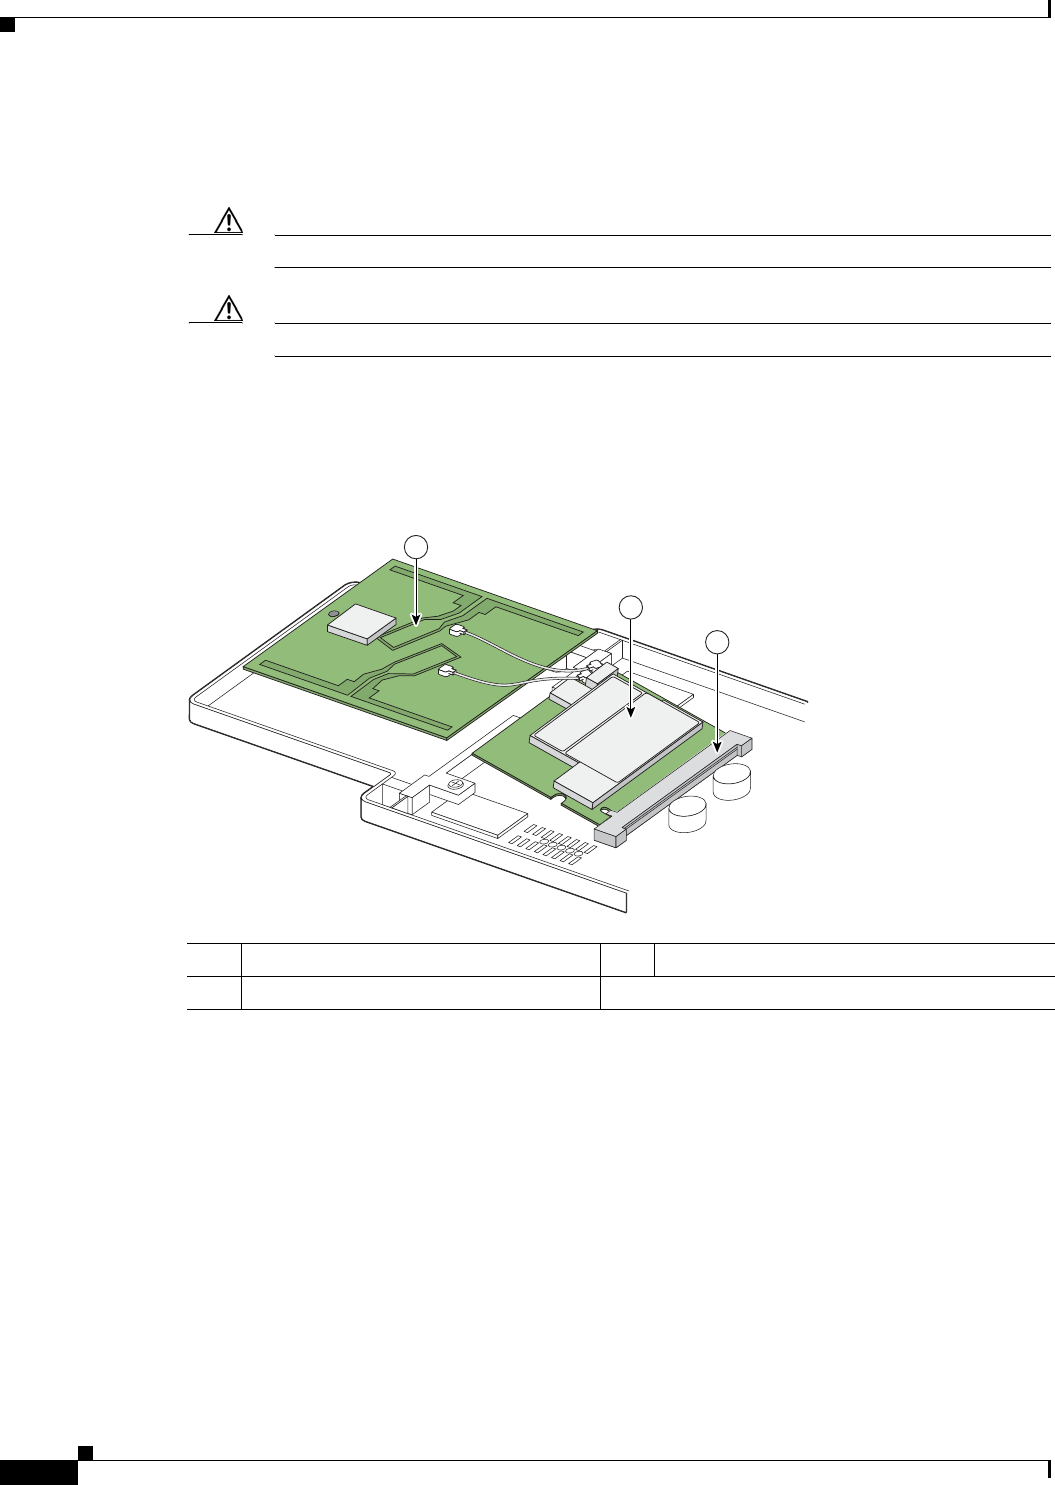
Step 3 Place the radio card on the anti-static work surface next to the antenna card.
Step 4 Use your fingers to carefully connect the antenna wire connectors to the connectors on the 2.4-GHz radio
card (see Figure 4-3).
Caution The antenna connectors can be damaged by using a pair of long-nose pliers.
Caution To avoid damaging the antenna wire assemblies, handle them by their connectors.
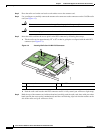
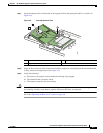
Step 5 Insert the radio card into the access point’s mini-PCI connector by following these steps:
a. Tilt the radio card at approximately 20
o
to 30
o
so that its gold pins are aligned with the mini-PCI
connector (see Figure 4-4).
Figure 4-4 Inserting Radio Card in Mini-PCI Connector
b.
Push the radio card into the mini-PCI connector until it is fully seated (you will hear a slight snap).
Step 6 Hold the top of the antenna card with one hand and carefully push the radio card down with your other
hand (towards the access point’s motherboard) until the card-retaining clips lock into the notches on the
side of the radio card (you will hear a click).
1 Antenna card 3 Mini-PCI connector
2 Radio card
95753
3
2
1