17
Fig. 49
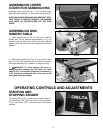
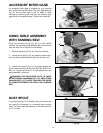
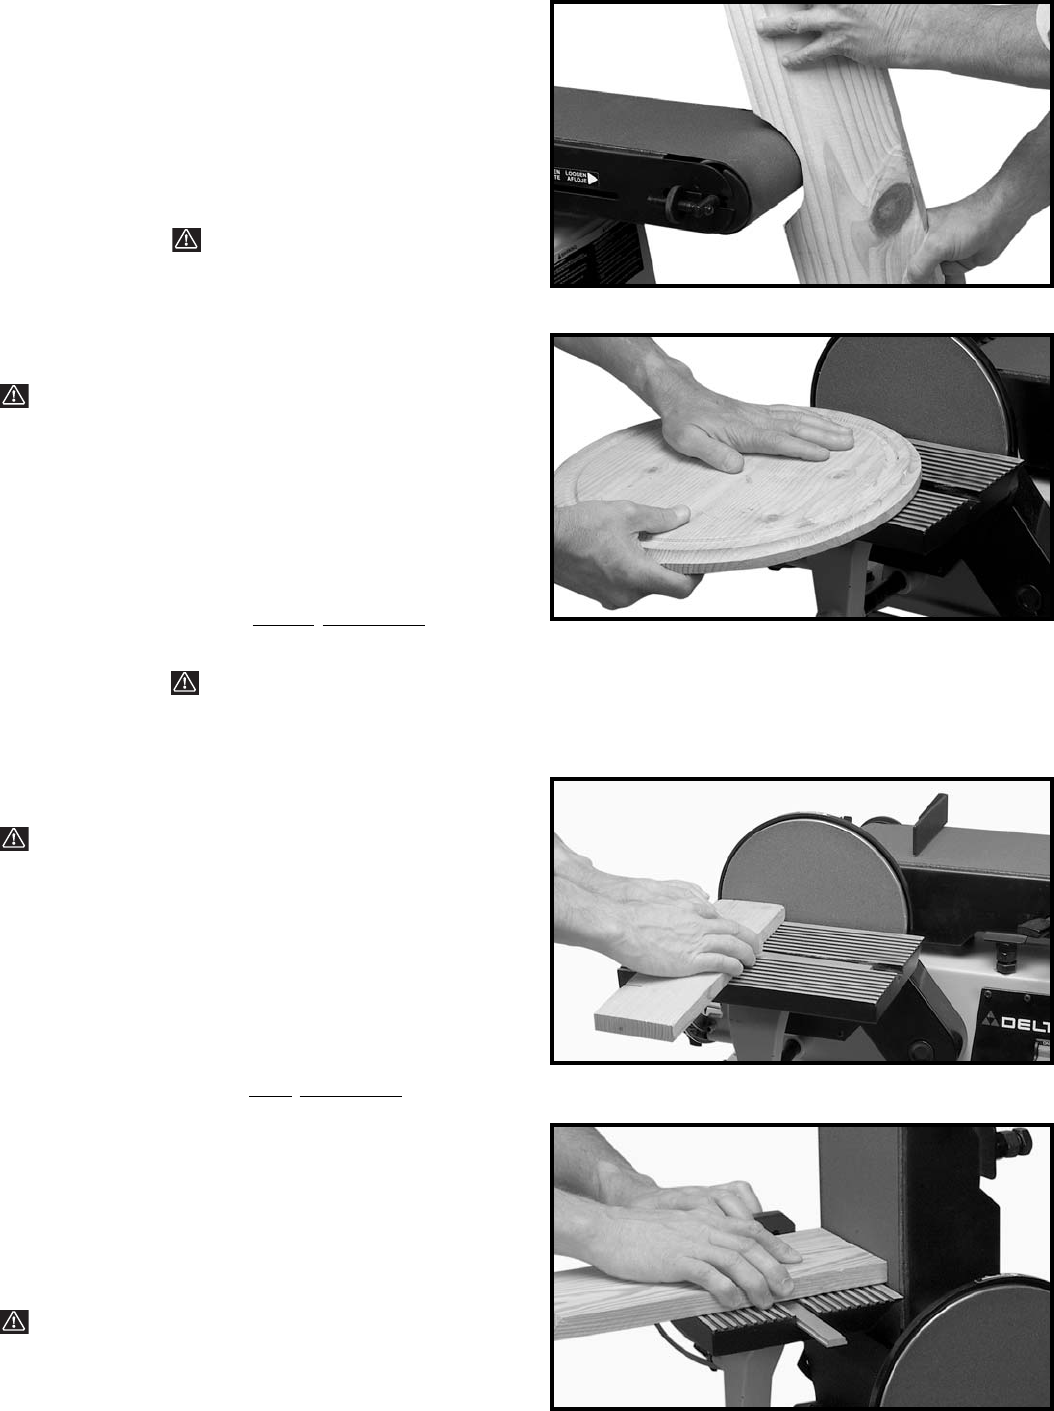
SANDING INSIDE CURVES
Inside curves can be sanded on the top sanding drum,
as shown in Fig. 49.
NOTE: Replace sanding drum guard after sanding
operation is completed!
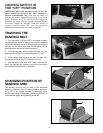
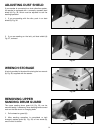
Fig. 50
SANDING OUTSIDE CURVES
Outside curves should be sanded on the sanding disc as
shown in Fig. 50. WARNING: ALWAYS SAND ON
THE LEFT (DOWNWARD) SIDE OF THE SANDING
DISC, AS SHOWN. SANDING ON THE RIGHT
(UPWARD) SIDE OF THE SANDING DISC COULD
CAUSE THE WORKPIECE TO FLY UP, WHICH COULD
BE HAZARDOUS.
WARNING: THE EDGE OF THE TABLE MUST BE
POSITIONED A MAXIMUM OF 1/16 INCH AWAY
FROM THE SANDING DISC TO AVOID TRAPPING
THE WORK OR FINGERS BETWEEN THE TABLE AND
SANDING DISC.
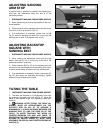
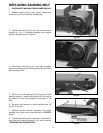
Fig. 51
END SANDING
WITH THE DISC
When sanding the ends of narrow workpieces use the
sanding disc and the accessory miter gage, as shown in
Fig. 51. Move the work from the center to the left side of
the sanding disc. WARNING: ALWAYS SAND ON
THE LEFT (DOWNWARD) SIDE OF THE SANDING
DISC, AS SHOWN. SANDING ON THE RIGHT
(UPWARD) SIDE OF THE SANDING DISC COULD
CAUSE THE WORKPIECE TO FLY UP, WHICH COULD
BE HAZARDOUS.
WARNING: THE EDGE OF THE TABLE MUST BE
POSITIONED A MAXIMUM OF 1/16 INCH AWAY
FROM THE SANDING DISC TO AVOID TRAPPING
THE WORK OR FINGERS BETWEEN THE TABLE AND
SANDING DISC.
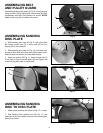
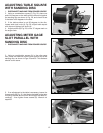
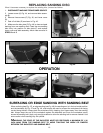
Fig. 52
END SANDING WIDE
WORKPIECES WITH THE
BELT
When sanding the ends of wide workpieces, it is more
convenient to use the sanding belt with the sanding arm
in the vertical position and the table assembly moved to
the sanding belt, as shown in Fig. 52. See sections titled
“CHANGING POSITION OF SANDING ARM” and
“USING TABLE ASSEMBLY WITH SANDING BELT.”
For more accurate work use the accessory miter gage
and move the work evenly across the sanding belt, as
shown in Fig. 52.
WARNING: THE EDGE OF THE TABLE MUST BE
POSITIONED A MAXIMUM OF 1/16 INCH AWAY
FROM THE SANDING BELT TO AVOID TRAPPING
THE WORK OR FINGERS BETWEEN THE TABLE AND
SANDING BELT.