


24
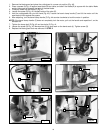
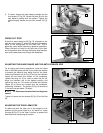
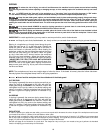
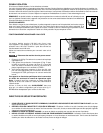
Miter cutting is similar to cross-cutting except that the workpiece is cut off at an angle (up to 45° right or left). The settings and
operation are performed in the same manner as cross-cutting except that you should position the track arm (A) Fig. 63 to the desired
angle on the miter scale before you clamp it in place with clamp handle (B). Position your hand that holds the workpiece on the
opposite side of the direction of the miter so that you pull the blade through the workpiece and away from your hand. See Fig. 63
for a typical miter cutting operation on the radial saw.
B
A
C
Fig. 60
Fig. 61
A
B
Always return the cutterhead carriage to the full rear position after each cross-cut operation.
NOTE: When cross-cutting material more than 1" thick, position the fence immediately behind the fixed front table board.
Always be conscious of your hand position. Make sure that your hands are clear of the blade and that you
are holding the workpiece firmly.
Additionally, you can turn the anti-kickback rod upside down and lock it in place so that the rod just clears the workpiece. The rod
can act as a guard from the exposed teeth of the blade.
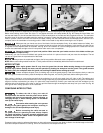
Miter angles greater than 45° may force the guard into the saw blade causing damage to the guard and
personal injury. Before starting the motor, test the operation by feeding the workpiece into the guard. If the guard contacts
the blade, place the workpiece under the guard, not touching the blade before starting the motor.
Certain workpiece shapes, such as molding may not lift the guard properly. Feed the workpiece slowly to start the
cut. If the guard contacts the blade, place the workpiece under the guard, not touching the blade, before starting the motor.
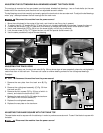
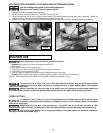
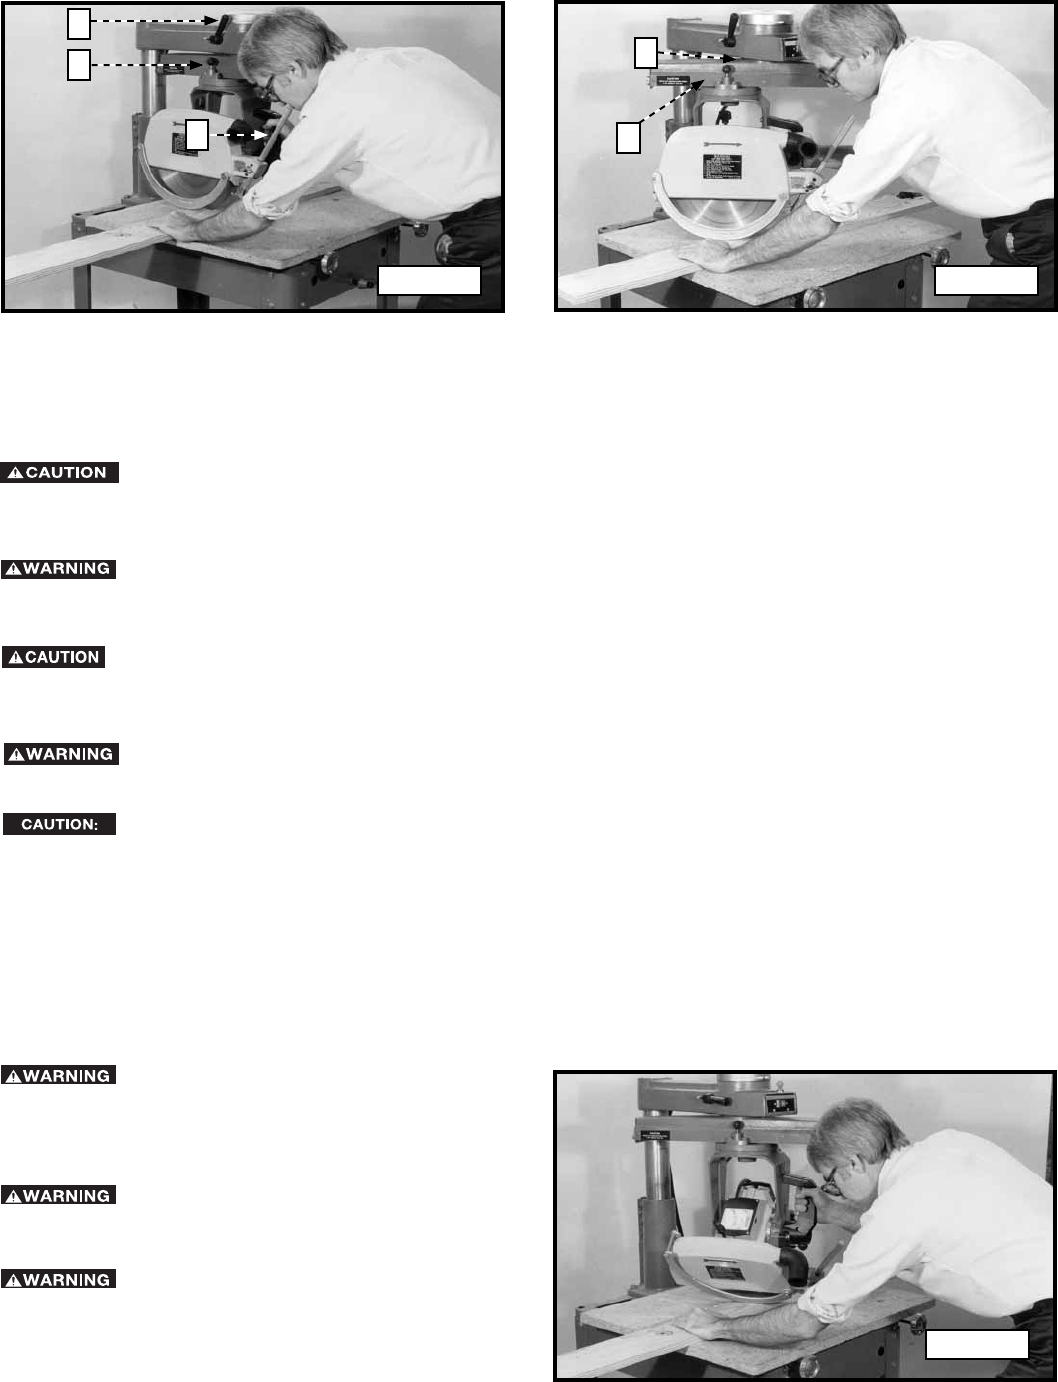
Compound miter cutting is performed the same as miter cutting except that the saw blade is tilted to the desired angle on the bevel
scale and clamped for a bevel cut. See Fig. 62 for an illustration of the compound miter cut.
To reduce the risk of injury, turn unit off
and disconnect the machine from the power source before
installing and removing accessories, before adjusting or
changing set-ups, or when making repairs. An accidental
start-up can cause injury.
Use caution when starting the cut to prevent
binding of the guard against the workpiece resulting in
damage to the saw and possible personal injury.
Before connecting the radial arm saw to
the power source or operating the saw, always inspect
the guard and splitter for proper operation alignment and
clearance with the saw blade. Check the alignment after
each change of bevel angle.
COMPOUND MITER CUTTING
Fig. 62
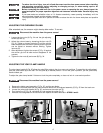
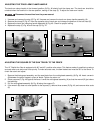
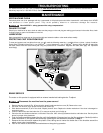
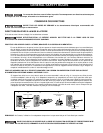
Cross-cutting consists of supporting the workpiece against the fence and pulling the saw blade through the material.
Before cross-cutting, set the track arm (A) at “0” and tighten the track arm clamp handle (B) Fig. 60. Clamp the fence Make sure
that the saw blade is to the left and behind the fence. Place the workpiece on the table and butt it against the fence. The saw blade
should be clear of the fence and table when the machine is turned on. Lower the saw blade until it lightly cuts into the table surface.
Position yourself a little to the left of the machine for better visibility. Pull the saw blade across the workpiece and, after the cut is
complete, return the saw blade to its starting position. Wait for the blade to stop before removing the cut-off piece.
Make sure that your hands are clear of the blade. Hold the workpiece firmly. As an added measure of safe ty, turn
the anti-kickback rod (C) upside down and lock it in place so that the rod just clears the workpiece. In this position, the rod can act
as a guard from the exposed teeth of the blade. See Fig. 60 for an illustration of a cross-cutting operation on a radial saw. Be sure
to return the cutterhead carriage to the full rear position after each cross-cut operation.
MITER CUTTING