Troubleshooting
312666R 33
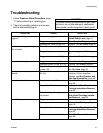
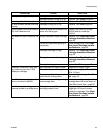
Steady air leakage from muffler. Damaged air valve o-rings (4d). Replace. See Air Valve, page 43.
Damaged piston o-rings (4a, 4c). Replace. See Piston, page 42.
Air leakage from front air valve. Damaged air valve o-rings (4d). Replace. See Air Valve, page 43.
Air leak between handle and fluid
housing
Damaged o-ring (2c or 2d). Replace. See Parts, page 44.
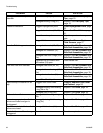
Cannot tighten front cover retainer
(20) until it bottoms out.
Installing round mix chamber front
cover on a flat tip gun.
Inspect front cover for flat tips
256416 and for round tips
256414.
Gun does not dose ClearShot Liq-
uid.
Empty ClearShot Liquid cartridge. Replace. See ClearShot Liquid
Cartridge Installation/Removal ,
page 23.
ClearShot Liquid dosing pump is
not primed.
Prime dosing pump. See Clear-
Shot Liquid Cartridge Installa-
tion/Removal , page 23.
Damaged cartridge o-rings. Replace. See ClearShot Liquid
Cartridge Installation/Removal ,
page 23.
Damaged or cracked cartridge. Replace. See ClearShot Liquid
Cartridge Installation/Removal ,
page 23.
Damaged dosing piston. Repair. See Piston, page 42.
Excessive ClearShot Liquid dos-
ing; producing less than 1000
doses per cartridge.
Non-regulated air supply to gun. Regulate air supply to gun.
Excessive air pressure at gun. Regulate air supply to 80 psi (0.56
MPa, 5.6 bar).
Damaged or dirty o-rings on air
piston and/or dosing piston.
Repair or clean o-rings. See Pis-
ton, page 42.
ClearShot Liquid cartridge instal-
lation or removal is difficult.
Friction between cartridge o-rings
and cartridge bore.
Lubricate cartridge o-rings and/or
cartridge bore with a few drops of
ClearShot Liquid. See , page 22.
ClearShot Liquid cartridge is
pressure locked in cartridge bore.
Cartridge is empty. Temporary
cartridge pressure lock.
Engage piston safety lock and
trigger gun 20 times to bleed
pressure in cartridge. See Clear-
Shot Liquid Cartridge Installa-
tion/Removal , page 23.
PROBLEM CAUSE SOLUTION


