


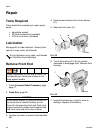
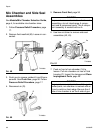

Repair
42 312666R
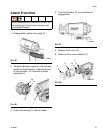
8. Liberally lubricate o-rings (44e, 44f) and
carefully reinstall in fluid housing (F). Use
hex nut driver to tighten.
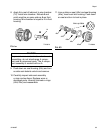
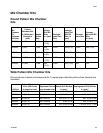
9. Attach fluid manifold (M). Connect air (D).
Return gun to service.
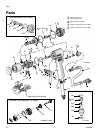
Piston
1. Follow Pressure Relief Procedure, page
17
2. Disconnect air (D) and remove fluid mani-
fold (M).
3. Remove Front End, page 36.
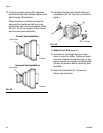
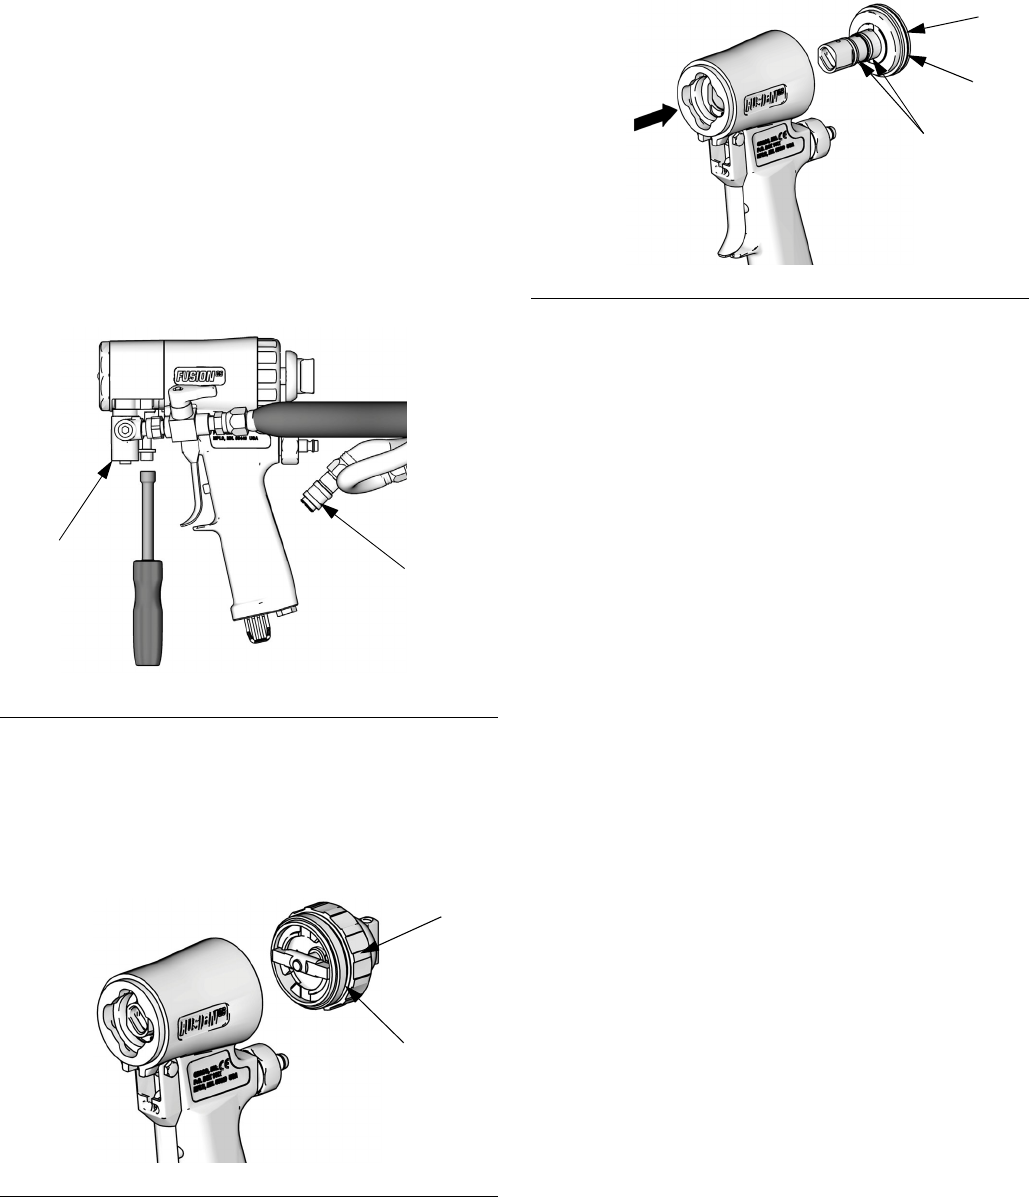
4. Unscrew variable flow adjustment knob (X)
and inspect o-ring (3a).
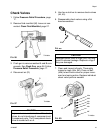
5. Push piston shaft to remove piston (4b).
Inspect piston o-ring (4c) and shaft o-rings
(4a).
6. Remove dosing piston.
a. Use supplied screw driver to remove
spiral retaining ring (4g).
b. Use screw driver to push dosing piston
(4e) out back of piston (4b) through
access hole on front side.
7. Clean and inspect o-rings on dosing piston
(4e). Clean dosing bore in piston (4b) with
a nylon brush and compatible solvent.
8. Lubricate dosing piston (4e) o-rings with
ClearShot Liquid prior to reassembly.
9. Liberally lubricate piston o-ring (4c) and
lightly lubricate shaft o-rings (4a).
10.Reinstall retaining ring (4g). Press it into
groove of dosing piston (4e).
F
IG
. 60
F
IG
. 61
TI11330a
M
D
TI12100a
X
3a
F
IG
. 62
TI12101a
4a
4c
4b