


16 308018
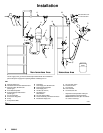
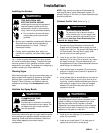
Operation
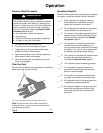
Shutdown
WARNING
PRESSURIZED EQUIPMENT HAZARD
To reduce the risk of an injury, follow the Pressure
Relief Procedure on page 13 whenever you stop
spraying and whenever you are instructed to
relieve pressure.
1. Relieve the pressure.
2. Flush and clean the equipment. Follow the instruc-
tion in Maintenance.
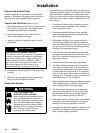
Maintenance
Daily Care and Cleaning
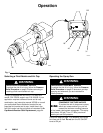
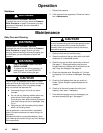
WARNING
PRESSURIZED EQUIPMENT HAZARD
To reduce the risk of an injury, follow the Pressure
Relief Procedure on page 13 when you stop
spraying, before cleaning or flushing the spray gun,
and whenever you are instructed to relieve the
pressure.
WARNING
FIRE, EXPLOSION, AND ELECTRIC
SHOCK HAZARD
To reduce the risk of fire, explosion, or
electric shock, turn the ES ON-OFF
lever OFF before flushing the gun.
CAUTION
Fluid left in gun air passages could result in a poor
quality paint finish and may draw current and reduce
the electrostatic effect. Fluid in the power supply
cavity can reduce the alternator life.
D Immersing the gun in fluid is not recom-
mended.
D Do not use any cleaning method which may
allow solvent into the gun air passages.
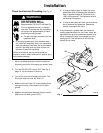
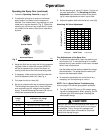
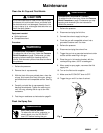
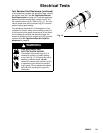
Point the gun down while cleaning to prevent
fluid from running into the air passages. See
Fig. 6.
D Hang the gun with its nozzle pointing down
when it is not being used.
Clean all parts with a non-conductive, compatible
solvent. Conductive solvents can cause the gun to
malfunction.
Methylene chloride is not recommended as a flush-
ing or cleaning solvent with this gun as it will damage
nylon components.
CAUTION
To avoid contaminating the fluid to be sprayed, make
sure that any solvent that is inside the shroud is
allowed to drain out through the hole at the shroud
base before spraying.
1. Clean the fluid and air line filters daily.
2. Clean the outside of the gun daily with a soft cloth
dampened in a compatible solvent.
3. Clean the air cap and fluid nozzle daily, minimum.
See page 17. Some applications require more
frequent cleaning. Replace the fluid nozzle and air
cap if they are damaged. See page 24.
4. Check the electrode wire. Straighten it if it is bent,
and replace it if it is broken or damaged. See page
25.
5. Check for fluid leakage from the gun and fluid
hoses. Tighten fittings or replace equipment as
needed.
6. Check all of the work hangers for build-up of
material; clean them, if necessary.
7. Flush before changing colors and whenever you
are done operating the gun. See page 17.