


34 308018
Service
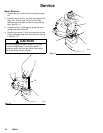
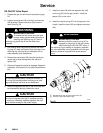
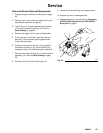
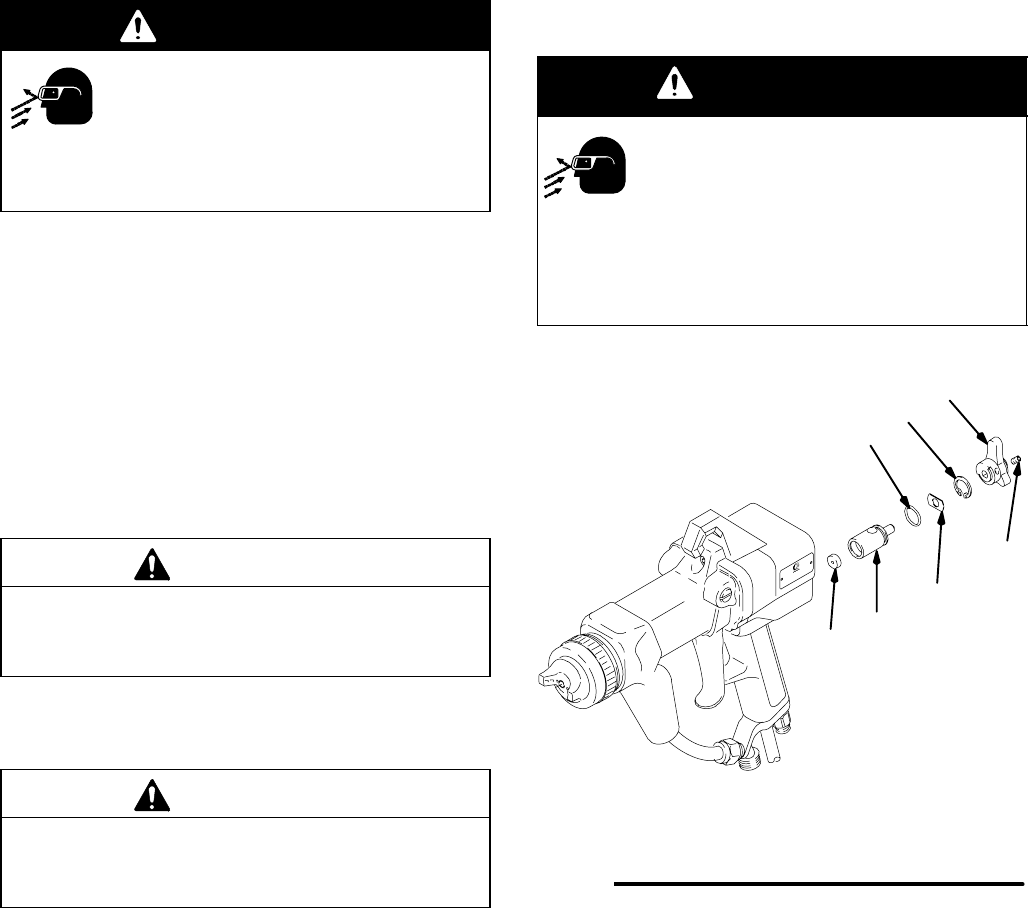
ES ON-OFF Valve Repair
1. Prepare the gun for service as instructed on page
24.
2. Loosen the set screw (24) with the 2 mm hex key
(69) provided. Remove the lever (26) from the
valve. See Fig. 23.
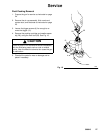
WARNING
MOVING PARTS HAZARD
To reduce the risk of eye injury, be sure
to wear safety glasses when removing or
installing the retaining ring (47) as the
retaining ring could slip off the tool when com-
pressed.
3. Use internal snap ring pliers to remove the retain-
ing ring (47) from the handle. Align the holes in the
retaining ring with the flat on the spacer (32) to
ease assembly and disassembly.
4. Remove the valve body (38) from the handle; be
careful not to drop the regulator disk (46) and
spacer (32).
5. Clean and inspect the parts for damage. Replace if
necessary. Lubricate the o-ring (36) with petroleum
jelly.
CAUTION
Do not over-lubricate parts. Excessive lubricant on
the o-ring (36) can be pushed into the gun air pas-
sage and blemish the finish on the workpiece.
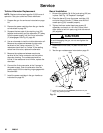
6. Install the regulator disk (46) in the valve (38) with
its bevelled side facing in toward the valve.
CAUTION
Be sure the regulator disk (46) is installed correctly.
A missing or incorrectly installed regulator disc can
cause severe damage to the power supply.
7. Install the valve (38) with the regulator disc (46)
and o-ring (36) into the gun handle. Install the
spacer (32) on the valve.
8. Install the retaining ring (47) into the groove in the
handle. Install the lever (26) and tighten set screw
(24).
WARNING
MOVING PARTS HAZARD
Make sure that the retaining ring (47) is
engaged in the groove in the gun handle
when installing the ES ON-OFF Valve. If
the retaining ring is missing or improperly installed,
the valve assembly can be propelled out of the gun
when air pressure is applied and cause serious
injury.
06632
Fig. 23
26
36
47
32
38
46
24
Bevelled side of disk (46) faces toward valve (38)
Lubricate o-rings with petroleum jelly