


-24-
G0456 Variable Speed Wood Lathe
The disc sander accepts 12" diameter cloth or
paper-backed PSA sanding discs, which are
available through Grizzly (see
Page 28).
The sanding disc sticks to the surface of the cast
iron disc, using the pressure sensitive adhesive
backing (PSA) on the reverse side of the sandpa
-
per disc. The sandpaper can be replaced without
removing either the table or the dust port.
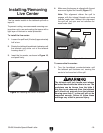
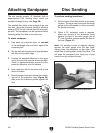
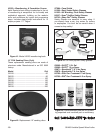
To attach sandpaper:
1. Peel back the protective layer on one-half
of the sandpaper disc and fold it against the
remaining half.
2. Slip the half with the protective layer between
the disc and the table edge.
3. Position the exposed adhesive on the upper
half of the disc that extends above the table.
Once it is positioned evenly across the disc,
press the adhesive onto the surface.
4. Now rotate the disc so the lower half is now
above the table.
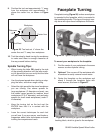
5. Bend the paper back and remove the remain-
ing half of the protective layer (
Figure 30),
then press the adhesive portion against the
disc.
Figure 30. Sandpaper being installed on disc.
Attaching Sandpaper
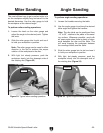
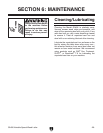
To perform sanding operations:
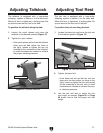
1. Set the angle of the table relative to the sand-
ing disc. The angle can be set with the angle
gauge on the disc sander or with a protractor
for greater accuracy.
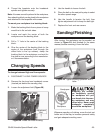
2. When a 90˚ horizontal angle is required,
place one surface of the workpiece firmly
against the face of the miter gauge (set at
0˚), with the other surface against the face of
the disc (
Figure 31).
Note: For sanding curves or irregular shapes,
remove the miter gauge from the disc table.
Always keep the workpiece on the side of the
wheel that is rotating down toward the table. This
will keep the workpiece from flying out of your
hands from the rotational forces.
Figure 31. Typical disc sanding operation.
Disc Sanding