


-32-
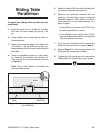
G0588/G0591 12" Sliding Table Saws
Test Run
Now that the machine is connected to the power
source, it is important to perform a test run to
make sure all the controls are working properly.
Before starting the saw, make sure you
have performed the preceding assembly
and adjustment instructions, and you have
read through the rest of the manual and
are familiar with the various functions and
safety issues associated with this machine.
Failure to follow this warning could result in
serious personal injury or even death!
To test run the saw:
1. Put on safety glasses and make sure any
bystanders are out of the way and also wear
-
ing safety glasses.
2. Rotate both of the red EMERGENCY STOP
buttons until they spring up.
3. Press the ON button.
—If any problems occur, press the
EMERGENCY STOP button.
—For Model G0588 only; If the main blade
is rotating in a counterclockwise direc
-
tion, disconnect the saw from power and
exchange wires R & T in the terminal box.
—Investigate and correct the problem before
operating the machine further. If you need
help, refer to the Troubleshooting section
in the back of this manual or contact Tech
Support at (570) 546-9663.
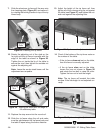
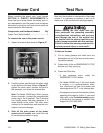
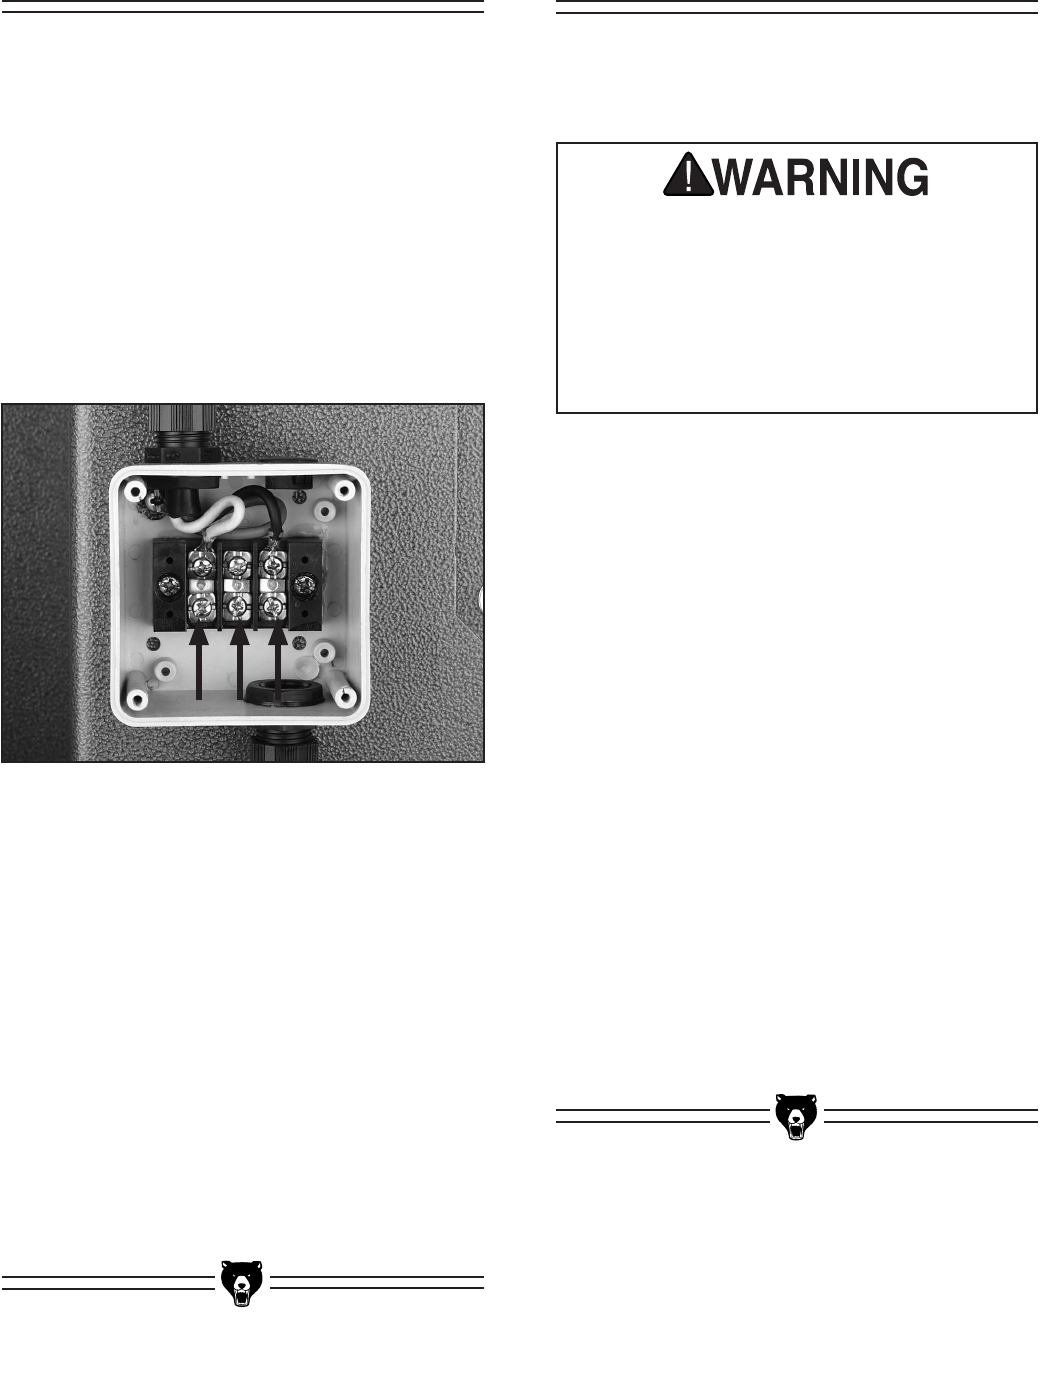
Figure 47. G0591 main terminal box.
2. Feed the power cord through the strain relief
on the bottom of the box shown in
Figure 47,
tighten the strain relief, connect the cord to
the terminals, and close the terminal box.
Note: For Model G0588 only; When using a
phase converter, connect the manufactured
power leg to the S terminal. The S terminal
can handle
power fluctuation because it is
wired directly to the motor. The other wires
connect to the transformer and must be con
-
sistent to prevent damage
.
3. Shut off the main power at the power
source circuit breaker and install the cord
to the disconnect switch or plug.
Power Cord
Before installing the power cord, read through
SECTION 2: CIRCUIT REQUIREMENTS to
check that your setup follows the safety and cir
-
cuit requirements, and the power cord and power
disconnect or plug that you have chosen meet the
requirements for this machine.
Components and Hardware Needed: Qty
Power Cord (Not Included) .................................
1
To connect the saw to the power source:
1. Open the terminal box shown in Figure 47.