


G0588/G0591 12" Sliding Table Saws
-47-
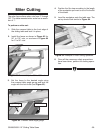
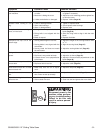
8. Adjust the blade angle until you hit the 45˚
positive stop. Check the bevel with an adjust
-
able square set to 45˚.
9. If variations exist, loosen the set screw in the
45˚ tilt stop nut (
Figure 83) and adjust the
stop nut until the blade and square match.
10. Tighten the set screw and recheck the bevel
by adjusting the blade back to 90˚, then back
to 45˚.
11. Check the scale for accuracy at 45˚ and 90˚.
—If the scale reads 45˚ when the blade is at
45˚ and 0˚ when the blade is at 90˚ to the
table, it is accurate.
—If the scale reading does not match the
blade angle, perform the adjustments in
Step 12
.
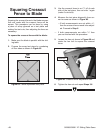
12. Loosen the lock nut called out in Figure
84
and rotate the barrel nut until the scale
matches the blade angle.
Blade Tilt
The blade tilt is calibrated at the factory, but can
be adjusted if it changes during the life of the
machine.
To calibrate the blade tilt:
1. Disconnect the saw from the power
source!
2. Move the blade tilt to 90˚ according to the
gauge, and raise the main blade as high as it
will go.
3. Place a machinist's square on the table sur-
face and between the blade teeth. Inspect for
gaps between the blade and the square.
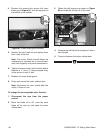
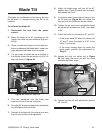
4. If a gap exists at either the top or bottom of
the square, loosen the set screw in the 90˚ tilt
stop nut shown in
Figure 83.
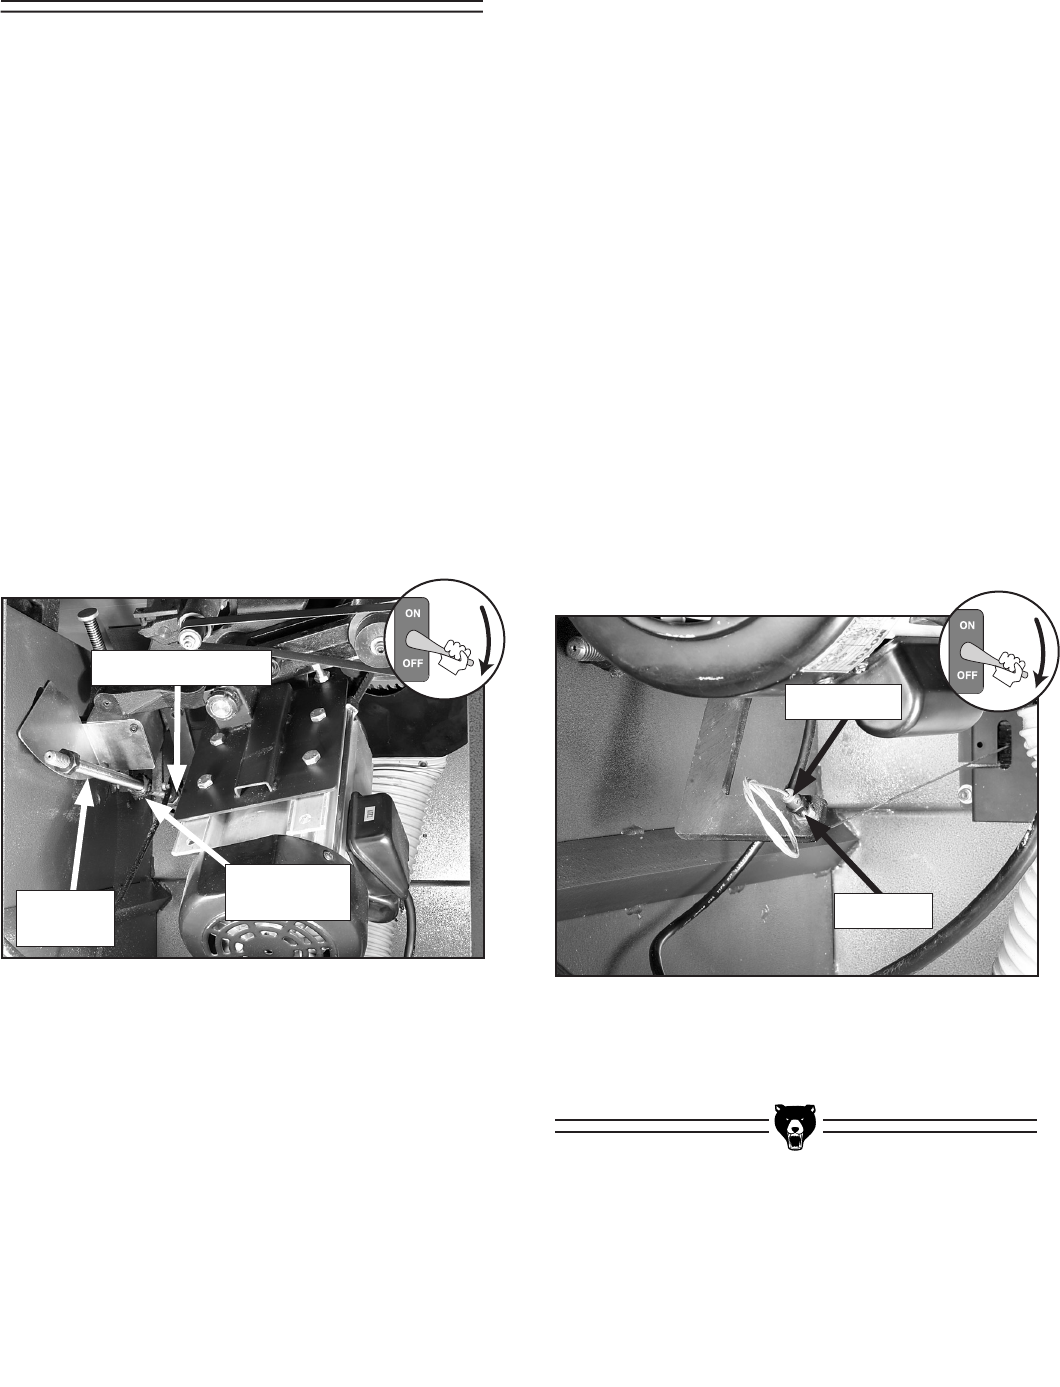
Figure 83. Blade tilt stop nuts.
90˚ Tilt
Stop Nut
45˚ Tilt Stop Nut
Leadscrew
Nut
5. Turn the handwheel until the blade and
square are flush from top to bottom.
6. Snug the 90˚ tilt stop nut against the leadscrew
nut and tighten the set screw.
7. Recheck the blade with the square to ensure
the nut has not been over-tightened.
Figure 84. Scale adjustment nuts.
13. Tighten the lock nut and recheck the scale at
90˚ and 45˚.
Lock Nut
Barrel Nut