


-10-
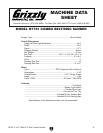
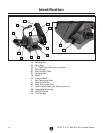
H7761 2" x 27" Belt & 6" Disc Combo Sander
Mounting
The Model H7761 weighs 22 lbs. Make sure
the workbench on which you plan to mount the
sander is sturdy enough to hold the weight of the
machine and any downward pressure that may be
applied during operation. The workbench should
have a level surface and be heavy, or attached to
the floor so that it will not move during operation.
Components and Hardware Required Qty
Sander Unit .......................................................
1
Hex Bolt M8-1.25 (length varies) .......................
2
Flat Washer 8mm ..............................................
4
Lock Washer 8mm ............................................
2
Hex Nut
M8-1.25 ............................................... 2
The Model H7761 can cause
personal injury if operated
by untrained users. Ensure
that your machine is inac
-
cessible to children and visi
-
tors by closing and locking
all entrances to your shop/
garage when you are away.
To mount the grinder:
1. Find the best place in your shop to mount the
sander.
—Pick a spot on the workbench that will
allow enough room to move the size of an
anticipated workpiece around the sander.
The operator (and possibly bystanders)
should have enough room to stand out of
the way.
—Mount the sander in an area with proper
lighting and near electrical outlets. Lighting
should be bright enough to eliminate shad
-
ow and prevent eye strain. Electrical cir
-
cuits should be dedicated or large enough
to handle amperage requirements.
Note: Keep power or extension cords clear
of high-traffic areas. If you install new light-
ing, outlets, or circuits, observe all electrical
codes.
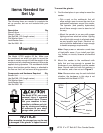
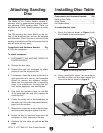
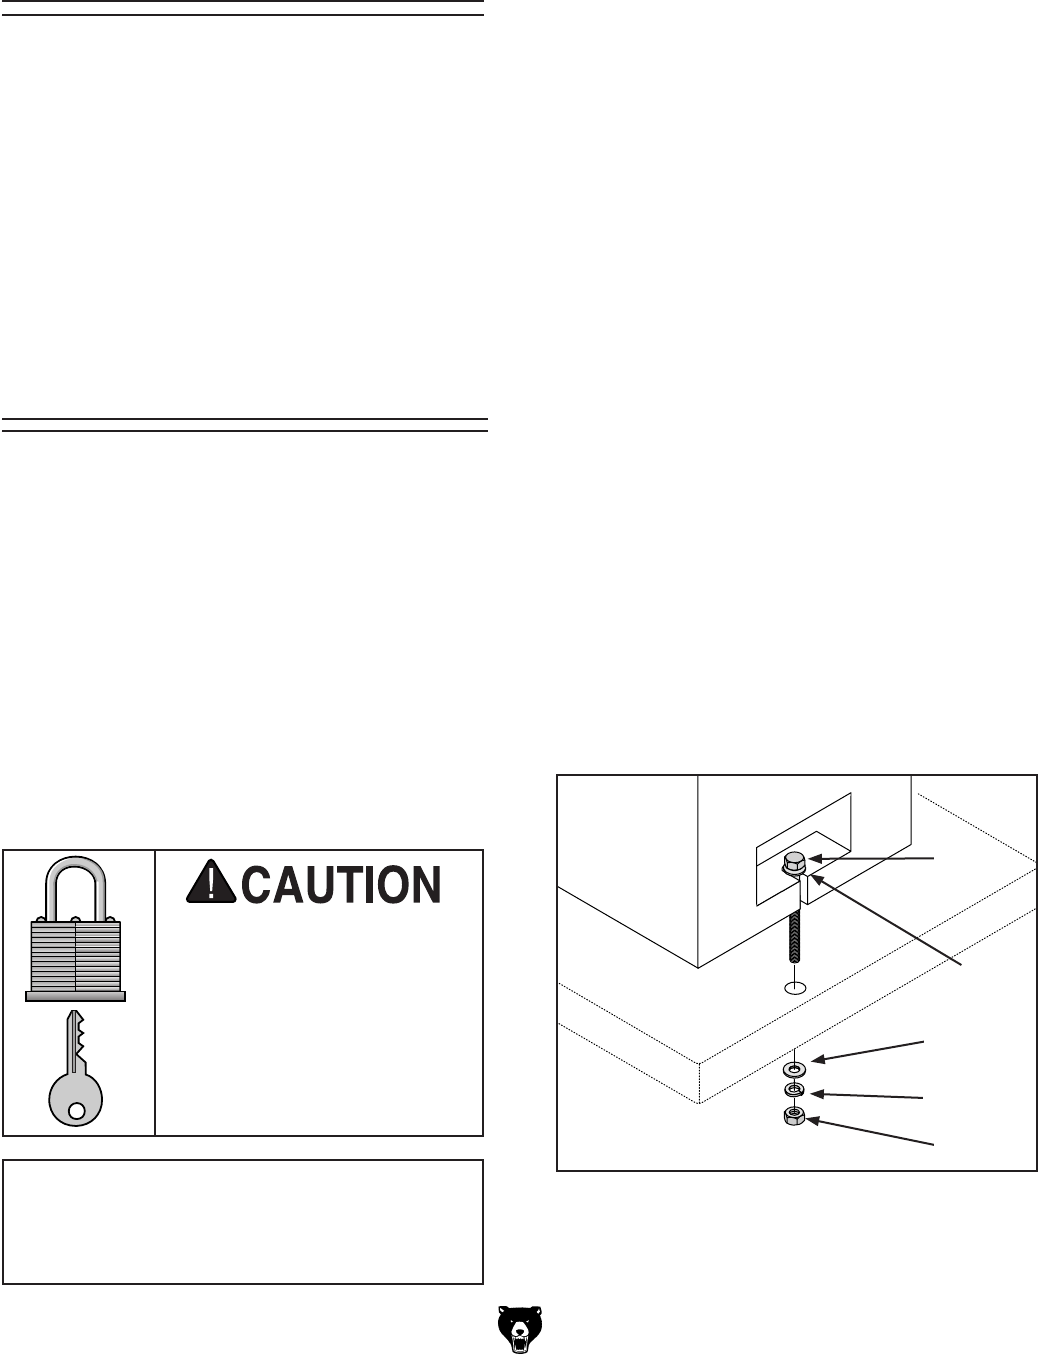
2. Mount the sander to the workbench with
bolts that are long enough to exceed the
thickness of your workbench and the sander
base. Secure each bolt with flat washers, a
lock washer, and a hex nut as in
Figure 3.
Note:
Because sizes vary for each individual
situation, the hardware in this step is not
included with the Model H7761.
NOTICE
When mounted, the storage tray can be eas-
ily damaged if the grinder is tipped forward.
The following items are needed to complete the
set up process, but are not included with your
machine:
Description Qty
Wrench 8mm ..................................................... 1
Wrench 13mm ...................................................
1
Hex Bolt M8-1.25 (length varies) .......................
2
Flat Washer 8mm ..............................................
4
Lock Washer 8mm ............................................
2
Hex Nut
M8-1.25 ............................................... 2
Items Needed for
Set Up
Figure 3. Mounting machine to the workbench.
H7761
Base
Workbench
Bolt
Nut
Lock
Washer
Flat
Washer
Flat
Washer