


H7761 2" x 27" Belt & 6" Disc Combo Sander
-13-
The Model H7761 Combo Sander accepts 6"
diameter cloth or paper-backed pressure sensi
-
tive adhesive (PSA) sanding discs. These are
available in the current Grizzly catalog in a variety
of grits.
The PSA sanding disc sticks directly to the sur
-
face of the aluminum disc and can be replaced
with little effort. Often if the disc is still warm from
sanding, the adhesive will be soft enough that the
disc will come off very easily.
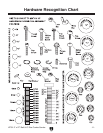
Components and Hardware Needed: Qty
6" PSA disc sandpaper .....................................
1
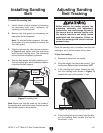
To attach sandpaper:
1. DISCONNECT THE MACHINE FROM THE
POWER SOURCE!
2. Remove the disc table.
3. Remove the worn out sandpaper by slowly
peeling it from the aluminum disc.
4. If necessary, clean the aluminum disc with a
light application of a non-oil, non-flammable
solvent to remove any adhesive residue.
Make sure the aluminum disc is thoroughly
clean of all substances, including the sol-
vent, before applying a new sanding disc.
5. Peel back the protective layer on one-half
of the sandpaper disc and fold it against the
remaining half.
6. Center the sticky half of the sandpaper on
the upper half of the disc and press the sand
-
paper onto the surface.
7. Remove the remainder of the protective layer
and then press the paper against the disc.
8. Rotate the disc by hand and make sure the
sandpaper is firmly attached to the disc.
9. Reattach the disc table as outlined on this
page.
Attaching Sanding
Disc
Components and Hardware Needed: Qty
Sanding Disc Tabl
e ........................................... 1
Table Knobs ......................................................
2
Flat Washer 6mm ..............................................
2
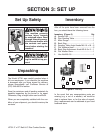
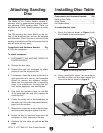
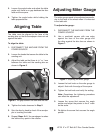
To install the disc table:
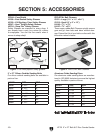
1. Attach the table as shown in Figure 4 with
the included knobs and washers.
Installing Disc Table
Figure 4. Installing disc table.
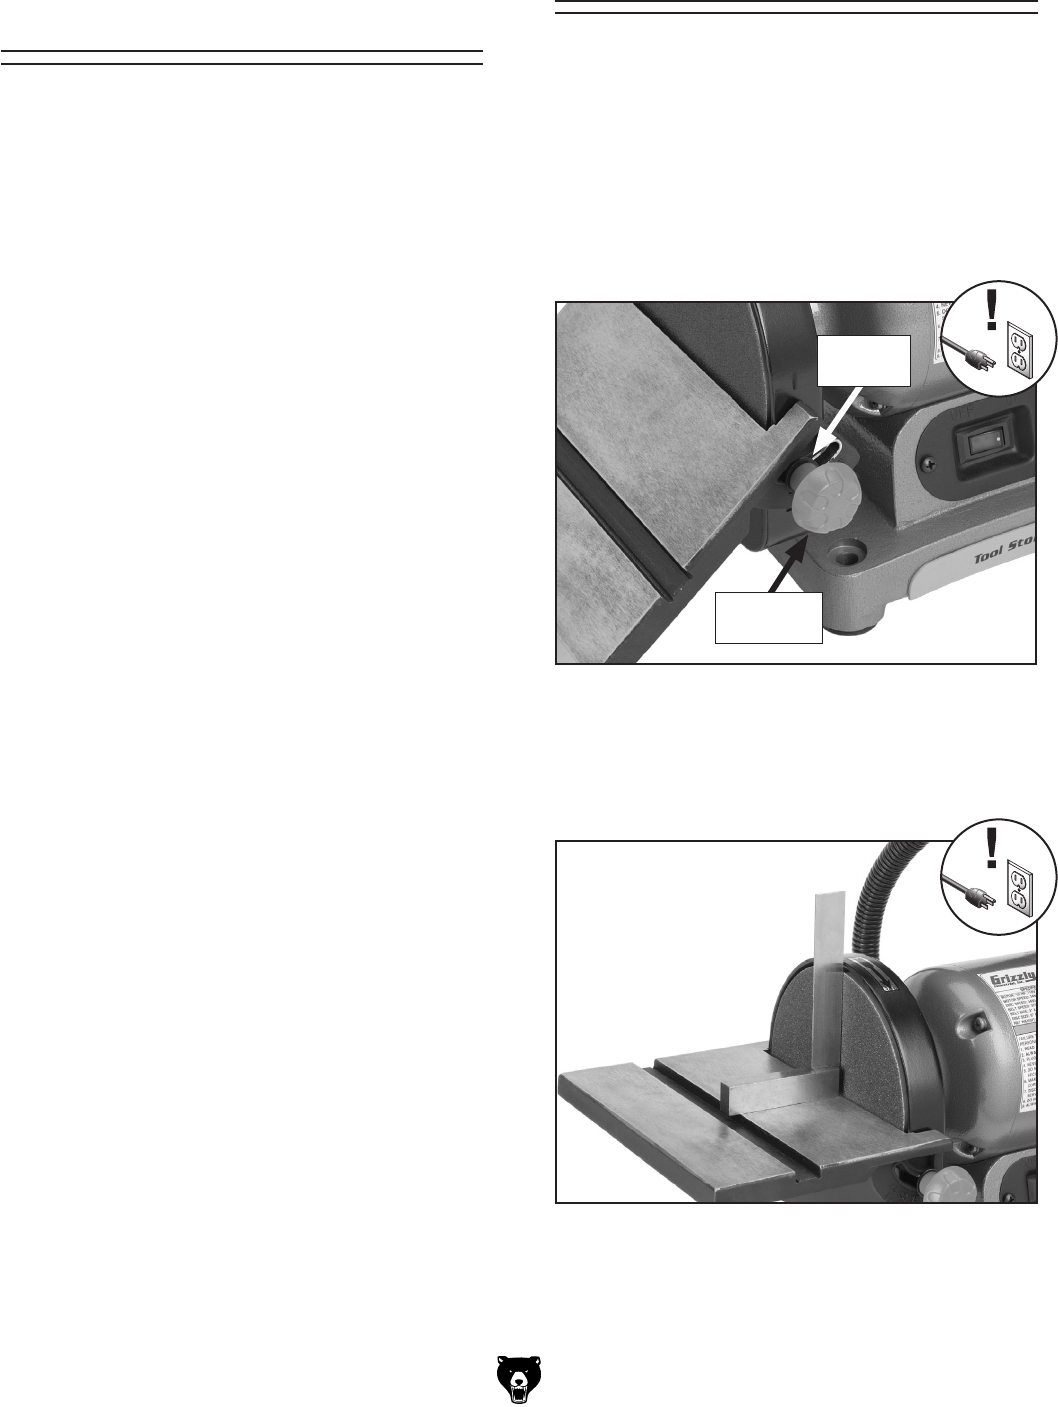
Figure 5. Squaring disc table.
2. Using a machinist’s square, set one edge on
the table surface and the other against the
face of the disc as shown in
Figure 5.
Flat
Washer
Table
Knob