


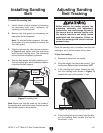

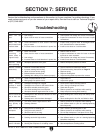

-18-
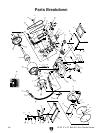
H7761 2" x 27" Belt & 6" Disc Combo Sander
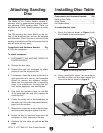
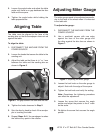
Miter Sanding
The most efficient way to get a perfect miter is to
cut the workpiece slightly long and sand it to the
desired dimension. Miter sanding can be done
easily with the miter gauge.
To perform miter sanding operations:
1. Loosen the knob on the miter gauge, adjust
the angle to the desired point, and tighten the
knob.
2. Slide the miter gauge into its slot and use it
to hold your workpiece in position.
Note: The miter gauge can be used in either
direction in the slot to achieve the proper
relation of the workpiece to the disc.
3. Using light pressure, move the workpiece
slowly back and forth across the disc as
shown in
Figure 12.
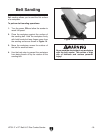
Never use the Model H7761 for applica-
tions other than those for which it was
made. DO NOT overload the machine or
use excess force when sanding. Severe
personal injury, damage to the machine, or
damage to your workpiece could occur.
Figure 12. Disc sanding with a miter gauge.
Miters can also be sanded by changing the angle
of the table.
To perform angle sanding operations:
1. Loosen the angle knobs securing the table.
2. Use the angle gauge to acheive the desired
table angle and tighten the angle knobs
.
Note: The disc table can be positioned from
0˚ to 45˚, relative to the plane of the sanding
surface.
3. Slide the miter gauge into the miter slot and
use the miter gauge to hold your workpiece
in position.
4. Using light pressure, push the workpiece
slowly into the downspin side of the rotating
disc (
Figure 13).
Figure 13. Mitering with the table angled.
Angle Sanding
5. Move the workpiece slowly back and forth
across the downspin side of the disc.
Always keep the workpiece on the side
of the wheel that is rotating down toward
the table. This will keep the workpiece
from flying out of your hands from the
rotational forces.