


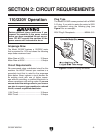


G1005Z Mill/Drill
-17-
To install end mill tooling:
1. UNPLUG THE MILL/DRILL!
2. Insert the appropriate-sized R8 collet into
the spindle, ensuring that the collet keyway
aligns with the pin inside the spindle.
3. Using a heavy rag or gloves to protect your
hands, insert the end mill tooling into the
collet.
4. While holding the collet in place, turn the
drawbar hex nut clockwise until the drawbar
engages with the collet.
5. Turn the drawbar nut clockwise until the tool-
ing is completely secured in the collet.
3. Strike the end of the drawbar with a dead
blow mallet to unseat the arbor from the
spindle.
4. While holding the arbor, unscrew the drawbar
until the arbor comes free.
To install an arbor:
1. UNPLUG THE MILL/DRILL!
2. Slide the arbor into the spindle, ensuring that
the arbor keyway aligns with the pin inside
the spindle.
3. While holding the arbor in place, turn the
drawbar clockwise until the drawbar engages
with the arbor.
4. Continue turning the drawbar until the arbor
is firmly secured in place.
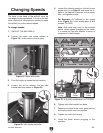
To remove an arbor:
1. UNPLUG THE MILL/DRILL!
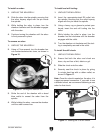
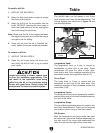
2. Using a 17mm wrench, turn the drawbar hex
nut counterclockwise two turns, as shown in
Figure 10.
Figure 10. Turning the drawbar nut.
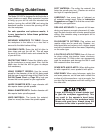
To install the drill chuck:
1. UNPLUG THE MILL/DRILL!
2. Ensure that both the arbor and chuck are
clean, dry and free of dirt, debris or grit.
3. Slide the chuck onto the arbor.
4. Securely seat the chuck in place by giving
it a single hard tap with a rubber mallet, as
shown in
Figure 11.
Note: Once the chuck is seated on the arbor, it is
a semi-permanent connection. If you wish to use
a different chuck, we recommend obtaining a new
arbor for that chuck.
Figure 11. Seating the JT6 drill chuck.