Page 13SKU 97181 For technical questions, please call 1-800-444-3353.
FUNCTIONS
This Belt/Disc Sander can be used
for rough or smooth sanding. It has an
adjustable belt platform for sanding both
inside or outside curves. It can be used to
included Table (69) tilts from 0° to 60° and
can be repositioned to use with sanding
belts or discs. There is a Miter Gauge (65)
for precise angle sanding.
OPERATING INSTRUCTIONS
Read the ENTIRE IMPORTANT
SAFETY INFORMATION section
at the beginning of this manual
including all text under
subheadings therein before set
up or use of this product.
Work Piece and Work Area Set Up
Designate a work area that is clean 1.
and well-lit. The work area must not
allow access by children or pets to
prevent injury and distraction.
Route the power cord along a safe 2.
route to reach the work area without
creating a tripping hazard or exposing
the power cord to possible damage.
The power cord must reach the work
area with enough extra length to
allow free movement while working.
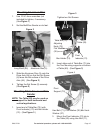
Leveling the Table
NOTE: For these instructions and
“General Operating Instructions”
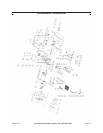
on following pages, refer to Figure
8 on page 17 of this manual.
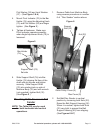
1.
on the Pivot Indicator (70). Place a
the Table (69) so that the combination
the Table (69) is 90° to the sanding
disc, the table is level. Tighten the
Angle Adjusting Knob (75).
If the Table (69) is not 90° to the 2.
sanding disc pad, loosen the Angle
Adjusting Knob (75) and tilt the Table
disc. Tighten the Angle Adjusting
Knob (75).
3.
Pointer (73) and adjust it so that it
points to 90°. Tighten the Screw (29).
General Operating Instructions
Insert 1. Orange Plastic Key into
Magnetic Switch (31). This “Key”
is a safety precaution and should
remain in the Magnetic Switch
during use and be removed after
Magnetic Switch (31) is turned
off and/or any time the Belt/Disc
Sander is left unattended or it is in
storage.
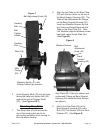
Adjusting the Sanding Belt
Tracking
With the Belt/Disc Sander turned off, 1.
manually move the sanding belt.
If the belt looks like it is going to 2.
slide off either roller, it needs to be
adjusted.
Turn the Belt Adjustment Knob (49) 3.
until the belt rides the center of the
Rear Roller (56) and the Front Roller
(44).
Move the sanding belt manually 4.
after adjustment to assure proper
alignment.


