


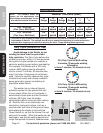

Page 12 For technical questions, please call 1-800-444-3353. SKU 98871
SAFETY SERVICEBASIC WELDING WELDING TIPSSETUP
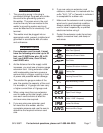
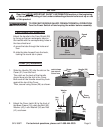
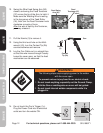
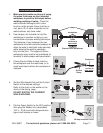
10. Swing the Wire Feed Swing Arm (36)
closed, and swing the Feed Tensioner
(37) across the tip of the Arm, to latch it.
Make sure the Welding Wire is resting
in the top groove of the Feed Roller
(34), then turn the Feed Tensioner knob
clockwise a couple of turns.
After the wire is held by the Tensioner,
you may release it.
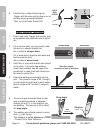
11. Pull the Nozzle (3) to remove it.
Using the third oval hole on the Multi-12.
wrench (43), turn the Contact Tip (2b)
counterclockwise and remove.
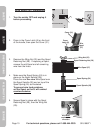
Lay the Gun Cable out in a straight line
13.
so that the wire moves through it easily.
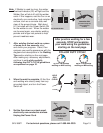
Leave the cover open, so that the feed
mechanism can be observed.
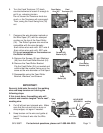
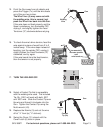
WARNING
The following steps require applying power to the welder
with the cover open.
To prevent serious injury from re or electric shock:
Do not touch anything, especially not the Ground Clamp, 1.
with the Gun or welding wire or an arc will be ignited.
Do not touch internal welder components while it is 2.
plugged in.
14. Do not touch the Gun’s Trigger (1c).
Plug the Power Cord into its electrical
outlet and turn the welder ON.
Feed Swing
Arm (36)
Feed
Tensioner (37)
Gun
Nozzle
(3)
Contact
Tip (2b)
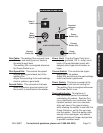
90 AMP FLUX WIRE WELDER
120 V~
60 Hz
Gun
WIRE-FEED SPEED
0
1
2
3
4
5
6
7
8
9
10
MAX
MIN
ON
OFF